Guilt-Free Chocolate Covered Pretzels
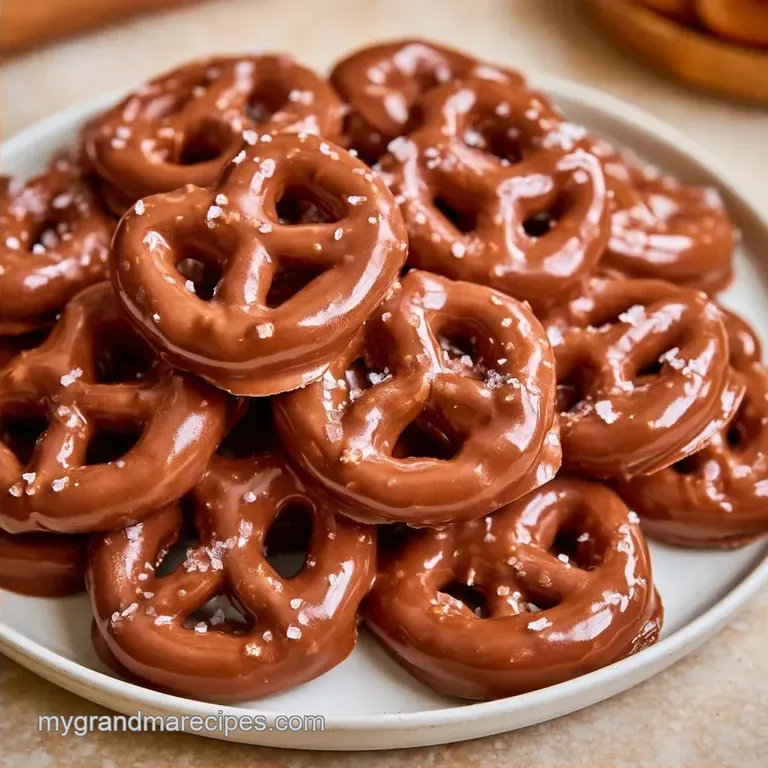
- Time: 5 min active + 20 min chilling
- Flavor/Texture Hook: Salty, crispy crunch with a silky finish
- Perfect for: Holiday gift baskets or a quick sweet craving
The aroma of melting chocolate always brings back memories of my grandmother in Georgia. She used to whip up treats for the whole neighborhood, and these pretzels were always the first to disappear from the platter. That specific contrast of salt and sugar felt like a warm hug.
I've been preparing these for years, often while catching up with a friend or waiting for the oven to preheat for another dish. You don't need any specialized tools just a simple bowl and a fork. It's the kind of treat that lets you focus on the company without spending hours sweating over a hot stove.
You can expect a snack with a satisfying snap that gives way to a slow, rich melt. A true Southern favorite in my home, these Chocolate Covered Pretzels are easy enough for anyone to master in just a few minutes.
Why Chocolate Covered Pretzels Work
Coconut Oil: This fat keeps the chocolate fluid and prevents it from seizing. It helps the coating stay thin rather than thick and clumpy.
Temperature Control: Stirring every 30 seconds stops the cocoa solids from burning. This ensures the chocolate stays glossy and smooth.
Salt Contrast: The salt on the pretzel enhances the sweetness of the dark chocolate. It creates a balanced flavor that keeps you reaching for another one.
Simple Tools For The Job
Anyone can make this at home. The most critical piece of equipment is a microwave safe glass bowl, which distributes heat more uniformly than plastic. I recommend using a silicone spatula for stirring; it's perfect for scraping the sides to ensure the mixture remains lump free.
For the preparation, a basic baking sheet and some parchment paper are sufficient. Rather than a specialized dipping tool, I find a fork works better for tapping off any extra chocolate.
What Goes Into The Mix
| Component | Purpose | Substitute Notes |
|---|---|---|
| Dark Chocolate Chips | Main flavor and structure | Milk chocolate works but is sweeter |
| Virgin Coconut Oil | Thins the chocolate | Butter adds a richer, saltier taste |
| Mini Salted Pretzels | Salty, crunchy base | Pretzel sticks work for a different look |
| Flaky Sea Salt | Flavor accent | Fine salt works, but lacks the crunch |
Adding a bit of oil keeps the chocolate from becoming too stiff. It's a simple trick that makes the dipping process much smoother.
| Original Ingredient | Substitute | Why It Works |
|---|---|---|
| Dark Chocolate Chips | Cocoa Powder + Cream | Creates a ganache. Note: Softer set, needs more chilling |
| Coconut Oil | Unsalted Butter | Similar fat content. Note: Changes flavor to be more buttery |
| Mini Pretzels | Pretzel Twists | Same salty profile. Note: Harder to dip evenly |
Basic Recipe Details
These specs ensure you have enough room on your tray and enough time in your schedule.
- Prep time: 5 minutes
- Cook time: 5 minutes
- Total time: 30 minutes
- Yield: 24 Pretzels
Chef: For a firmer set that survives warmer rooms, chill the pretzels for 1 hour instead of 20 minutes.
The Coating Process

Prep The Station
Line a large baking sheet with parchment paper. Arrange the 3 cups of mini salted pretzels in a single layer with a small gap between them. Note: This prevents them from sticking together once coated.
Pulse Melting Method
Place 8 oz dark chocolate chips and 1 tbsp virgin coconut oil in a glass bowl. Microwave on high for 30 seconds, then remove and stir vigorously with a spatula.
Repeat the 30 second intervals, stirring each time, until the chocolate is smooth and glossy. Stop immediately when the last few lumps vanish.
Dip and Drain
Using a fork, dip each pretzel halfway into the melted chocolate. Lift the pretzel and gently tap the fork against the bowl's side to shake off excess chocolate.
Setting and Finishing
Place each dipped pretzel on the parchment paper. Sprinkle 1/2 tsp flaky sea salt over the wet chocolate before it sets.
Place the baking sheet in the refrigerator for 20 minutes until the chocolate feels firm to the touch.
Fixing Coating Issues
If the chocolate feels sluggish or doesn't flow, it has likely cooled too much. Just pop it back in the microwave for 10-15 seconds. Be careful not to overdo it, or you'll burn the cocoa.
When the chocolate looks gray, it's usually "bloomed," meaning the fat separated. It's still safe to eat, but it looks less appealing. You can fix this by gently reheating the chocolate and re dipping.
| Problem | Fix |
|---|---|
| Chocolate is too thick | Microwave for 10 more seconds |
| Chocolate is grainy | Stir more vigorously or add a drop of oil |
| Pretzels sticking together | Space them further apart on the tray |
Storage And Leftover Tips
Keep these in a cool, dry spot. If your kitchen is on the warmer side, store them in a container in the refrigerator to prevent melting. They will stay fresh for about 2 weeks when chilled.
For longer storage, you can freeze them for up to 2 months. Securely wrap each piece in wax paper, then slide them into a freezer safe bag. Let them thaw for 10 minutes before serving.
Don't toss any remaining melted chocolate. Instead, pour it into a small mold or a cupcake liner to create a single chocolate disc.
Flavor and Dietary Swaps
For a lower sugar option, use 90% cocoa chocolate. It's more intense but pairs beautifully with the salt. If you're avoiding gluten, just swap the wheat pretzels for a certified gluten-free brand.
For those following a vegan diet, ensure your chocolate chips are dairy-free. These chocolate covered pretzels are naturally vegan if you use dark chocolate and coconut oil. For another treat in this style, you might like a no bake cookie dough bar.
- - For a nutty flavor
- Press crushed peanuts into the wet chocolate.
- - For a festive look
- Use white chocolate and add red sprinkles.
- - For a spicy kick
- Add a pinch of cayenne pepper to the melted chocolate.
Best Ways To Serve
I enjoy presenting these on a wooden platter accompanied by fresh berries and assorted nuts. This turns a basic treat into something more festive. Since they are bite sized and mess free, they are a perfect choice for any gathering.
For a complete dessert table, pair these with a fruit based treat. These look beautiful next to strawberry roses with chocolate sauce to create a truly impressive display.
As for drinks, a chilled glass of milk or a steaming cup of coffee perfectly offsets the salty pretzels and rich dark chocolate.
Recipe FAQs
How to make chocolate coated pretzels?
Melt dark chocolate chips and coconut oil in 30-second microwave intervals.
Tip: Stir vigorously between each heating cycle to ensure a glossy finish.
What type of chocolate is best for coating?
Dark chocolate chips provide the best stability and flavor balance.
Tip: Use high-quality chips to avoid a waxy texture.
Is it true that chocolate must be tempered for this?
Actually, no. The coconut oil creates a smooth, glossy finish without the need for tempering.
Tip: This simplifies the process for a quick snack.
What is the quickest way to dip?
Dip each pretzel halfway with a fork and shake off the excess.
Tip: Line your tray with parchment paper to prevent sticking.
Which technique prevents chocolate pooling at the bottom?
Tap the fork against the bowl's rim before placing the pretzel on the paper.
Tip: If you like these sweet treats, try the quick prep of our cookie dough for one.
Can I use milk chocolate instead?
Substitute milk chocolate chips using the same amount of coconut oil.
Tip: Watch the microwave closely as milk chocolate burns faster than dark.
Where should I store these?
Keep them in a cool, dry place or a refrigerator container.
Tip: Let frozen treats thaw for 10 minutes before eating.
Chocolate Covered Pretzels