Butter Squishy Cake from Target with Vanilla
- Time: 20 min active + 2 hours 35 mins chilling/baking = Total 2 hours 55 mins
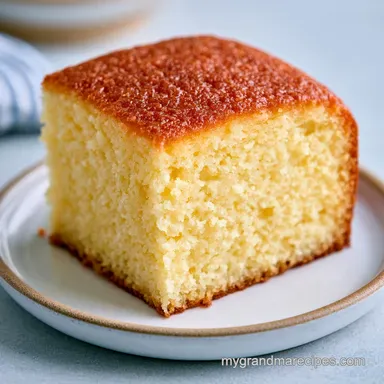
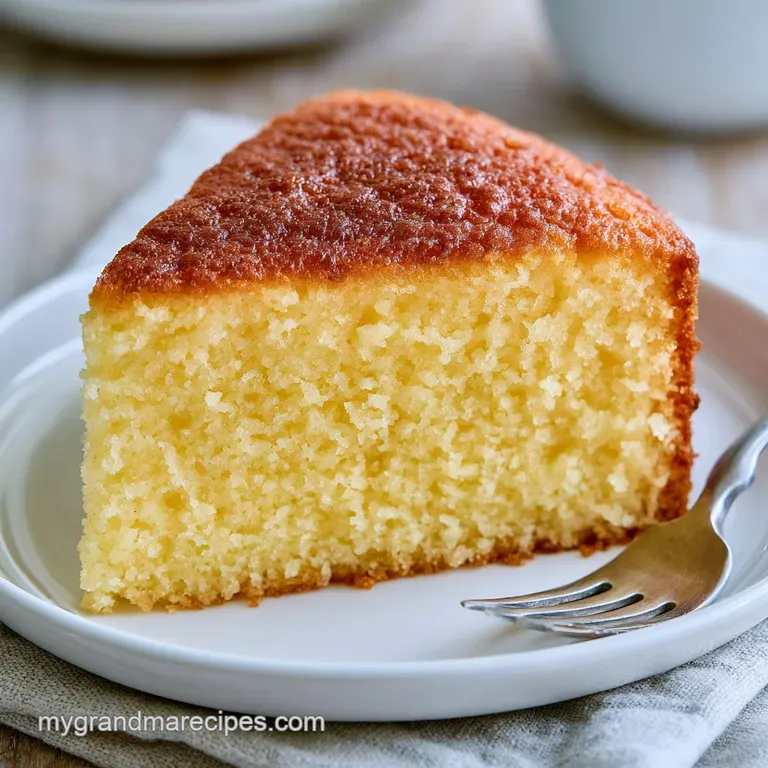
- Flavor/Texture Hook: Velvety, matte yellow finish with a pale, buttery sponge
- Perfect for: TikTok inspired parties, baking challenges, or a whimsical dessert table
Butter Squishy Cake from Target with Vanilla
The smell of pure vanilla bean paste hitting softened butter is honestly one of the best things in the world. It's that deep, floral scent that tells you this isn't going to be some bland, store-bought sponge.
I remember seeing the butter squishy tiktok videos and thinking there was no way a real cake could look that matte and "plastic" while still tasting like a high end bakery treat. It looked more like a Sunny Days Butter Squishy toy than actual food.
Here is the ultimate recipe for a Butter Squishy Cake from Target with Vanilla. I spent way too much time staring at those viral clips, wondering what is inside the viral butter squishy if it were edible.
The goal was to create something that had the exact rectangular prism shape of a stick of butter, a color that looked like a highlighter, and a texture that felt soft and springy when you pressed into it.
You can expect a cake that is visually striking but surprisingly light. We aren't doing a heavy pound cake here, because that wouldn't have the "squish." Instead, we're using a specific professional technique to make sure the crumb is tight but velvety.
It's a bit of a process with the chilling and the sculpting, but the result is a dessert that looks like it was plucked straight off a Target shelf.
Getting That Squishy Texture
To get this right, we have to change how we usually mix cake. Most people cream butter and sugar first, but that adds too much air and creates a different kind of rise. For this, we want a controlled, dense yet-soft feel.
Reverse Creaming: We mix the butter directly into the flour. This coats the flour particles in fat, which blocks water from hitting the proteins, meaning less gluten forms. This is what creates that "squishy" rather than "springy" feel.
Matte Finishing: Adding a pinch of cornstarch to the buttercream kills the shine. Most frostings are glossy because of the fat, but the starch absorbs just enough surface moisture to make it look like a matte toy.
Temperature Control: Freezing the cake for 20 minutes before frosting is non negotiable. It firms up the fats in the sponge, so when you're carving it into a rectangle, you don't end up with a pile of crumbs.
Vanilla Depth: Using bean paste instead of just extract gives us those tiny black specks and a more concentrated flavor. It ensures the vanilla actually stands up to the heavy amount of butter in the frosting.
| Style | Prep Time | Texture | Best For |
|---|---|---|---|
| Fast Mix | 10 mins | Airy/Holey | Quick snacks |
| Butter Squishy | 20 mins | Velvety/Tight | Visual impact |
| Classic Sponge | 30 mins | Springy/Light | Layer cakes |
If you're in the mood for something equally sweet but way faster, my edible sugar cookie dough is a total win.
The Essential Component List
The ingredients here are simple, but the quality of the flour is where the battle is won. If you use all purpose flour, you'll get a cake that's too tough. You need the low protein of cake flour to get that specific feel. According to King Arthur Baking, cake flour is milled more finely and has less protein, which is why it produces a more tender crumb.
| Ingredient | Science Role | Pro Secret |
|---|---|---|
| Cake Flour | Structure | Provides the "soft" bite |
| Unsalted Butter | Tenderness | Use 65°F butter for best mixing |
| Cornstarch | Matte Effect | Turns glossy icing into "plastic" look |
| Vanilla Bean Paste | Flavor Core | Gives the "expensive" vanilla scent |
Gathering Your Essentials
Make sure your eggs and milk are at room temperature. If you add cold milk to creamed butter, the batter will break (it'll look curdled), and you'll lose that velvety finish.
For the Vanilla Squish Sponge:
- 1.5 cups (190g) cake flourWhy this? Low protein for a tender, squishy crumb
- 1 cup (200g) granulated sugarWhy this? Provides structure and sweetness
- 1 tbsp (8g) baking powderWhy this? Ensures a consistent, fine rise
- 0.5 tsp (3g) saltWhy this? Balances the sugar
- 0.5 cup (115g) unsalted butter, softenedWhy this? Essential for the reverse creaming method
- 3 large eggs, room temperatureWhy this? Binds the batter and adds moisture
- 1 cup (240ml) whole milkWhy this? Fat content creates a richer mouthfeel
- 2 tsp (10ml) pure vanilla bean pasteWhy this? Deep, authentic vanilla flavor
- 2 tbsp (30ml) vegetable oilWhy this? Keeps the cake moist for days
For the "Butter Yellow" Matte Frosting:
- 1 cup (225g) unsalted butter, softenedWhy this? The base for the matte finish
- 3 cups (360g) powdered sugarWhy this? Provides the stiffness needed for sharp edges
- 1 tsp (5ml) pure vanilla extractWhy this? Complements the sponge
- 2 tbsp (30ml) heavy creamWhy this? Adjusts the consistency
- 1 pinch (1g) cornstarchWhy this? The secret to the non reflective matte look
- 0.25 tsp yellow gel food coloringWhy this? Gel is more concentrated than liquid
| Original Ingredient | Substitute | Why It Works |
|---|---|---|
| Cake Flour | AP Flour + 2 tbsp Cornstarch | Mimics lower protein. Note: Slightly less tender |
| Vanilla Bean Paste | Pure Vanilla Extract | Similar flavor. Note: No black vanilla specks |
| Whole Milk | Buttermilk | Adds tang. Note: May change the "butter" color slightly |
| Heavy Cream | Full fat Coconut Milk | Similar fat content. Note: Adds slight coconut hint |
Tools for the Job
You don't need a professional kitchen, but a few specific tools make the "toy" look possible. A stand mixer is great, but a hand mixer works too, as long as you're patient.
- 8x8 inch square baking pan: This gives us the starting block for our rectangle.
- Parchment paper: Essential for lifting the cake out without it cracking.
- Offset spatula: This is how you get those sharp, clean edges on the frosting.
- Sifter: Because lumps in cake flour are the enemy of a smooth crumb.
- Digital scale: Baking is science. Weights are always more accurate than cups.
Bringing It Together

Right then, let's get into the actual build. Follow these steps closely, especially the mixing times, to ensure your Butter Squishy Cake from Target with Vanilla turns out exactly like the viral version.
- Prep the oven. Preheat your oven to 325°F (160°C). Sift together the cake flour, baking powder, and salt into a large mixing bowl. Note: Sifting prevents air pockets from being too large.
- The fat flour mix. Add the 115g of softened unsalted butter to the dry ingredients. Beat on low speed until the mixture looks like coarse sand. Note: This is the reverse creaming method we talked about.
- Mix the liquids. In a separate jug or bowl, whisk the eggs, milk, vanilla bean paste, and vegetable oil until smooth.
- Emulsify the batter. Slowly stream the liquid mixture into the flour butter mixture on low speed. Once combined, increase to medium speed and beat for exactly 2 minutes until the batter is pale and glossy.
- Bake the sponge. Pour the batter into your lined 8x8 inch pan. Bake for 30-35 minutes until a toothpick inserted comes out with a few moist crumbs.
- Shape the cake. Let the cake cool completely on a wire rack. Once cold, use a serrated knife to trim the edges, carving it into a clean rectangular prism shape.
- The flash freeze. Place the carved cake in the freezer for 20 minutes. Note: This makes the frosting process way easier by locking in the structure.
- Whip the matte frosting. Beat the 225g butter, powdered sugar, vanilla extract, heavy cream, cornstarch, and yellow gel food coloring. Whip on high until the frosting is stiff and has a matte finish.
- The crumb coat. Apply a very thin layer of frosting over the whole cake to seal in the crumbs. Chill in the fridge for 15 minutes.
- The final sculpt. Apply the remaining yellow buttercream. Use your offset spatula to smooth the sides until you have sharp, toy like edges.
Chef's Tip: If your frosting feels too soft to get those sharp edges, put the whole bowl in the fridge for 5 minutes, then whip it again. It's all about the temperature of the butter.
Fixes for Common Flaws
When I first tried this, my cake looked more like a lumpy potato than a stick of butter. It usually comes down to temperature or over mixing. If you've seen a "Butter squishy review" online, you'll notice people complaining about the cake being too dry that's usually from over baking.
Why Your Cake is Too Dense
If the cake feels like a brick instead of a squishy sponge, you probably over mixed the batter after adding the liquids. Even with reverse creaming, beating it for too long develops too much gluten.
Frosting is Too Glossy
If your frosting looks like shiny icing instead of a matte toy, you likely skipped the cornstarch or used too much heavy cream. The cream adds shine, while the starch dulls it.
Cake Sinks in the Middle
This usually happens if the oven door was opened too early or the baking powder is expired. Ensure your oven is fully preheated to 325°F before the cake goes in.
| Problem | Root Cause | Solution |
|---|---|---|
| Crumbly edges | Cake was too warm | Freeze for 20 mins before carving |
| Neon color | Too much gel dye | Add color drop by-drop |
| Batter curdled | Cold milk/eggs | Use room temperature liquids |
Common Mistakes Checklist:
- ✓ Did you sift the cake flour? (Lumps = uneven texture)
- ✓ Is the butter for the sponge "softened" and not melted?
- ✓ Did you beat the batter for exactly 2 minutes?
- ✓ Did you use gel coloring instead of liquid?
- ✓ Was the cake completely cold before frosting?
Make It Your Own
Once you've nailed the Butter Squishy Cake from Target with Vanilla, you can start playing with the "toy" aesthetic. The key is keeping that matte, monochromatic look.
Flavor Twists: - Strawberry Squish: Use pink gel coloring and replace the vanilla bean paste with freeze dried strawberry powder. - Minty Matcha: Use green coloring and a tablespoon of matcha powder in the flour mix for a "green tea butter" look.
Diet Swaps: - gluten-free: You can use a 1:1 gluten-free baking flour, but add an extra 1/2 tsp of baking powder to help with the lift. - dairy-free: Use a high-quality vegan butter stick (like Miyoko's) and full fat coconut milk.
Note: The texture will be slightly more oily but still squishy.
If you want something a bit more decadent and rich, these mini oreo cheesecakes are the way to go.
| Modification | Change | Impact |
|---|---|---|
| Extra Moist | +1 tbsp oil | Heavier crumb, lasts longer |
| Brighter Color | +1 drop yellow | More "neon" toy appearance |
| Lighter Frosting | -1/4 cup sugar | Less sweet, softer edges |
Butter Squishy Myths
There are a few things people get wrong when trying to replicate viral cakes. Let's clear them up.
Myth 1: "You need a professional airbrush for the matte look." Not true. The cornstarch trick does 90% of the work. As long as you don't over beat the butter into a liquid state, the frosting will look flat and matte.
Myth 2: "Cake flour is just fancy all purpose flour." It really isn't. The protein content is significantly lower. If you use AP flour, the "squish" becomes a "bounce," and it won't feel like the toy it's mimicking.
Myth 3: "The cake needs to be baked at a high temp to set quickly." Actually, the lower temp (325°F) is what keeps the crumb tight and prevents the edges from browning. Brown edges ruin the "plastic" look.
Keeping Your Cake Fresh
Because this cake has a high fat content from the reverse creaming and the buttercream, it stays moist longer than a standard sponge. However, the frosting can develop a "crust" if left uncovered.
Storage Guidelines:
- Fridge: Store in an airtight container for up to 3 days. This is actually the best way to keep the sharp edges of the frosting.
- Freezer: You can freeze the unfrosted cake layers for up to 2 months. Wrap them tightly in plastic wrap and foil.
- Reheating: If you've refrigerated the cake, let it sit at room temperature for 30 minutes before eating. This allows the butter in the sponge to soften, restoring that "squishy" feel.
Zero Waste Tips: Don't throw away the cake scraps from when you carved the rectangle! I usually toss them in a bowl with a bit of extra frosting and some sprinkles to make "cake pops" for the kids. You can also use any leftover yellow buttercream as a dip for fresh fruit.
Best Ways to Serve
To really lean into the Target butter squishy aesthetic, presentation is everything. The goal is to trick the eye into thinking it's a toy until the first bite.
The Reveal: Place the cake on a plain white platter. If you want to go full "viral," place it next to an actual stick of butter or a few real squishy toys. When you cut it, use a hot knife (dip it in boiling water, then wipe dry) to get a clean, surgical slice through the matte frosting.
Pairing Suggestions: Since the cake is quite sweet and buttery, pair it with something acidic. A tart raspberry coulis or a side of fresh blackberries cuts through the richness of the vanilla buttercream. A cup of strong, unsweetened black coffee is also a classic pairing that balances the sugar.
Trust me on this: the look of this cake is what makes it a winner, but the taste is what makes people come back for seconds. It's a fun project that demystifies how professional "sculpted" cakes are made, all while using a modern, easy to follow method. Right then, go grab your mixer and start squishing!
Recipe FAQs
Does Target have the viral butter squishy?
No, Target sells the toy version. This recipe creates an edible, cake based version of that viral aesthetic using a specialized matte buttercream.
How to quickly soften butter?
Cut the butter into small cubes and let them sit at room temperature for 15-30 minutes. Alternatively, grate the cold butter with a box grater for nearly instant softening.
Why use the reverse creaming method for this cake?
It prevents gluten development by coating the flour in fat first. This ensures the tight, velvety crumb necessary for a toy-like "squish" rather than a traditional airy sponge.
Is it true that you need fondant to get the plastic matte look?
No, this is a common misconception. Adding a pinch of cornstarch to the buttercream creates a matte, non-glossy finish that mimics the look of plastic.
Why did my cake not have sharp edges?
You likely skipped the chilling steps. Freezing the cake for 20 minutes before and after the crumb coat is essential for sculpting clean, rectangular prism sides.
Can I substitute all-purpose flour for cake flour?
No, stick with cake flour for the most tender result. If you enjoyed the delicate crumb here, see how a similar focus on tender textures works in our jam thumbprint cookies.
How to store the finished butter cake?
Keep it in an airtight container in the refrigerator. This preserves the stability of the buttercream and prevents the sharp edges from softening at room temperature.
Butter Squishy Vanilla Cake