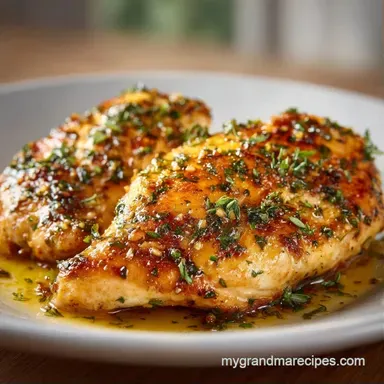
Baked Garlic Herb Chicken: Golden and Juicy
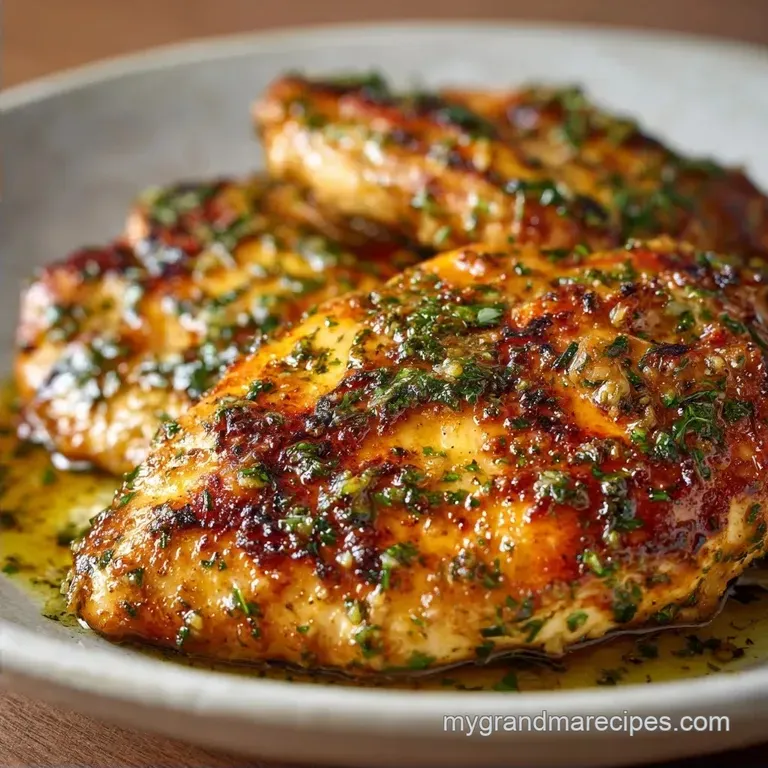
- Time: 10 min active + 20 min baking
- Flavor/Texture Hook: Garlic forward with a velvety, buttery crust
- Perfect for: Weeknight dinners or beginner friendly meal prep
- Making the Best Baked Garlic Herb Chicken
- The Logic Behind the Method
- Component Analysis
- Pantry Staples and Swaps
- Essential Kitchen Gear
- Step by Step Cooking Guide
- Solving Common Cooking Problems
- Troubleshooting Common Issues
- Creative Flavor Twists
- Adjusting Your Portion Size
- Kitchen Myths Debunked
- Keeping Your Chicken Fresh
- What to Serve on the Side
- Recipe FAQs
- 📝 Recipe Card
Making the Best Baked Garlic Herb Chicken
Ever wonder why some oven chicken ends up tasting like cardboard while others stay juicy? I used to think it was all about the marinade, but I found out the real secret is the fat barrier.
When you rub a thick paste of butter and herbs onto the meat, it creates a shield that keeps the moisture from escaping into the dry oven air.
Right then, let's get into it. This Baked Garlic Herb Chicken isn't about fancy techniques or expensive gear. It's about using a few basic pantry staples to create a crust that sizzles in the oven and smells like a professional kitchen.
You can expect a dish that is tender on the inside and has a savory, concentrated garlic punch on the outside. It's the kind of meal that feels like a treat but actually takes very little effort.
The Logic Behind the Method
Fat Insulation: Butter acts as a thermal barrier, slowing down the heat penetration and preventing the muscle fibers from tightening too quickly.
Over High heat Browning: Cooking at 400°F (200°C) triggers a quick brown on the surface, creating a savory crust before the inside overcooks.
Surface Dehydration: Patting the chicken dry removes excess water, which means the butter sticks better and doesn't steam the meat.
Carry Over Cooking: Removing the chicken at 160°F (71°C) allows the residual heat to bring it to a safe 165°F (74°C) without crossing into "dry" territory.
| Method | Time | Texture | Best For |
|---|---|---|---|
| over High heat Bake | 30 mins | Juicy center, gold crust | Busy weeknights |
| Pan Sear + Bake | 45 mins | Deeply browned, firm | Special dinners |
| Slow Roast | 2 hours | Very soft, fall apart | Sunday lunch |
Component Analysis
| Ingredient | Science Role | Pro Secret |
|---|---|---|
| Unsalted Butter | Moisture Barrier | Use softened, not melted, for a thicker paste |
| Fresh Garlic | Aromatic Base | Mince finely to avoid large, burnt chunks |
| Dried Herbs | Flavor Depth | Rub them into the butter to wake up the oils |
| Paprika | Color Catalyst | Adds a reddish gold hue without needing long cook times |
Pantry Staples and Swaps
For this recipe, you'll need a few specific items. I prefer using a high-quality unsalted butter so I can control the salt level myself.
- 3 tbsp unsalted butter, softened Why this? Creates the protective crust (Swap: Ghee for a nuttier taste)
- 4 cloves garlic, minced Why this? Provides the primary savory punch (Swap: 1 tsp garlic powder if fresh is unavailable)
- 1 tsp dried oregano Why this? Earthy, herbal notes (Swap: Dried basil for a sweeter profile)
- 1 tsp dried thyme Why this? Classic poultry pairing (Swap: Dried rosemary, but use only 1/2 tsp)
- ½ tsp kosher salt Why this? Enhances all other flavors (Swap: Sea salt)
- ¼ tsp black pepper Why this? Adds a subtle bite (Swap: White pepper for less visual speckling)
- ¼ tsp paprika Why this? For that golden brown look (Swap: Smoked paprika for a campfire flavor)
- 2 boneless, skinless chicken breasts (12 oz each) Why this? Lean and quick to cook (Swap: Chicken thighs for more fat/moisture)
- 1 tbsp olive oil Why this? Prevents sticking to the pan (Swap: Avocado oil for higher smoke point)
Essential Kitchen Gear
You don't need a fancy setup for this. A basic baking sheet and some parchment paper will do the trick. If you have a meat thermometer, use it. Trust me on this, guessing the doneness of chicken breasts is a gamble that usually ends in dry meat.
I also recommend a small bowl and a fork for mashing the butter. It's faster than using a whisk and gives you a thicker, more spreadable paste.
Step by step Cooking Guide
Preparing the Infusion
- Combine the softened butter, minced garlic, oregano, thyme, salt, pepper, and paprika in a small bowl.
- Mash with a fork until a thick, uniform paste forms. Note: Don't overwork it or the butter will melt.
Coating the Protein
- Pat the chicken breasts dry with paper towels. Note: This ensures the butter doesn't slide off.
- Rub the garlic herb mixture evenly over the top and sides of each breast, pressing it firmly into the meat to create a thick layer.
Roasting to Perfection
- Preheat your oven to 400°F (200°C).
- Line your baking sheet with parchment paper and brush with olive oil.
- Place the chicken on the sheet and bake for 18-22 minutes until the top is golden brown and sizzling.
- Remove from oven when the internal temperature reaches 160°F (71°C).
Resting for Juiciness
- Transfer the chicken to a plate and tent loosely with foil.
- Let it rest for 5 minutes until the internal temperature reaches 165°F (74°C).
Chef's Note: If your chicken breasts are very thick on one end, gently pound them to an even thickness. This prevents the thin end from drying out while the thick part finishes cooking.
Solving Common Cooking Problems
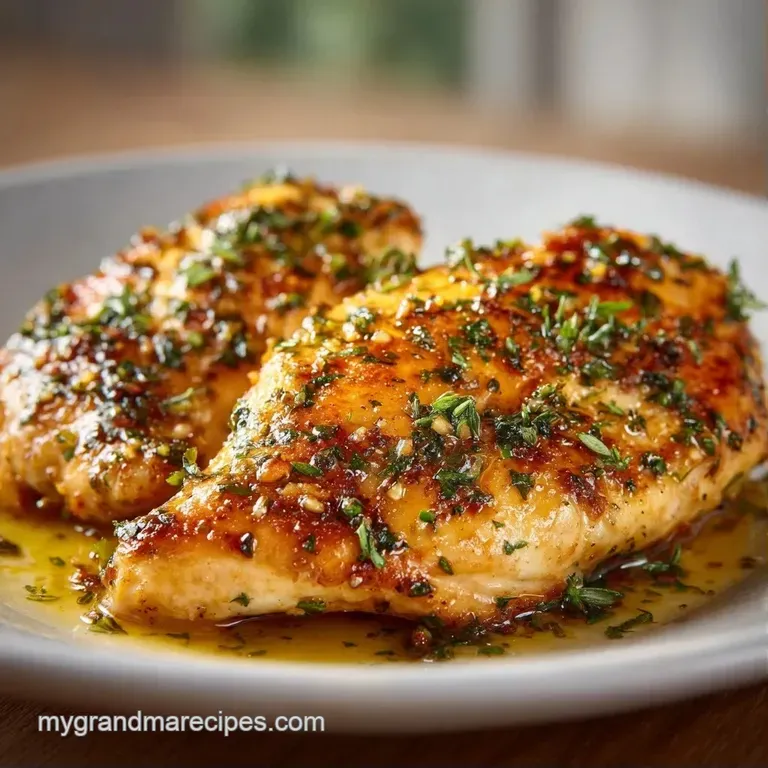
The most frequent issue I see with Baked Garlic Herb Chicken is the garlic burning. Because garlic has a low burn point, it can turn bitter if it's not shielded by the butter. This is why we make a paste rather than just tossing the chicken in oil and garlic.
Troubleshooting Common Issues
| Issue | Solution |
|---|---|
| Why Your Chicken Is Dry | If the meat feels rubbery, it's usually because it stayed in the oven too long. Chicken breasts have very little fat, so a few extra minutes can ruin the texture. |
| Why Your Garlic Is Bitter | Burnt garlic happens when the cloves are too large or the oven is too hot. Ensure your garlic is minced very finely so it integrates fully into the butter paste. |
| Why The Crust Is Pale | This usually happens if the oven wasn't fully preheated or if the chicken was too wet when you applied the butter. Make sure the oven is at 400°F (200°C) before the pan goes in. |
Common Mistakes Checklist
- ✓ Forgetting to pat the meat dry
- ✓ Skipping the 5 minute rest period
- ✓ Using melted butter instead of softened butter
- ✓ Overcrowding the pan (prevents airflow)
- ✓ Using cold chicken straight from the fridge (let it sit for 15 mins)
Creative Flavor Twists
If you want to change things up, you can easily adapt this Baked Garlic Herb Chicken recipe. I love adding a squeeze of fresh lemon juice over the meat right after it comes out of the oven. The acid cuts through the richness of the butter and makes the herbs pop.
For those who like a bit of heat, try adding a pinch of cayenne pepper or red chili flakes to the butter paste. If you're looking for something different, you could use a savory chicken glaze to brush on during the last 5 minutes of baking.
Decision Shortcut:
- If you want more moisture → Swap breasts for boneless, skinless thighs.
- If you want a dairy-free version → Use refined coconut oil or vegan butter.
- If you want a zesty kick → Add 1 tsp of lemon zest to the butter paste.
Adjusting Your Portion Size
When you're making a larger batch of Baked Garlic Herb Chicken Breast, avoid the temptation to cram them all together. If the pieces are touching, they will steam instead of roast, and you'll lose that golden crust.
Scaling Down (1 person): Use a smaller toaster oven tray. Reduce the bake time by about 20% since there's less mass in the oven. You'll only need about 1.5 tbsp of the butter mixture.
Scaling Up (4+ people): Work in batches or use two separate baking sheets. Only increase the salt and spices to 1.5x the original amount, as they can become overpowering in large quantities.
Lower the oven temp to 375°F (190°C) and extend the bake time by 5-10 minutes to ensure even cooking across the larger volume.
Kitchen Myths Debunked
Searing meat does not "seal in juices." This is a common mistake. Moisture loss happens regardless of whether you sear first or not. The browning actually adds flavor through a chemical change in the proteins and sugars, but it doesn't act as a waterproof seal.
Another myth is that you need to "marinate" chicken for hours to make it tender. For a lean cut like the breast, a long soak in acid (like vinegar) can actually make the meat mushy. A fat based rub applied right before cooking is much more effective for tenderness.
Keeping Your Chicken Fresh
Fridge Storage: Store leftovers in an airtight container for up to 3-4 days. The butter crust will firm up, but it'll still be tasty.
Freezer Instructions: You can freeze the cooked chicken for up to 2 months. Wrap it tightly in foil and then put it in a freezer bag to prevent freezer burn.
Reheating Without Drying: Don't use the microwave on high. Instead, place the chicken in a pan with a splash of water or broth, cover it with a lid, and heat on low for 5-8 minutes. This steams the meat back to life.
Zero Waste Tip: Don't throw away the pan drippings! That brown butter and garlic oil on the parchment paper is liquid gold. Pour it over steamed vegetables or stir it into some rice for an easy flavor boost.
What to Serve on the Side
Since this dish is quite rich, I like pairing it with something bright or comforting. A crisp green salad with a lemon vinaigrette balances the garlic and butter perfectly.
If you're in the mood for a full comfort meal, this goes great with a side of cheesy baked macaroni. The savory herbs in the chicken complement the creaminess of the pasta. For a lighter option, roasted asparagus or sautéed spinach provides a nice color contrast on the plate.
- 1. Internal Temp
- Pull the meat at exactly 160°F (71°C).
- 2. Rest Time
- Minimum 5 minutes under foil.
- 3. Oven Temp
- Stable 400°F (200°C) before the pan enters.
Recipe FAQs
What is the safe internal temperature for baked chicken breast?
165°F (74°C). Remove the meat from the oven at 160°F and allow it to reach the final safe temperature during the resting period.
How long should I rest the chicken after baking?
Rest for 5 minutes. Tent the breasts loosely with foil to ensure juices redistribute for a moister result.
How do I prevent the garlic from burning during baking?
Mince the garlic very finely. Finely minced cloves integrate better into the butter paste, protecting them from the 400°F heat.
Is it true that patting the chicken dry doesn't matter much for a baked recipe?
No, this is a common misconception. Drying the surface ensures the herb butter adheres and prevents a pale, steamed crust.
How can I adjust this recipe for a slightly spicier flavor profile?
Increase the amount of paprika. This deepens the warmth without introducing new ingredients. For another bold approach, see how we use flavor in our crispy chicken thighs.
What is the best way to reheat leftover baked garlic chicken breast?
Reheat in the oven at 325°F. Cover the chicken with foil to prevent the lean meat from drying out further.
How can I ensure my chicken breasts cook evenly if they are different thicknesses?
Pound the thickest part of the breast. Use a heavy pan to create a uniform thickness so the entire piece reaches 160°F at the same time.
Baked Garlic Herb Chicken in 30 Minutes