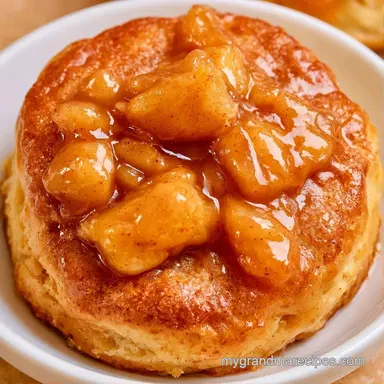
Apple Pie Filling Biscuits: Golden and Jammy
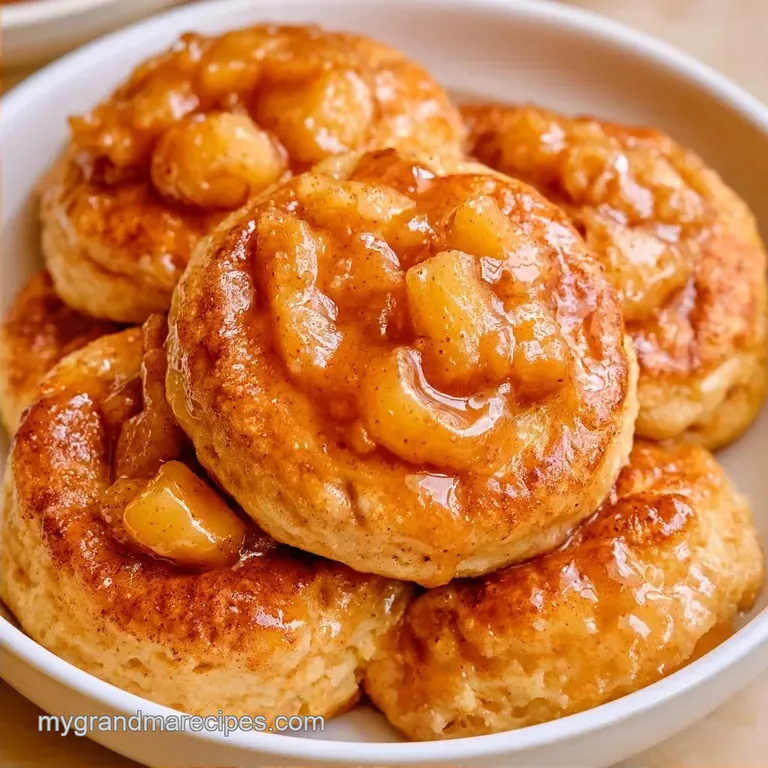
- Time: 10 minutes prep + 35 minutes in the oven
- Key Appeal: Deep mahogany crust with a gooey, spiced center
- Perfect for: Quick weekend brunches or a cozy autumn treat
Apple Pie Filling Biscuits
The smell of cinnamon hitting a hot cast iron skillet is something that just sticks with you. For me, it's the scent of October in my grandmother's kitchen, where the air always felt heavy with the aroma of bubbling fruit and toasted sugar.
She didn't believe in fancy techniques, just the kind of comfort food that fills the house and makes everyone gather around the table.
I've always loved the idea of a warm apple dessert, but I don't always have the patience to peel a dozen Granny Smiths. That's why these Apple Pie Filling Biscuits are such a staple in my home. They take the nostalgic taste of a slow baked pie and condense it into a single, handheld treat that hits every note of a traditional Southern dessert.
You can expect a biscuit that's crisp on the outside and soft on the inside, topped with a concentrated burst of spiced apples. We're using a few smart shortcuts here to keep things affordable, but the result tastes like it took all afternoon. Let's get these in the oven.
Why These Taste So Good
The magic here happens when the butter and brown sugar heat up together on the surface of the dough. It creates a caramelized shell that prevents the apple filling from making the biscuit soggy.
The Butter Barrier: Dipping the dough in melted butter before the sugar creates a seal that keeps the biscuit fluffy. Sugar Caramelization: Brown sugar breaks down at high heat, turning the edges of the dough a deep mahogany color.
| Method | Time | Texture | Best For |
|---|---|---|---|
| Oven Bake | 35 mins | Crispy top, soft base | Traditional batches |
| Air Fryer | 12-15 mins | Extra crunchy edges | Small portions |
Trust me, using a heavy pan like cast iron helps the heat distribute evenly, which gives those edges a better sear.
Gathering Your Ingredients
I keep these basics in my pantry because they're the backbone of so many Old-Fashioned treats. When you're working on a budget, using a quality canned filling is a smart way to get a consistent taste without buying expensive spices and fresh fruit every time.
The Base and Coating
- 1 can (462 g) refrigerated buttermilk biscuits Why this? Provides a tangy, salty base that balances the sugar
- 3 tbsp (42 g) salted butter, melted Why this? Acts as the glue for the cinnamon sugar
- 1/4 cup (50 g) light brown sugar Why this? Adds a deep, molasses like sweetness
- 1 tsp (2 g) ground cinnamon Why this? Essential for that classic apple pie aroma
The Apple Topping
- 1 can (595 g) apple pie filling Why this? Ready to use fruit with a thick, jammy sauce
- 1 tsp (5 ml) vanilla extract Why this? Brightens the flavor of the canned apples
| Component | Purpose | Substitute Notes |
|---|---|---|
| Buttermilk Biscuits | Structural base | Homemade dough works; see my Homemade Biscuits Recipe |
| Brown Sugar | Caramelization | White sugar works but lacks the rich, dark color |
| Apple Filling | Flavor core | Fresh apples sautéed with cinnamon and cornstarch |
If you're looking for other Canned Apple Pie Filling Desserts, this is the easiest starting point. The salty kick from the buttermilk biscuits is what makes this recipe stand out from a standard sweet roll.
The Tools You Need
No professional equipment is necessary for this recipe. A standard baking sheet works fine, but a 10-inch cast iron skillet is preferred. The heavy metal retains heat more effectively, allowing the bottoms of the biscuits to brown while the tops caramelize.
Use a sharp paring knife to chop the apples. Keep the pieces small so they stay put and don't slide off the biscuits as they bubble in the oven. To minimize cleanup, I suggest using a small microwave-safe bowl for the butter.
Putting It All Together
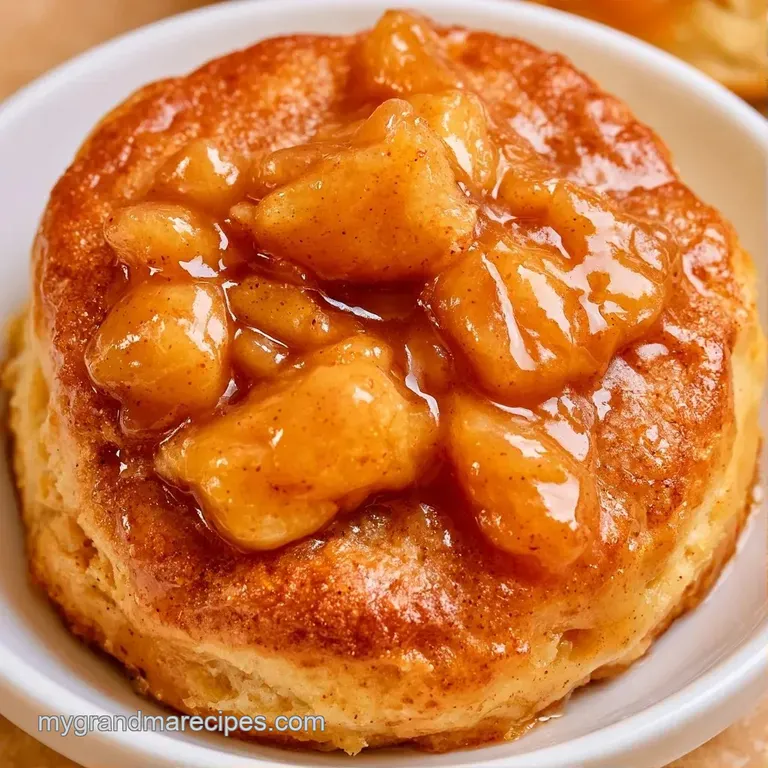
Right then, let's dive in. The secret is to be generous with the cinnamon sugar; don't hesitate to really press the biscuits into the coating.
- Set your oven to 350°F (175°C).
- Pour the apple pie filling into a bowl. Use a sharp knife to dice the apple slices into small, bite-sized pieces and stir in the vanilla extract. Note: Smaller pieces stay on the biscuit better
- Open the can of biscuits and separate the pieces.
- Combine the melted butter, brown sugar, and cinnamon in a small bowl.
- Dip the top of each biscuit in the butter, then push it firmly into the cinnamon sugar mixture until heavily coated.
- Grease a 10 inch cast iron skillet or baking pan and arrange the biscuits inside.
- Spoon 1 to 2 tablespoons of the chopped apple filling onto the center of each biscuit, pressing down slightly.
- Bake for 25–35 minutes until the edges of the biscuits are mahogany colored and the apple filling is bubbling.
Once they are finished, let them rest for 5 minutes. This allows the apple jam to set so it doesn't run when you take your first bite.
Fixing Common Mistakes
Even the most skilled home cooks encounter hurdles. Most challenges with these biscuits stem from liquid management or uneven oven heat.
Preventing Soggy Bottoms
If the bottoms remain doughy, it is typically due to filling leakage or a pan that wasn't hot enough. To avoid this, be careful not to overfill the center, as too many apples will release excessive juice.
Stopping Burnt Sugar
The cinnamon and sugar mixture can scorch if the oven is too hot or the tray is positioned too close to the heating element. If the tops brown too quickly, shield them with a piece of parchment paper for the final 10 minutes.
Dealing With Flat Biscuits
A lack of rise often means the dough was over-handled or became too warm before baking. Keep your dough refrigerated until the moment you are ready to coat and bake them.
| Problem | Fix |
|---|---|
| Soggy Base | Reduce filling to 1 tbsp per biscuit |
| Burnt Topping | Tent with parchment paper |
| Flat Biscuits | Keep dough cold until baking |
Swaps and Variations
Feel free to customize this Simple Apple Pie Biscuits recipe based on what you have on hand. While you can use a homemade dough instead of canned, remember that refrigerated buttermilk biscuits provide a distinct salty tang that's hard to mimic.
For a bolder flavor, add a pinch of ground cloves or nutmeg to the cinnamon mixture. You can also swap the apple filling for peach or cherry to create a different seasonal treat.
| Original Ingredient | Substitute | Why It Works |
|---|---|---|
| Brown Sugar | Maple Syrup | Similar depth; Note: Use 2 tbsp syrup instead of 1/4 cup sugar |
| Salted Butter | Unsalted Butter | Works fine; Note: Add a pinch of salt to the sugar mix |
| Vanilla Extract | Almond Extract | Gives a cherry like aroma; Note: Use only 1/2 tsp as it's strong |
For a more sophisticated version, try placing a small piece of brie cheese under the apple filling. The pairing of melted cheese and sweet apples is a classic combination that turns these into an elegant appetizer.
Storage and Leftovers
These are most delicious served warm, but they keep surprisingly well. Store any leftovers in a sealed jar or airtight container in the fridge for 3 days max. Avoid using open plates, as the biscuits will dry out quickly.
For longer storage, you can freeze the baked biscuits. Wrap each one in foil, then store them in a freezer-safe bag for up to 2 months. To reheat, warm them at 350°F (175°C) for roughly 10 minutes.
This restores the crispness of the crust without drying out the apple center.
If you have any apple pie filling remaining in the can, don't toss it. Stir in some cinnamon and a splash of lemon juice, then simmer it on the stove to make a thick apple compote for oatmeal or pancakes.
How to Serve Them
For the full experience, serve these Apple Pie Filling Biscuits while they're still warm. A scoop of cold vanilla bean ice cream on the side is the traditional way to go, as the ice cream melts into the warm apple jam.
If you're serving these as part of a larger brunch spread, they pair well with something savory to cut through the sweetness. I've found that placing them alongside a platter of Classic Deviled Eggs creates a great balance of flavors for your guests.
| Goal | What to change |
|---|---|
| More Crunch | Use a cast iron skillet |
| Extra Sweet | Add a drizzle of honey after baking |
| Lighter Taste | Use a dash of lemon juice in the filling |
If you're serving these for a party, you can place them on a wooden board with some fresh mint leaves for a pop of color. For a more comforting vibe, just serve them straight from the skillet.
A Few Old-Fashioned Myths
There's a common idea that you need to "blind bake" the biscuits before adding the filling to keep them from getting soggy. That's simply not true here. The butter sugar coating handles the moisture barrier, and baking everything together allows the juices to seep slightly into the dough, creating a velvety texture.
Another myth is that you must use a specific brand of canned biscuits for them to rise. While some are fluffier than others, any refrigerated buttermilk variety will work as long as you don't over handle the dough.
Whether you call them Grandma's Apple Pie Biscuits or just a quick dessert, the result is always the same: a warm, comforting treat that tastes like home. Trust your instincts, don't overthink the measurements, and enjoy the process.
Recipe FAQs
Can I use Pillsbury biscuits with apple pie filling?
Yes, refrigerated buttermilk biscuits work perfectly. The store-bought dough provides a consistent rise that supports the heavy fruit topping.
How to make store bought pie fillings taste homemade?
Stir in one teaspoon of vanilla extract. This adds a layer of aromatic depth that mimics a scratch-made filling.
Is it true that Macintosh apples are the best for pie?
Actually, no. Macintosh apples tend to break down into sauce when baked, whereas firmer varieties hold their shape better in a biscuit topping.
How to get a thicker apple pie filling?
Chop the apple slices into smaller pieces. This increases the surface area for the existing thickeners in the canned filling to bind together.
What is an easy recipe for apple biscuits?
Top store-bought biscuits with canned apple filling and cinnamon-sugar butter. Bake at 350°F for 25–35 minutes until the edges reach a mahogany color. If you enjoy the quick assembly of this treat, you can apply the same time-saving logic to these no bake cookies.
Can you make apple pie filling at home?
Yes, it is quite simple. You just need to simmer chopped apples with sugar, cinnamon, and a thickener until the mixture reaches your desired consistency.
Which brands of apple pie filling are the best?
Most major supermarket brands are comparable. Look for ones with a higher fruit-to-syrup ratio and distinct apple chunks for the best texture.
Apple Pie Filling Biscuits in 45 Minutes