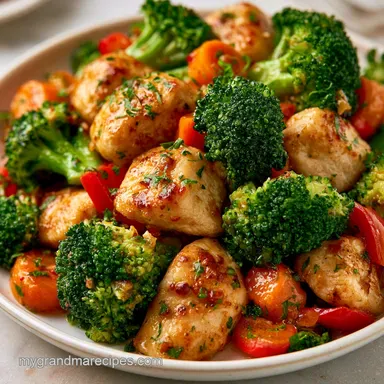
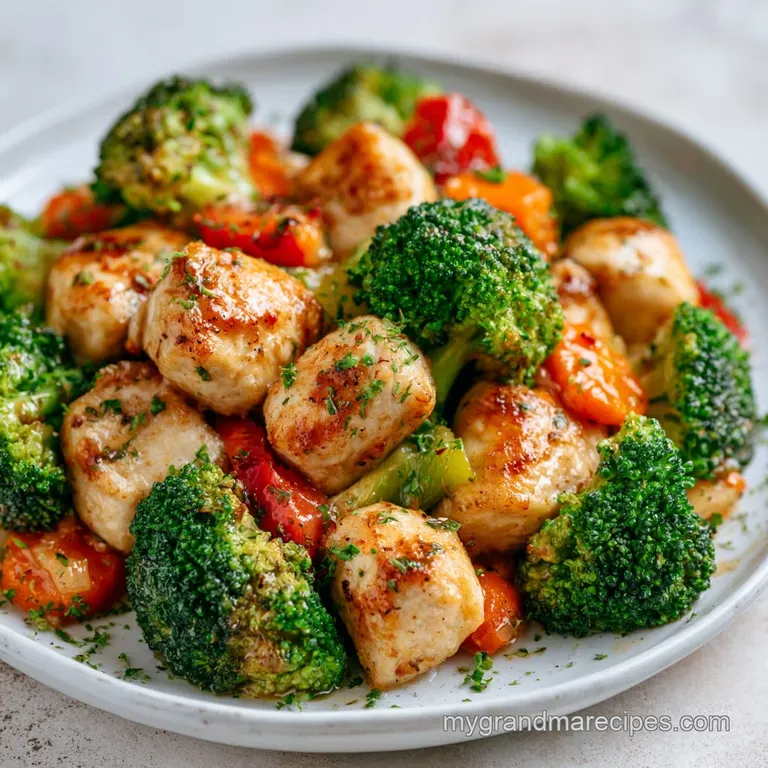
Mild Chicken Stir Fry: Crispy and Velvety
- Time:15 minutes prep + 12 minutes cook = Total 27 minutes
- Flavor/Texture Hook: Glossy, savory sweet glaze with a satisfying vegetable crunch
- Perfect for: Busy weeknight dinners or a kid friendly meal that sneaks in extra veggies
- The Best Mild Chicken Stir Fry
- Common Stir Fry Mistakes
- Component Analysis
- The Ingredient List
- The Tool Kit
- The Cooking Process
- Fixing Stir Fry Issues
- Troubleshooting Common Issues
- Easy Ingredient Swaps
- Adjusting the Portion Size
- Kitchen Myths
- Storage and Leftovers
- Best Side Dishes
- Recipe FAQs
- 📝 Recipe Card
Ever wonder why restaurant stir fry has that glassy, mirrored finish while the versions we make at home often look like a pale, watery mess? I spent years trying to figure this out in my own kitchen. I remember one night trying to make a quick meal for my kids, and I just threw everything in the pan at once.
The result was boiled chicken and gray broccoli that smelled like a steamed vegetable tray from a hospital. It was a total letdown.
The secret isn't some fancy equipment, but rather the order of operations and the heat. When you get the pan shimmering hot, you hear that aggressive hiss the moment the chicken hits the oil. That's when the magic happens.
The aroma of toasted sesame oil and fresh ginger should fill your kitchen, creating a warm, inviting scent that makes everyone run to the table before you've even plated the food.
This Mild Chicken Stir Fry is my go to when I want those fusion vibes but need to keep things gentle for the family. It's got that Texas Mexican spirit of "get it on the table fast" combined with classic Asian flavors.
We're talking about a velvety sauce that clings to every piece of chicken, paired with vegetables that still have a snap to them. Trust me, once you see that glossy glaze bubble up, you'll never go back to the "dump and stir" method.
The Best Mild Chicken Stir Fry
The trick to this dish is treating the pan like a stage. You don't want everyone crowding the spotlight at once. Most people make the mistake of overcrowding the pan, which drops the temperature and leads to steaming. In my house, we've learned that patience in the prep phase leads to speed in the cooking phase.
If you have your sauce mixed and your veggies chopped before the heat even goes on, the actual cooking is a breeze.
I've always loved how a simple change in temperature can change the entire soul of a meal. By searing the chicken first and removing it, we create a brown crust that holds onto the flavor. Then, we build the vegetable layers. This ensures the carrots don't turn to mush while the broccoli is still raw.
It's a simple system, but it's what makes this recipe feel like it came from a professional kitchen rather than a chaotic Tuesday night.
Right then, let's get into the nitty gritty of why this actually works. It's not just about following steps, but understanding the "why" behind the heat. Whether you're cooking for picky toddlers or just want a healthy meal that doesn't taste like cardboard, this approach is the way to go.
Common Stir Fry Mistakes
A lot of recipes tell you to just "stir fry everything," but that's a recipe for disaster. If you put a pound of chicken and three cups of vegetables in a standard skillet, the moisture released from the veggies will pool at the bottom.
Instead of searing, your chicken will poach in its own juices, leaving you with a rubbery texture and no color.
The Brown Crust: Using high heat to sear the meat quickly creates a savory layer on the outside. This doesn't "lock in juices," but it adds a massive amount of flavor that a simmered piece of meat just doesn't have.
The Sauce Stick: Adding a tiny bit of cornstarch to the liquid creates a thickener. When this hits the hot pan, it transforms from a watery soup into a velvety glaze that coats the ingredients instead of puddling at the bottom.
Vegetable Timing: Harder veggies like carrots take longer to soften than bell peppers. By adding them in stages, we ensure everything reaches the "crisp tender" stage at the exact same time.
| Method | Time | Texture | Best For |
|---|---|---|---|
| Fast (This Way) | 27 mins | Crispy & Glossy | Weeknights/Kids |
| Classic (Slow) | 60 mins | Soft & Integrated | Sunday Dinners |
Component Analysis
Before we hit the grocery store, let's look at what each ingredient is actually doing in the pan. It's not just about taste, but about how they interact under high heat.
| Ingredient | Science Role | Pro Secret |
|---|---|---|
| Cornstarch | Thickening Agent | Whisk it well to avoid "clumps" in the glaze |
| Honey | Glaze Base | Adds a floral sweetness that balances the salty soy |
| Sesame Oil | Aroma Builder | Add it to the sauce, not the frying oil, to keep flavor |
| Ginger/Garlic | Flavor Foundation | Grate them fresh for a sharp, zingy punch |
The Ingredient List
I like to keep my pantry stocked with these basics. If you're missing something, don't panic. Most of these have easy swaps that won't ruin the vibe.
- 1 lb (450g) boneless, skinless chicken breast, cut into 1 inch cubes Why this? Lean protein that cooks quickly and absorbs sauce
- 2 cups (300g) broccoli florets Why this? Great texture and absorbs the glaze in the crowns
- 1 cup (150g) sliced carrots Why this? Adds a natural sweetness and bright color
- 1 red bell pepper (150g), thinly sliced Why this? Adds a mild, peppery sweetness
- 2 tbsp (30ml) vegetable oil Why this? High smoke point so it doesn't burn
- 1/4 cup (60ml) low sodium soy sauce Why this? Salt and umami without oversalting the dish
- 2 tbsp (30ml) honey Why this? Creates that signature glossy shine
- 1 tbsp (15ml) toasted sesame oil Why this? Provides the deep, nutty aroma
- 1 tsp (5g) fresh ginger, grated Why this? Adds a warm, spicy kick
- 2 cloves (6g) garlic, minced Why this? Essential savory depth
- 1 tsp (5g) cornstarch Why this? Turns the sauce into a glaze
| Original Ingredient | Substitute | Why It Works |
|---|---|---|
| Low Sodium Soy Sauce | Tamari (1/4 cup) | Similar salt profile. Note: Essential for a gluten-free version |
| Honey (2 tbsp) | Maple Syrup (2 tbsp) | Same viscosity and sweetness. Note: Adds a slight woody flavor |
| Chicken Breast | Chicken Thighs | Higher fat content. Note: Result is more juicy but slightly richer |
| Broccoli | Cauliflower | Similar structure. Note: Milder taste, less "grassy" than broccoli |
I usually recommend a good quality vegetable oil, but if you have a high smoke point avocado oil, that works brilliantly too. Just avoid using extra virgin olive oil for the actual stir frying, as it can smoke and taste bitter at these temperatures.
The Tool Kit
You don't need a professional wok to make this work, though one helps. A large stainless steel skillet or a non stick pan will do the job just fine. The key is having enough surface area so the chicken isn't touching.
I also suggest using a wide spatula. You'll be doing a lot of tossing and flipping, and a wide tool helps you move the vegetables around without breaking the broccoli florets. A small whisk is also handy for the sauce to make sure the cornstarch is fully integrated.
The Cooking Process
Now, let's get into the action. Remember to have everything chopped and ready. Stir frying happens fast, and there is no time to dice a carrot once the oil is shimmering.
- Whisk together the soy sauce, honey, sesame oil, ginger, garlic, and cornstarch in a small bowl and set aside. Note: This prevents the garlic from burning in the pan
- Heat 1 tbsp (15ml) of vegetable oil over medium high heat until it shimmers and almost wisps with smoke.
- Add chicken in a single layer; let it sit undisturbed for 2-3 minutes until a golden brown crust forms, then toss and cook for another 2 minutes.
- Remove chicken from the pan and set aside on a plate. Note: This prevents the meat from overcooking while the veggies soften
- Add the remaining 1 tbsp (15ml) of oil to the same pan.
- Toss in the carrots and broccoli, stir frying for 3-4 minutes until the broccoli is bright green.
- Add the bell peppers and cook for another 2 minutes until the peppers are just starting to soften but still have a snap.
- Return the chicken to the pan, pour the sauce over everything, and toss constantly for 1-2 minutes until the sauce thickens into a glossy, velvety glaze.
Chef's Note: To get that real restaurant feel, try "velveting" your chicken. Toss the raw cubes in a pinch of baking soda and cornstarch 15 minutes before cooking. It keeps the meat incredibly tender, even at high heat.
Fixing Stir Fry Issues

Even the best of us have days where the pan doesn't behave. The most common issue is the "stew effect," where everything releases water and you end up with a soup. This usually happens because the heat was too low or the pan was too full.
Troubleshooting Common Issues
| Issue | Solution |
|---|---|
| Why Your Sauce is Too Thin | If the sauce doesn't cling to the chicken, it's usually because the cornstarch didn't activate or you didn't cook it long enough. The sauce needs to reach a simmer to thicken. |
| Why Your Vegetables are Mushy | This happens when you add everything at once or cook them for too long. The bell peppers should only be in the pan for a couple of minutes. |
| Why Your Chicken is Dry | Overcooking is the enemy. By removing the chicken after the first sear, you ensure it stays juicy. If it's still dry, you might be cooking it on too high a heat for too long. |
Mistakes Checklist:
- ✓ Did I chop everything before turning on the stove?
- ✓ Did I wait for the oil to shimmer before adding meat?
- ✓ Did I avoid crowding the pan to prevent steaming?
- ✓ Did I whisk the cornstarch into the sauce thoroughly?
- ✓ Did I remove the chicken before starting the vegetables?
Easy Ingredient Swaps
Depending on who you're feeding, you might want to tweak the Mild Chicken Stir Fry for dietary needs. The beauty of this dish is its flexibility.
Gluten-free Swap
Simply replace the soy sauce with Tamari or coconut aminos. Coconut aminos are slightly sweeter and less salty, so you might want to reduce the honey by a teaspoon.
Low Sugar Option
Swap the honey for a monk fruit syrup or a small amount of maple syrup. You'll lose a bit of that "sticky" glaze, but the flavor remains quite similar.
Extra Veggie Boost
Feel free to add snap peas, baby corn, or water chestnuts. Just remember the "hardest first" rule. Add the water chestnuts with the carrots and the snap peas with the peppers.
Protein Swap
If you aren't feeling chicken, shrimp works beautifully. Just be careful: shrimp only need about 2 minutes per side. Add them at the very end when you return the meat to the pan.
Adjusting the Portion Size
Cooking for one or cooking for a crowd requires a few tweaks to the technique. You can't just multiply everything and expect the same result in the same pan.
Scaling Down (Half Recipe): Use a smaller skillet to keep the heat concentrated. Reduce the cooking time for the vegetables by about 20% since there's less mass in the pan. If you're using eggs as a side, beat one and use half.
Scaling Up (Double or Triple): This is where most people fail. Do NOT double the ingredients in one pan. You must work in batches. Sear the chicken in two turns, then do the vegetables in two turns. If you crowd the pan, you'll get steamed meat instead of seared meat.
Also, only increase the salt and spices to 1.5x initially, then taste and adjust.
| Goal | Pan Strategy | Heat Adjustment | Texture Result |
|---|---|---|---|
| Single Serving | Small Skillet | Standard | High Crisp |
| Family Size | Batch Cooking | Slightly Higher | Consistent Sear |
Kitchen Myths
There are a few old wives' tales in the stir fry world that just aren't true. Let's clear the air so you can cook with confidence.
The "Seal in Juices" Myth: Many people think searing meat seals in the juices. In reality, searing is about creating flavor through browning. The moisture loss happens regardless, but the taste you get from that crust is worth it.
The "Wok Only" Myth: You don't need a carbon steel wok to get a great stir fry. While woks are great for heat distribution, a heavy stainless steel pan works just as well for home portions.
The "Pre Cook Veggies" Myth: Some suggest steaming vegetables before adding them to the pan. Don't do this. You'll lose the snap and the bright color, turning your meal into a mushy mess.
Storage and Leftovers
This dish keeps surprisingly well in the fridge for about 3-4 days. Store it in an airtight container. When reheating, I recommend using a skillet over medium heat with a tiny splash of water to loosen the glaze. Microwave it in 30 second bursts to avoid overcooking the chicken.
For the freezer, it'll last about 2 months, though the broccoli may lose some of its snap. Thaw it in the fridge overnight before reheating in a pan.
Zero Waste Tips: Don't throw away the broccoli stems! Peel the tough outer skin, slice the inside into thin rounds, and toss them in with the carrots. They have a wonderful, sweet crunch. Also, save any leftover veggie scraps in a freezer bag to make a homemade stock later.
Best Side Dishes
While this Mild Chicken Stir Fry is great on its own, it really shines when paired with a starch that can soak up that extra glaze. Fluffy jasmine rice is the classic choice, but if you're looking for something different, quinoa or cauliflower rice works well for a healthier twist.
If you want a lighter start to your meal, a bowl of Turkish Chicken Soup provides a silky, comforting contrast to the crunch of the stir fry. For those who want a bit more heat on the side, a dollop of Red Chile Sauce can be served in a small bowl for dipping the chicken.
The key is to balance the sweetness of the honey glaze with something neutral or slightly acidic. A side of steamed bok choy or a simple cucumber salad with rice vinegar and sesame seeds will cut through the richness and make the whole meal feel balanced.
Now that you've got the system down, you can start experimenting with your own fusion twists. Maybe add a pinch of cumin for a Texas Mexican flare or some red pepper flakes if the "mild" part is too tame for you. Just remember: high heat, batch cooking, and a glossy glaze are your best friends. Happy cooking!
Recipe FAQs
Is stir fry ok for diabetics?
Yes, but monitor the honey. Reduce the honey amount or use a diabetic friendly sweetener to better manage blood glucose levels.
How to cook chicken if you have gallstones?
Reduce the vegetable oil. Use a high-quality non-stick pan to minimize added fats, which helps prevent gallbladder flare ups.
How to make a simple chicken stir fry?
Whisk the sauce and sear the chicken first. Sauté carrots and broccoli for 3-4 minutes, add bell peppers for 2 minutes, then toss everything with the sauce for 1-2 minutes.
Is stir fry good for heart patients?
Yes, when using low-sodium ingredients. This recipe specifically utilizes low-sodium soy sauce to keep salt intake within heart healthy limits.
What is a go-to easy dinner recipe for the family?
This mild chicken stir fry is an ideal choice. It provides four hearty servings with a total time of only 27 minutes from prep to plate.
What is your go-to easy dinner recipe when you're tired?
Choose a one-pan meal like this stir fry. The 15-minute prep and quick 12-minute cook time make it perfect for low-energy evenings.
What are some easy dinner ideas for picky eaters?
Offer customizable stir fry. Serve the chicken and sauce separately or wrap the filling in homemade flour tortillas for a more familiar texture.
Mild Chicken Stir Fry