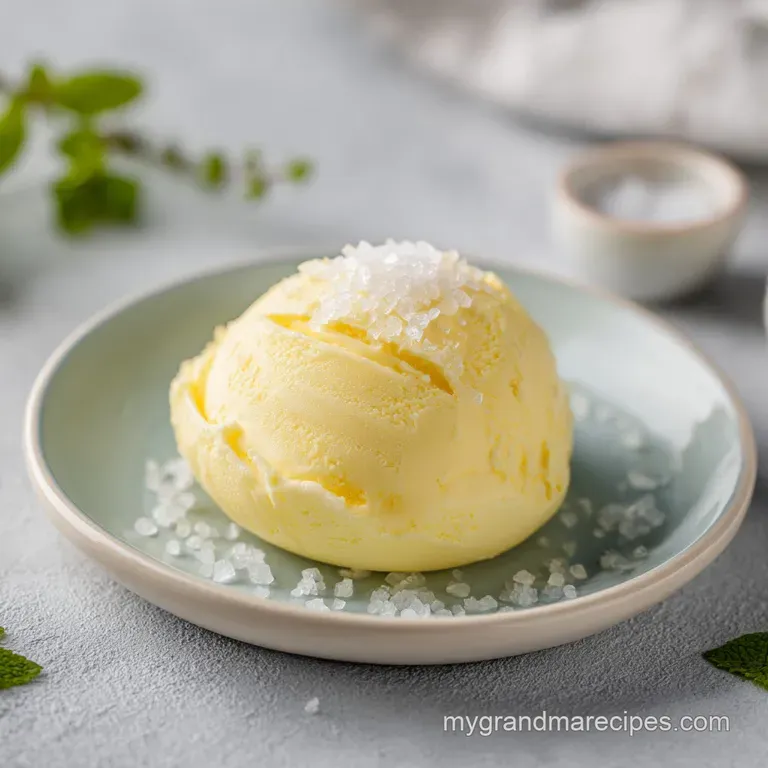
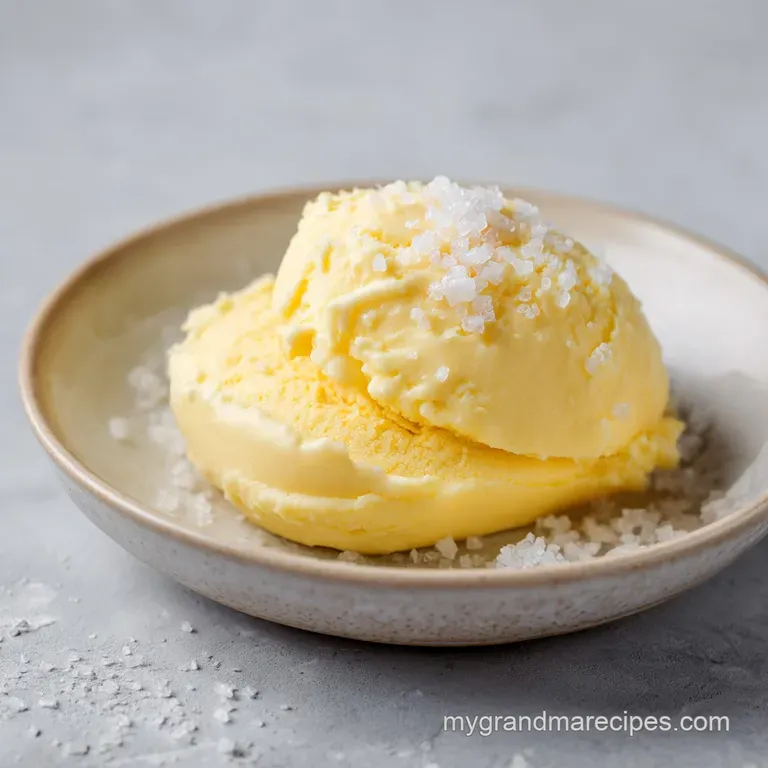
Homemade Butter: Silky and Rich
- Time:15 minutes active = Total 15 minutes
- Flavor/Texture Hook: Velvety, rich, and naturally creamy
- Perfect for: Warm biscuits, morning toast, or holiday brunch
The Secret to Homemade Butter
I still remember the sound of my grandmother's old hand cranked churn echoing through her Southern kitchen. There was something about the way the room smelled of yeast and warm flour that made the anticipation of fresh butter feel like a grand event.
She'd let me help her rinse the solids in a basin of ice water, and I'd marvel at how the liquid turned from a cloudy white to crystal clear.
Right then, I learned that patience is everything. One time, I tried to rush the process and stopped the moment it looked like whipped cream. I ended up with a bowl of very expensive foam because I didn't wait for the "break". That mistake taught me that you have to push past the fluff to get to the gold.
This Homemade Butter recipe is about returning to those basics. You don't need a fancy farmhouse setup, just some heavy cream and a bit of movement. Once you taste the difference between this and a store-bought stick, you'll realize why we used to cherish this process for generations.
- Fat Clumping
- Agitation breaks the membranes surrounding fat globules, allowing them to stick together.
- Liquid Separation
- As fat bonds, the water based buttermilk is pushed out and separates.
- Rinse Effect
- Washing the butter removes leftover buttermilk, which prevents it from spoiling quickly.
| Method | Time | Texture | Best For |
|---|---|---|---|
| Food Processor | 3-5 mins | Velvety | Speed |
| Stand Mixer | 5-8 mins | Traditional | Hands free |
| Glass Jar | 15 mins | Rustic | old-fashioned feel |
Quick Recipe Specs
The flow of this recipe is straightforward. You'll spend a few minutes churning, a few minutes rinsing, and a moment shaping. It's a fast process that delivers a high-quality result without needing any heat.
If you're planning a bigger meal, this fits right into a morning prep flow. You can churn your butter while your coffee brews and your biscuits are rising in the oven. It's a low stress way to add a touch of luxury to a simple breakfast.
Essential Pantry Ingredients
Before we start, let's look at what's actually happening in the bowl. According to USDA FoodData, the high milkfat content in heavy cream is what allows the solids to bind.
| Ingredient | Science Role | Pro Secret |
|---|---|---|
| Heavy Cream | Fat Source | Use minimum 36% fat for a stable break |
| Sea Salt | Flavor/Preservation | Use fine grains to avoid a gritty texture |
| Ice Water | Purification | Must be ice cold to keep the fat solid |
- 2 cups (480ml) heavy whipping cream Why this? High fat content ensures a clean separation. Substitute: Double cream (common in UK).
- 1/2 tsp (3g) fine sea salt Why this? Enhances richness and helps preserve. Substitute: Kosher salt (use 3/4 tsp).
- 2 cups (480ml) ice cold water Why this? Removes buttermilk to extend shelf life. Substitute: Filtered chilled water.
The Right Kitchen Gear
You can use a variety of tools, but for a quick homemade butter recipe, a food processor is my go to. It creates the most consistent agitation and gets the job done in a fraction of the time.
If you have a stand mixer such as a KitchenAid, use the whisk attachment on medium high. Just keep an eye on it, as it's easier to over beat the cream into a grainy mess if you walk away.
Simple step-by-step Guide
Let's crack on. Keep your water ice cold and your cream chilled for the best results.
- Pour the heavy cream into your food processor or mixer bowl.
- Start on medium low speed, then increase to high.
- Churn until the cream breaks and yellow clumps separate from the buttermilk. Note: This is the "break" where it stops looking like whipped cream.
- Strain the mixture through a fine mesh sieve into a bowl.
- Transfer the butter solids into a bowl of ice cold water.
- Knead the butter with a spoon or hands until the rinse water remains clear. Note: Repeat this 2-3 times.
- Press the butter with a spatula to push out any trapped water pockets.
- Fold in the fine sea salt.
- Shape the butter into a log using parchment paper.
Avoiding Common Butter Blunders
The most frustrating part of making butter from scratch is when it just won't separate. Usually, this happens because the cream is too warm. If the fat is too soft, it won't clump together properly, leaving you with thick cream.
Butter not separating
If the mixture stays fluffy, your cream might have warmed up. Stop the mixer and put the bowl in the fridge for 10 minutes before trying again.
Greasy butter texture
This often happens if you over process the butter after the break has occurred. Once you see the clumps, stop churning immediately and move to the rinsing phase.
Sour butter taste
This is caused by leftover buttermilk trapped in the fat. Ensure you knead the butter in ice water until the liquid is completely clear.
| Problem | Root Cause | Solution |
|---|---|---|
| Won't Break | Cream too warm | Chill bowl and cream 15 mins |
| Grainy Feel | Over churned | Stop immediately after separation |
| Fast Spoilage | Poor rinsing | Knead in ice water until clear |
Common Mistakes Checklist
- ✓ Used cream with at least 36% milkfat
- ✓ Kept rinsing water ice cold
- ✓ Stopped churning the moment solids appeared
- ✓ Pressed out all water pockets before salting
Tasty Flavor Twists
Once you've mastered the basic Homemade Butter, you can get creative. Since you're controlling the ingredients, you can infuse it with whatever you like. For a savory version, fold in roasted garlic and fresh thyme. It's a silky addition to grilled steak or corn on the cob.
If you're in the mood for something sweet, try mixing in a bit of honey and cinnamon. This makes a wonderful spread for pancakes. If you're serving a spread of treats, these Mini Oreo Cheesecakes are a hit and pair well with a variety of rich flavors.
Another option is the cultured style shortcut. Let your cream sit on the counter for 12-24 hours (depending on room temperature) to develop a slight tang before churning. This mimics the old-fashioned European style.
Storage and Zero Waste
Keep your Homemade Butter in a glass jar or wrap it tightly in wax paper. It will stay fresh in the fridge for about 2 weeks. If you've made a large batch, you can freeze it for up to 3 months, though the texture can shift slightly.
Don't throw away that leftover liquid! That's real buttermilk, which is a goldmine for baking. It adds a wonderful tang and tenderness to pancakes or biscuits. If you aren't baking this week, use it as a marinade for fried chicken to tenderize the meat.
Serving Your Fresh Batch
The best way to enjoy this is on a slice of toasted sourdough, still steaming from the toaster. The way the butter melts into the nooks and crannies is purely comforting. For a real treat, serve it alongside my Classic Lemon Bars for a balanced sweet and salty dessert platter.
Honestly, don't even bother with low-fat options here. The richness is where the joy is. This Homemade Butter experience is about slowing down and appreciating a process that our ancestors did every single day. It's a small win in the kitchen that makes every meal feel like a special occasion.
Adjusting Your Batch Size
If you only need a tiny bit, you can halve the recipe using 1 cup of cream. Just be careful with the salt; reduce it to a pinch so it doesn't overpower the flavor. Use a smaller bowl for rinsing to avoid wasting water.
For larger batches (2x or 3x), work in stages. Don't overload your food processor, or the cream won't agitate evenly. If you're using a stand mixer, you can double the recipe easily, but keep the speed at medium high to avoid splashing buttermilk across your kitchen.
Recipe FAQs
Is it actually cheaper to make your own butter?
Generally, no. Heavy cream often costs more per ounce than store-bought butter. The value is found in the superior fresh taste and the bonus batch of buttermilk.
How much butter will 1 gallon of milk make?
It depends on the milk's fat content. Since this recipe uses heavy cream, 2 cups of cream yield approximately 1 cup of butter. To use milk, you must first separate the cream from the liquid.
Does butter inhibit yeast?
Yes, fat can slow yeast activity. It coats the yeast cells, which hinders their ability to absorb moisture and sugar. If you enjoyed mastering fat ratios here, the same principle creates the tender texture in our homemade flour tortillas.
What are the ingredients of making butter?
Heavy whipping cream, sea salt, and ice-cold water. Use cream with at least 36% milkfat to ensure the butter solids separate properly from the buttermilk.
How to store homemade butter?
Place it in a glass jar or wrap it tightly in wax paper. It stays fresh in the refrigerator for about 2 weeks or in the freezer for up to 3 months.
How to remove all the buttermilk from the butter?
Knead and squeeze the butter solids in ice-cold water. Repeat this process 2 3 times until the rinse water remains clear to prevent the butter from spoiling.
Is it true you must shake a jar by hand to make butter?
No, this is a common misconception. A food processor or stand mixer is significantly faster and more efficient for churning the cream.
Homemade Butter Recipe

