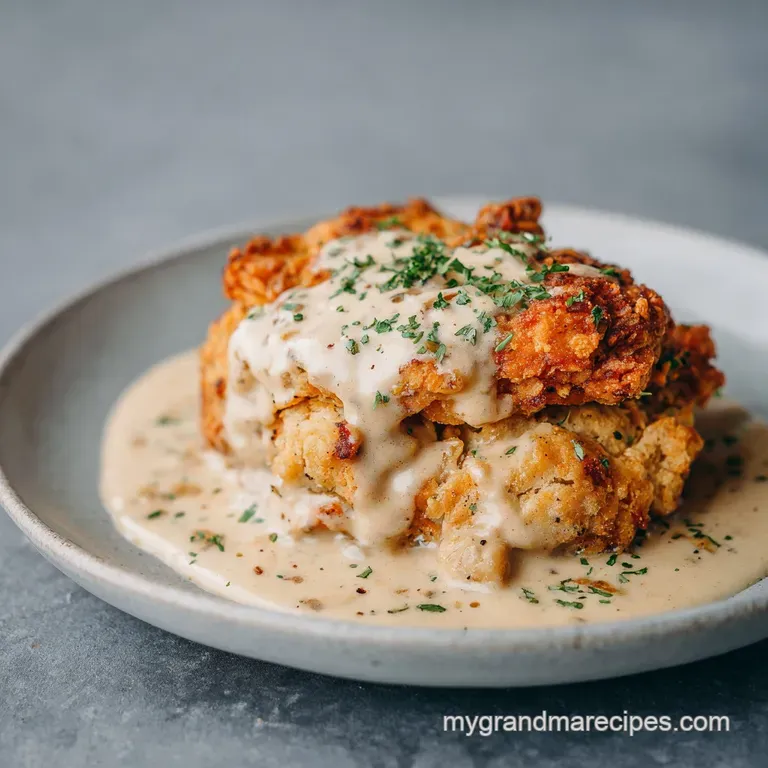
Chicken Fried Chicken: Shattering Crust and Creamy Gravy
- Time: Active 20 minutes, Passive 15 minutes, Total 35 minutes
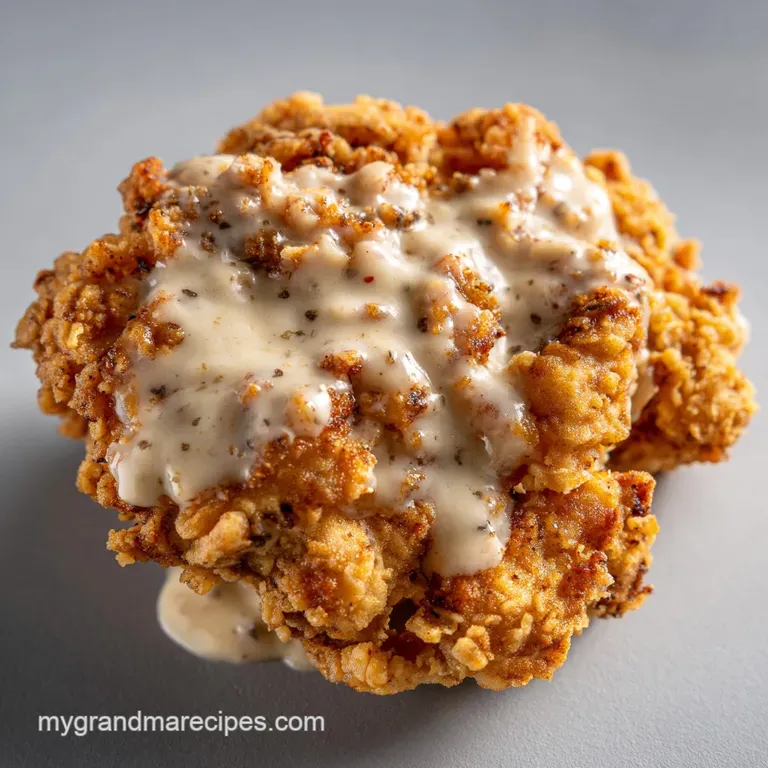
- Flavor/Texture Hook: A salty, peppery, "shatter crisp" crust paired with velvety, rich white gravy.
- Perfect for: A Sunday family dinner or a weeknight comfort food craving when you need a hug on a plate.
- Master the Golden Crunch of Tennessee Chicken Fried Chicken
- Why This Works
- Component Analysis: Essential Ingredients
- Essential Stats for This Comfort Food Classic
- Selecting the Right Components for Crispy Results
- The Only Tools You Need for Success
- The Step by Step Guide to Frying
- Fixing Common Mistakes in the Frying Process
- Simple Ways to Adapt This Hearty Meal
- Myths About Frying Chicken
- Keeping Your Leftovers Fresh and Crispy
- The Best Sides to Serve Alongside This
- CRITICAL Sodium Alert!
- Recipe FAQs
- 📝 Recipe Card
Master the Golden Crunch of Tennessee Chicken Fried Chicken
Have you ever stopped to wonder why we call it "Chicken Fried Chicken" instead of just, well, fried chicken? It sounds like a bit of a stutter, doesn't it? The truth is actually tucked away in the history of the Southern kitchen, specifically in how my grandma used to prepare her Sunday roasts.
In Tennessee, we have a deep love for "chicken fried steak," which is beef prepared just like fried chicken. So, when you take a boneless chicken breast and treat it with that same tenderizing, double dredging, gravy slathered love, it becomes Chicken Fried Chicken.
It's a dish that carries the soul of the skillet and the warmth of a grandmother's kitchen in every single bite.
I remember sitting on a tall wooden stool, watching the clouds of flour rise as Grandma worked. She didn't use a timer or a fancy thermometer. She listened. She knew the chicken was ready when the sizzle changed from a frantic pop to a steady, rhythmic hum.
That aroma of toasted flour, shimmering oil, and heavy black pepper is something that stays with you. It’s the smell of a home where everyone is welcome, and no one leaves with an empty stomach. This isn't just a meal, it's a ritual of comfort that has been passed down through generations.
We are going to walk through this together, and I promise you don't need any expensive gadgets or a culinary degree to get it right. We're going to focus on the basics: the weight of the mallet, the heat of the cast iron, and the patience required to let a roux develop its flavor.
By the time we're done, you'll have a plate of chicken that is so crispy it practically echoes when you cut into it, all topped with a gravy so smooth it'll make you want to lick the spoon. Let's get the skillet heating and talk about why this method works so well.
Why This Works
- Mechanical Tenderization: Pounding the chicken to a 1/2 inch thickness breaks down tough muscle fibers and ensures the entire piece cooks at the exact same rate, preventing dry edges.
- The Cornstarch Barrier: Adding cornstarch to the all purpose flour lowers the gluten content, creating a brittle, glass like crunch that doesn't get soggy as quickly as pure flour breading.
- Double Dredge Adhesion: Coating the meat in flour before the egg wash gives the liquid something to grip, while the second flour dip builds up those craggy, "nubbly" bits that catch the gravy.
- Fond Based Flavor: Using the reserved oil and browned bits (the fond) from the frying process as the base for the gravy incorporates the concentrated chicken essence directly into the sauce.
| Cooking Method | Cook Time | Texture Result | Best For |
|---|---|---|---|
| Cast Iron Skillet | 15 minutes | Maximum shatter crisp crust | Traditional, authentic results |
| Air Fryer | 18 minutes | Lighter, less oily finish | Quick weeknight cleanup |
| Oven Baked | 25 minutes | Softer crust, less mess | Large batches for crowds |
Choosing the right method depends on your mood, but if you want that genuine Tennessee flavor, the cast iron skillet is the way to go. The way the heavy iron retains heat ensures that the oil temperature doesn't plummet when you add the chicken, which is the secret to avoiding a greasy, limp breading. If you're in the mood for something with a bit more spice later this week, you might enjoy my Mexican Chicken and Rice Skillet for a different kind of one pan comfort.
Component Analysis: Essential Ingredients
| Ingredient | Science Role | Pro Secret |
|---|---|---|
| Cornstarch (0.5 cup) | Moisture Absorbent | This is what keeps the crust "shatter crisp" even after the gravy hits it. |
| Eggs (2 large) | Protein Binder | Acts as the "glue" that keeps the heavy breading from sliding off the meat during frying. |
| Smoked Paprika (2 tsp) | Maillard Assistant | Beyond flavor, the sugars in paprika help the crust achieve that deep mahogany color quickly. |
| Whole Milk (2.5 cups) | Emulsification Base | The fat content in whole milk is vital for a gravy that feels velvety rather than watery. |
Essential Stats for This Comfort Food Classic
This recipe is designed to be efficient without sacrificing the quality of the final product. We are looking at a total time of 35 minutes, which is faster than ordering a pizza in most towns. The preparation takes 20 minutes because we aren't rushing the pounding or the dredging.
You want to be intentional with your movements here. The cooking itself only takes 15 minutes, as the chicken is thin and fries up quite rapidly.
When you're looking at the specs for this dish, remember that the internal temperature is your most reliable guide. We are aiming for 165°F. Because the chicken is pounded thin, it can jump from "perfectly juicy" to "overdone" in a matter of sixty seconds.
Keep your meat thermometer handy, and don't be afraid to use it. This is a high protein, high satisfaction meal that serves four people comfortably, providing a substantial 66.4 grams of protein per serving.
The beauty of these stats is that they prove you can have a "from scratch" meal on a Tuesday night. You don't need to marinate the chicken for twelve hours or use a complicated multi step cooling process. It’s about being smart with your 35 minutes. If you have your station set up before you start, you'll breeze through the process. For those nights when you want the crunch without the frying, I often turn to Oven Baked Chicken Thighs as a reliable alternative that keeps the kitchen a bit cooler.
Selecting the Right Components for Crispy Results
- 4 boneless, skinless chicken breasts (approx. 6 oz each): Look for breasts that haven't been "plumped" with saline for the best texture. Why this? Smaller breasts are easier to pound thin without tearing the delicate meat fibers.
- 1.5 cups All purpose flour: This provides the structure for our crust. Why this? AP flour has enough protein to create a sturdy coating that stands up to frying.
- 0.5 cup Cornstarch: Mixed with the flour. Why this? It prevents gluten development, leading to a much crispier, more brittle exterior.
- 2 tsp Smoked paprika: Adds a subtle depth and helps with browning. Why this? The smokiness mimics the flavor of an old-fashioned wood fired stove.
- 1 tbsp Garlic powder & 1 tbsp Onion powder: Our primary aromatics. Why this? Powders distribute more evenly in a dry dredge than fresh aromatics would.
- 1 tsp Cayenne pepper: Just enough for a back of-the throat tingle. Why this? It cuts through the richness of the fried coating and the creamy gravy.
- 2 large eggs: The foundation of our wet bind. Why this? Eggs provide the structure needed to hold onto that thick double layer of flour.
- 0.5 cup Whole milk (for the wash): Thins the eggs just enough. Why this? It creates a smooth liquid that coats every nook and cranny of the chicken.
- 1 tbsp Hot sauce: Added to the egg wash. Why this? Vinegar in the sauce helps tenderize the meat while adding a bright flavor note.
- 2.5 cups Whole milk (for the gravy): The heart of the sauce. Why this? You need the fat from whole milk to get that signature velvety mouthfeel.
The Only Tools You Need for Success
You don't need a kitchen full of high tech gear to make world class Chicken Fried Chicken. In fact, some of the best versions I've ever had were made with nothing more than a heavy skillet and a fork. However, there are a few items that will make your life significantly easier.
First and foremost is a 12 inch cast iron skillet. Cast iron is the king of heat retention. Once it gets hot, it stays hot, which means your chicken will sizzle the moment it hits the pan instead of stewing in lukewarm oil.
Next, you'll want a meat mallet. If you don't have one, don't worry, a heavy rolling pin or even a small, heavy saucepan can work in a pinch. The goal is to apply even pressure to flatten the meat. You'll also need three shallow bowls for your dredging station.
I like to use pie plates or square baking dishes because they give you plenty of room to move the chicken around without making a mess. A wire cooling rack is another "pro" tool that is actually quite cheap.
Resting the fried chicken on a rack instead of a paper towel allows air to circulate underneath, which prevents the bottom from getting soggy.
Finally, a sturdy whisk is essential for the gravy. You want to be able to scrape up all those delicious browned bits from the bottom of the pan while you're incorporating the milk. If you use a spoon, you might end up with lumps, and nobody wants lumpy gravy.
A simple, stainless steel whisk is all you need to achieve that smooth, velvety finish. With these few tools, you are fully equipped to create a masterpiece.
The step-by-step Guide to Frying
Phase 1: The Mechanical Tenderization
- Place the 4 chicken breasts between two large sheets of plastic wrap to prevent any splashing.
- Use the flat side of a meat mallet to pound the chicken until it reaches a consistent 1/2 inch thickness. Note: This ensures the meat cooks evenly and tenderizes the protein fibers.
- Season both sides of the flattened meat lightly with salt and pepper to build the first layer of flavor.
Phase 2: The Double Dredge Dance
- Set up your station by whisking 1.5 cups flour, cornstarch, paprika, garlic powder, onion powder, cayenne, 2 tsp salt, and 2 tsp pepper in the first shallow bowl.
- In the second bowl, whisk the 2 eggs with 0.5 cup milk and 1 tbsp hot sauce until no streaks of egg yolk remain.
- Dredge each breast in the flour first, then dip it completely in the egg mixture, and return it to the flour bowl.
- Press the flour firmly into the chicken with the palms of your hands until a thick, craggy crust forms. Note: These rough edges turn into the best crispy bits once fried.
Phase 3: The Golden Fry
- Heat approximately 1/2 inch of oil in your cast iron skillet over medium high heat.
- Lay the chicken into the hot oil away from you and fry for 3-4 minutes per side until the crust is deep golden brown and the internal temp is 165°F.
- Transfer the finished pieces to a wire rack to drain while you prepare the sauce.
Phase 4: The Pan Gravy Finish
- Carefully pour the oil into a heat safe container, then return 1/4 cup of that oil and the browned bits (fond) back to the skillet.
- Whisk in 1/4 cup of flour and cook over medium heat for 1-2 minutes until it smells toasted and looks like wet sand.
- Slowly pour in the 2.5 cups of whole milk, whisking constantly to prevent lumps.
- Simmer the gravy until it is thick enough to coat the back of a spoon.
- Season heavily with black pepper and serve immediately over your crispy chicken.
Fixing Common Mistakes in the Frying Process
Why Your Breading Falls Off
One of the most frustrating things is seeing that beautiful crust slide right off the chicken. This usually happens because the surface of the meat was too wet before the first flour dip. If there's a layer of moisture between the meat and the flour, it creates steam as it cooks, which pushes the breading away.
Another culprit is "crowding" the pan. If you put too many pieces in at once, the temperature of the oil drops, and the breading starts to soak up oil rather than searing, which weakens its bond to the meat.
Why the Crust is Dark but the Inside is Raw
If you find that your chicken looks perfect on the outside but is still pink in the middle, your heat is likely too high. The outside is burning before the heat has time to penetrate to the center. This is exactly why we pound the chicken to a 1/2 inch thickness.
A thick, uneven breast will almost always result in this problem. If you’ve pounded it correctly and it’s still happening, turn your burner down slightly. You want a steady sizzle, not a violent splash.
| Problem | Root Cause | Solution |
|---|---|---|
| Soggy Breading | Oil was not hot enough | Wait until oil reaches 350°F before adding the chicken. |
| Greasy Gravy | Flour and oil didn't emulsify | Whisk the roux longer before adding milk to ensure a stable bond. |
| Bland Crust | Under seasoned flour | Always taste a tiny pinch of your flour mix; it should be highly flavorful. |
Common Mistakes Checklist
- ✓ Pat the chicken dry with paper towels before you start the dredging process to ensure the flour sticks.
- ✓ Give the oil plenty of time to preheat; a drop of flour should sizzle instantly when it hits the pan.
- ✓ Don't flip the chicken too early; wait until you see the edges turning brown to ensure the crust has "set."
- ✓ Use a wire rack instead of paper towels for draining to maintain that essential bottom side crunch.
- ✓ Whisk your gravy constantly and vigorously to keep it smooth and prevent the bottom from scorching.
Simple Ways to Adapt This Hearty Meal
If you find yourself needing to feed a larger crowd, scaling this recipe is quite straightforward. For doubling the recipe to serve eight, you’ll want to use two skillets or work in batches.
When working in batches, keep the first set of chicken in a 200°F oven on a wire rack to keep them warm and crispy. Be careful with the spices when scaling up; I usually find that 1.5x the salt and pepper is plenty when doubling the volume, as the flavors can become overly concentrated in the frying oil.
For those times when you only need a meal for two, you can easily halve the ingredients. Use one large egg and just a quarter cup of the milk for the wash. You might have a little extra flour mix left over, but it’s better to have too much than to run out mid dredge.
If you're cutting the recipe down, you can still use a 12 inch skillet, just be mindful that the oil might heat up faster with less meat in the pan.
If you are following a specific dietary need, like making this "without buttermilk" as written, you're already on the right track with the whole milk and hot sauce combo. It provides all the acidity and fat you need without requiring a special trip to the store.
If you need a dairy-free version, full fat coconut milk (the kind in the can) works surprisingly well for both the wash and the gravy, though it will add a very slight nutty undertone to the finished dish.
Myths About Frying Chicken
One of the biggest misconceptions is that you need to soak the chicken in a brine or buttermilk for 24 hours to get it tender. While brining is great for whole fried chicken on the bone, it’s not necessary for Chicken Fried Chicken.
Because we are pounding the meat thin, we are tenderizing it mechanically. The 35 minute total time is all you need for a melt in-your mouth result. The "soaking" step is often a hurdle that keeps people from making this on a weeknight, but you can safely skip it here.
Another myth is that you need a deep fryer to get a crispy result. In reality, shallow frying in a cast iron skillet often produces a better crust because the meat is in contact with the hot surface of the pan, which creates more of those browned, flavorful spots. You only need about a half inch of oil.
Deep frying can actually lead to a more uniform but less interesting texture. The skillet method is more authentic and, frankly, much easier to clean up.
Finally, some people believe that gravy must be made with butter to be good. While a butter based roux is delicious, using the reserved frying oil and the chicken drippings (the fond) provides a depth of flavor that butter simply cannot match.
It connects the sauce to the meat in a way that makes the entire dish feel cohesive. It’s an old school technique that honors the ingredients and ensures nothing goes to waste.
Keeping Your Leftovers Fresh and Crispy
If you happen to have any leftovers, they can be stored in an airtight container in the refrigerator for up to 3 days. However, do not store the chicken with the gravy already on top, or it will turn into a soggy mess. Keep them in separate containers. When it comes time to reheat, stay away from the microwave!
The microwave is the enemy of fried food. Instead, put the chicken on a baking sheet in a 350°F (180°C) oven for about 10-12 minutes until the crust crisps back up.
You can also freeze the fried chicken for up to 2 months. Wrap each piece individually in plastic wrap and then place them in a freezer bag. To reheat from frozen, you don't even need to thaw them; just pop them in a 375°F (190°C) oven for about 20 minutes.
The gravy doesn't freeze quite as well because the milk can separate, so I usually recommend making a fresh batch of gravy if you're pulling chicken from the freezer. It only takes a few minutes, after all!
For a zero waste approach, any leftover gravy can be used the next morning over biscuits or even as a topping for a breakfast hash. If you have extra flour and egg wash left over after dredging, don't just throw it away.
You can mix them together with a little extra milk and a handful of chopped onions or corn to make "hushpuppy" style fritters that you can fry up in the leftover oil. It's a little treat that my grandma always made for the kids while the chicken was resting.
The Best Sides to Serve Alongside This
When you have a dish as rich as Chicken Fried Chicken, you want sides that can either stand up to that richness or provide a bright, acidic contrast. The classic pairing is, of course, a big scoop of mashed potatoes. The gravy was practically born to be poured over a mountain of buttery spuds.
If you want to keep the meal feeling traditional, some slow simmered green beans with a bit of bacon or a simple vinegar based coleslaw can provide the perfect balance to the fried elements.
I also love serving this with a side of honey glazed carrots or a crisp garden salad with a sharp lemon vinaigrette. The acidity in a salad helps to cleanse the palate between bites of the savory, peppery chicken. If you’re looking for more inspiration on how to build a full menu around a chicken main, you might find some great ideas in my post about Greek Chicken Meatball Recipe, which also focuses on achieving that perfect tender texture.
No matter what you choose to serve it with, the star of the show will always be that golden, gravy covered chicken. It's the kind of meal that brings everyone to the table and keeps them there, sharing stories and passing the gravy boat.
It’s a piece of Tennessee history that you can recreate in your own kitchen, 35 minutes at a time. Trust me on this one once you hear that first shatter of the crust, you’ll understand why it’s a generational favorite. Happy frying!

CRITICAL Sodium Alert!
1385 mg 1385 mg (60% 60%)
The American Heart Association recommends limiting sodium intake to less than 2,300mg per day, with an ideal limit of less than 1,500mg per day for most adults.
Tips to Reduce Sodium
-
Eliminate Added Salt-25%
Completely remove the 2 tsp of sea salt from the chicken coating and 'salt to taste' from the gravy. Rely on herbs and spices for flavor. This is the biggest contributor to sodium in this recipe.
-
Rethink the Hot Sauce-20%
Many hot sauces are very high in sodium. Opt for a low-sodium or no-salt added hot sauce, or omit it entirely. If using a low-sodium version, check its sodium content.
-
Boost Natural Flavors
Increase the amounts of garlic powder, onion powder, smoked paprika, and cayenne pepper. Consider adding fresh herbs like parsley or chives to the gravy for more complex flavors without salt.
-
Use Low-Sodium Milk-5%
While milk itself isn't a high sodium item, using low-sodium or unsweetened plant based milk (like almond or soy) for the gravy can make a small difference. Ensure it's unsweetened if using plant based.
-
Watch Pan Drippings-10%
Pan drippings can concentrate sodium from any seasoning used on the chicken initially. If you're strictly avoiding salt, consider searing the chicken without any salt and using a small amount of unsalted butter or oil for the gravy base.
Recipe FAQs
What is the difference between fried chicken and chicken fried chicken?
Fried chicken uses bone-in, skin-on pieces, whereas chicken fried chicken uses a pounded boneless breast. The latter is prepared like a country fried steak, creating a flat, uniform cutlet that is dredged and fried until crisp.
What chicken is used for chicken fried chicken?
Use boneless, skinless chicken breasts. For the best results, pound the meat to a consistent 1/2 inch thickness using a meat mallet before seasoning with salt and pepper.
How to cook chicken for diabetic patients?
Prioritize leaner cooking methods to manage caloric intake. If you enjoyed mastering the crispy texture technique here, apply it to skinless poultry without the heavy gravy to reduce carbohydrates and saturated fats.
Can heart patients eat fried chicken?
Generally, this dish is not recommended for those with heart conditions due to high sodium and fat content. The combination of deep frying and a milk based gravy provides significant amounts of saturated fat that should be avoided in heart healthy diets.
How to ensure the crust stays crispy?
Drain the cooked chicken on a wire rack rather than paper towels. Using a rack prevents the bottom of the crust from steaming, keeping the entire piece crunchy until you are ready to serve.
How to fix lumpy gravy?
Whisk the milk into the roux gradually while maintaining constant motion. If lumps persist, continue whisking vigorously over medium heat until the sauce becomes smooth and velvety, ensuring you scrape the flavorful browned bits from the bottom of the skillet.
Is it true the chicken must be at room temperature before frying?
No, this is a common misconception. You can fry the chicken directly from the refrigerator as long as you pat the surface dry with paper towels to ensure the flour coating adheres properly to the meat.
Classic Chicken Fried Chicken
Ingredients:
Instructions:
Nutrition Facts:
| Calories | 885 calories |
|---|---|
| Protein | 66.4 g |
| Fat | 46.2 g |
| Carbs | 52.8 g |
| Fiber | 1.9 g |
| Sugar | 8.7 g |
| Sodium | 1385 mg |
