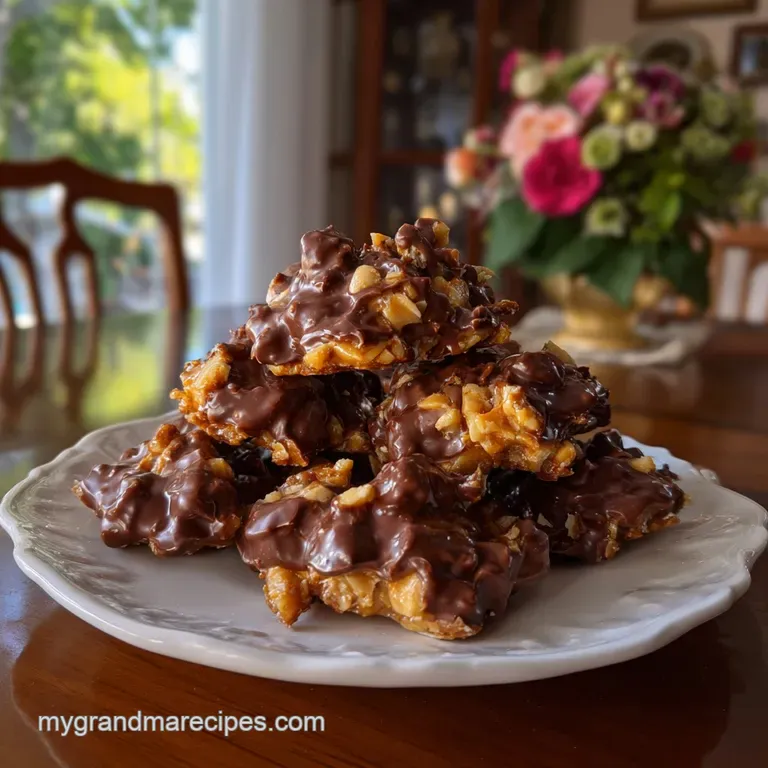
Simple Chocolate Peanut Clusters
- Time: Active 10 minutes, Passive 5 minutes, Total 15 minutes
- Flavor/Texture Hook: Silky chocolate coating with a shattering, salty nut center
- Perfect for: Holiday gifting, last minute party platters, or beginner friendly snacks
- Create Tasty Chocolate Peanut Clusters
- The Science Behind the Snap
- Analyzing Our Key Ingredients
- Selecting Your Pantry Staples
- Reliable Tools You Need
- Step-by-Step Cooking Method
- Fixing Common Texture Problems
- Creative Substitutions and Scaling
- Storage and Freezing Guidelines
- Perfect Dishes to Serve
- Common Myths and Truths
- Recipe FAQs
- 📝 Recipe Card
Create Tasty Chocolate Peanut Clusters
Whenever the humidity drops and the air in Tennessee gets that sharp, winter bite, I find myself reaching for the heavy glass mixing bowls. There is something truly grounding about the scent of melting chocolate filling a kitchen.
It takes me straight back to my grandma’s countertop, where she would have rows of wax paper laid out like a silver carpet, waiting for the sizzle of the next batch. These treats are the ultimate comfort food because they don't ask for much, but they give back so much in return.
This recipe is even simpler than making a traditional Apple Pie Recipe, making it the ideal entry point for anyone who feels a bit intimidated by candy making. We aren't dealing with candy thermometers or scary boiling sugar stages here. Instead, we focus on high-quality ingredients and a few instinctual cues to get that glossy, professional finish. It’s the kind of recipe you memorize after one try and pass down through the family just like we did.
But what about that dreaded "bloom" or those dull, grey streaks that sometimes ruin homemade candy? We are going to tackle that head on. By understanding just a little bit of the "how" behind the melt, we ensure every single bite has that velvety texture we crave.
Honestly, don't even bother with low quality imitation chocolate; the real cocoa butter makes all the difference in the world. Trust me on this, your patience during the melting stage will be rewarded with the best chocolate peanut clusters you've ever tasted.
The Science Behind the Snap
Understanding why this works helps you become a more intuitive cook. It isn't just about mixing things together; it's about managing fats and temperatures.
- Lipid Stabilization: The refined coconut oil acts as a thinning agent, reducing the viscosity of the melted chocolate chips so they coat every peanut nook and cranny.
- Fat Crystal Control: Mixing semi sweet and milk chocolates introduces different levels of milk solids, which helps prevent the cocoa butter from separating and forming white streaks.
- Salt Induced Flavor Contrast: The sea salt doesn't just add grit; it suppresses bitter notes in the dark chocolate while heightening the perception of sweetness.
Chef's Note: I always freeze my peanuts for about 20 minutes before folding them into the warm chocolate. This "thermal shock" helps the chocolate begin to set immediately, preventing a messy pool at the bottom of your clusters.
Analyzing Our Key Ingredients
This component analysis shows exactly why we use these specific items to achieve that old-fashioned result.
| Ingredient | Science Role | Pro Secret |
|---|---|---|
| Chocolate Chips | Provides structural base and snap | Use Ghirardelli for a higher cocoa butter content. |
| Refined Coconut Oil | Lowers melting point and adds shine | Ensure it is refined to avoid a heavy coconut aroma. |
| Roasted Peanuts | Adds structural bulk and savory contrast | Toast them in a dry pan for 2 minutes to revive oils. |
Selecting Your Pantry Staples
Right then, let's look at what you need to gather. I prefer using specific brands because consistency is the secret to grandmother level cooking. If you love salty sweet snacks, you might also want to check out this White Chocolate Pretzels recipe for your next baking session.
- 340 g Ghirardelli Semi Sweet Chocolate Chips: This provides the deep, rich backbone. Why this? Semi sweet has enough sugar to balance the salt without being cloying.Substitute: Dark chocolate chunks (60% cacao) for a more intense flavor.
- 170 g Guittard Milk Chocolate Chips: Adds creaminess and a smoother melt. Why this? Milk chocolate contains milk solids that soften the final texture.Substitute: White chocolate chips, though the final cluster will be much sweeter.
- 15 ml Nutiva Refined Coconut Oil: The secret to that glossy, professional sheen. Why this? It keeps the chocolate from becoming too hard to bite through.Substitute: Unsalted butter, though it may slightly dull the shine.
- 450 g Planters Roasted Salted Peanuts: The classic crunch factor. Why this? Pre salted nuts ensure the seasoning is distributed throughout the cluster.Substitute: Toasted almonds or pecans for a more festive holiday twist.
- 2.5 g Maldon Flaky Sea Salt: For that final, beautiful "shatter" of salt on top. Why this? Large flakes provide a concentrated burst of flavor without dissolving.Substitute: Fleur de sel or any coarse grain finishing salt.
Reliable Tools You Need
You don't need a fancy laboratory, but a few specific items from the kitchen cupboard will make this much easier. I always reach for my heavy bottomed glass bowls because they retain heat evenly, preventing the chocolate from seizing as you work.
- Glass Heat Proof Bowl: A Pyrex bowl is perfect for the double boiler method.
- Silicone Spatula: Use a Rubbermaid spatula to scrape every bit of chocolate from the sides.
- Baking Sheet: A standard Nordic Ware half sheet pan provides plenty of room.
- Parchment Paper: This is non negotiable for an easy, clean release.
- Small Cookie Scoop: A 15 ml (1 tablespoon) scoop ensures every cluster is uniform.
step-by-step Cooking Method

Follow these steps closely. The key is gentle heat; chocolate is temperamental and hates being rushed.
Melting Chocolate Gently
- Fill a small saucepan with 5 cm of water and bring to a simmer.
- Place your glass bowl over the pan, ensuring the bottom doesn't touch the water.
- Add the 340 g semi sweet chips, 170 g milk chocolate chips, and 15 ml coconut oil.
- Stir constantly with a spatula until the mixture is silky and flows like ribbons.
- Remove the bowl from the heat once it reaches 43°C (110°F). Note: This prevents scorching.
Folding in the Peanuts
- Add the 450 g of roasted salted peanuts into the warm chocolate.
- Fold gently using an over under motion until every peanut is fully submerged.
- Check that no dry nut surfaces remain visible to ensure the clusters stay together.
Shaping the Clusters
- Line your baking sheet with a fresh piece of parchment paper.
- Use the 15 ml scoop to drop mounds of the mixture onto the paper.
- Leave about 3 cm of space between each mound until the sheet is full.
- Sprinkle the 2.5 g of flaky sea salt over the tops while they are still wet.
Chilling for the Perfect Snap
- Place the tray in the refrigerator for exactly 30 minutes.
- Wait until the chocolate feels firm and doesn't stick to your finger.
- Peel the clusters off the parchment and let them sit at room temperature for 10 minutes before serving.
Fixing Common Texture Problems
Sometimes things go sideways in the kitchen. If your chocolate looks grainy or your clusters won't set, don't panic. Most candy mistakes are reversible with a little heat or patience.
Why Your Chocolate Seized
If a single drop of water gets into your melting bowl, the chocolate will turn into a gritty, clumpy mess. This happens because the water binds with the sugar and cocoa solids. To fix it, stir in a teaspoon of boiling water or more coconut oil and whisk vigorously.
It won't be quite as shiny, but it will save the batch.
| Problem | Cause | Fix | Pro Tip |
|---|---|---|---|
| Grey Streaks | Temperature was too high | Re melt and cool slowly | Keep the water at a low simmer, never a boil. |
| Clusters Won't Set | Not enough chocolate to nut ratio | Add more melted chips | Use exactly 450 g of peanuts for this volume. |
| Sticky Surface | Humidity in the kitchen | Chill for another 15 minutes | Use a fan to circulate dry air in the room. |
Creative Substitutions and Scaling
If you're making these for a big church bake sale or a small family gathering, you'll need to adjust the quantities. Cooking for a crowd requires a bit more care than just doubling everything.
Scaling Up (2x or 4x): When you double the recipe, only increase the flaky salt to 1.5x the original amount. Using too much salt in a large batch can become overwhelming.
Also, work in batches for the melting stage; trying to melt 1 kg of chocolate at once often leads to uneven heating and scorched bottoms.
Scaling Down (1/2): If you only want a dozen clusters, reduce the chilling time by about 20% since the smaller thermal mass will set faster. You can easily do this in a microwave safe bowl using 30 second bursts.
- Extra Crunch
- Use "Extra Crunchy" style roasted peanuts or add a handful of crushed pretzels.
- Holiday Flare
- Stir in 50 g of dried cranberries after folding in the peanuts.
- Darker Profile
- Swap the milk chocolate for 70% dark chocolate and omit the coconut oil.
Storage and Freezing Guidelines
Keeping these fresh is all about moisture control. In the humid air of Tennessee, we always use airtight tins. These treats will stay perfect in the fridge for up to 3 weeks, though they rarely last that long in my house! For longer storage, you can freeze them for up to 3 months.
Just make sure to layer them with parchment paper so they don't fuse into one giant chocolate brick.
To use up leftovers or "crumbs" at the bottom of the bag, crush them up and sprinkle them over vanilla bean ice cream. It's a zero waste way to enjoy every last bit of that salty sweet goodness.
If you find the chocolate has dulled in the freezer, a quick 5 second "breath" of warm air from a hairdryer can sometimes bring the shine back, though it's purely cosmetic.
Perfect Dishes to Serve
These clusters are quite rich, so they pair best with items that offer a bit of acidity or a neutral palate cleanser. I love serving them alongside a platter of tart Granny Smith apple slices. The crispness of the apple cuts right through the heavy cocoa butter.
For a more substantial spread, they fit right in next to a warm basket of Homemade Biscuits Recipe served with a bit of honey. The contrast between the warm, flaky bread and the cold, snappy chocolate is a sensory delight that feels like a true Sunday afternoon treat. You could also serve them with a strong pot of black coffee; the bitterness of the roast highlights the creamy milk chocolate perfectly.
Common Myths and Truths
Myth: You must use a microwave to save time. Truth: While the microwave is faster, the double boiler method offers much more control. Microwaves create hot spots that can burn the chocolate in seconds, leading to a bitter aftertaste.
If you do use a microwave, use 50% power and stir every 20 seconds without fail.
Myth: Adding water makes chocolate thinner. Truth: Water is the enemy of melted chocolate. If you want a thinner consistency for dipping, always use a lipid like coconut oil or cocoa butter. Water will cause the mixture to seize and become a solid, unworkable mass almost instantly.
Myth: Any peanut will work for clusters. Truth: Raw peanuts lack the depth of flavor needed to stand up to rich chocolate. Always use dry roasted or oil roasted nuts. The roasting process develops the aromatic compounds that make the "peanut" flavor truly pop against the sweetness of the coating.
Myth: Chocolate peanut clusters need to be tempered. Truth: Because we are adding coconut oil and mixing chocolate types, we are creating a "cheat" version of tempering.
The oil stabilizes the fats enough that you get a beautiful snap and shine without the complex temperature cycling required for pure chocolate bars. It's the ultimate kitchen hack for busy home cooks.

Recipe FAQs
Can I substitute the coconut oil with butter for a richer flavor?
No, not if you want the characteristic shine. Coconut oil lowers the melting point and aids in achieving a glossy finish; butter introduces water solids which can dull the final appearance.
What is the key technique to prevent the chocolate from getting dull grey streaks?
Gentle, low-heat melting is crucial. By avoiding high temperatures and incorporating the two different chocolate types, you stabilize the cocoa butter crystals, ensuring a smooth snap.
Do I need to temper the chocolate for this recipe to set properly?
No, traditional tempering is not required. The addition of refined coconut oil acts as a stabilizer, simplifying the setting process without needing precise temperature cycling.
How should I store leftovers to maintain the crunch?
Store them airtight in the refrigerator. Keep them in a container layered with parchment paper to prevent moisture transfer, which is what softens the crunch over time.
Can I use raw peanuts instead of roasting them first?
No, you must use roasted peanuts. Raw nuts lack the necessary developed flavor oils and will taste chalky against the rich chocolate coating.
My chocolate seized up after I added the nuts. What went wrong?
A small amount of water likely introduced itself, causing the sugar to bind. If this happens, you can try stirring in a tiny bit more boiling water or coconut oil to loosen the mass, similar to the technique we use when balancing flavor in our Banana Bread Recipe: Moist Loaf with Yogurt.
What kind of chocolate offers the best balance of sweetness and depth?
A blend of semi sweet and milk chocolate works best. The semi sweet provides backbone, while the milk chocolate adds necessary creaminess, balancing the saltiness of the nuts.
Chocolate Peanut Clusters Recipe
Ingredients:
Instructions:
Nutrition Facts:
| Calories | 222 kcal |
|---|---|
| Protein | 5.6 g |
| Fat | 16.0 g |
| Carbs | 17.1 g |
| Fiber | 2.3 g |
| Sugar | 11.4 g |
| Sodium | 117 mg |
