Sea Salt Taffy Candy: Briny Finish
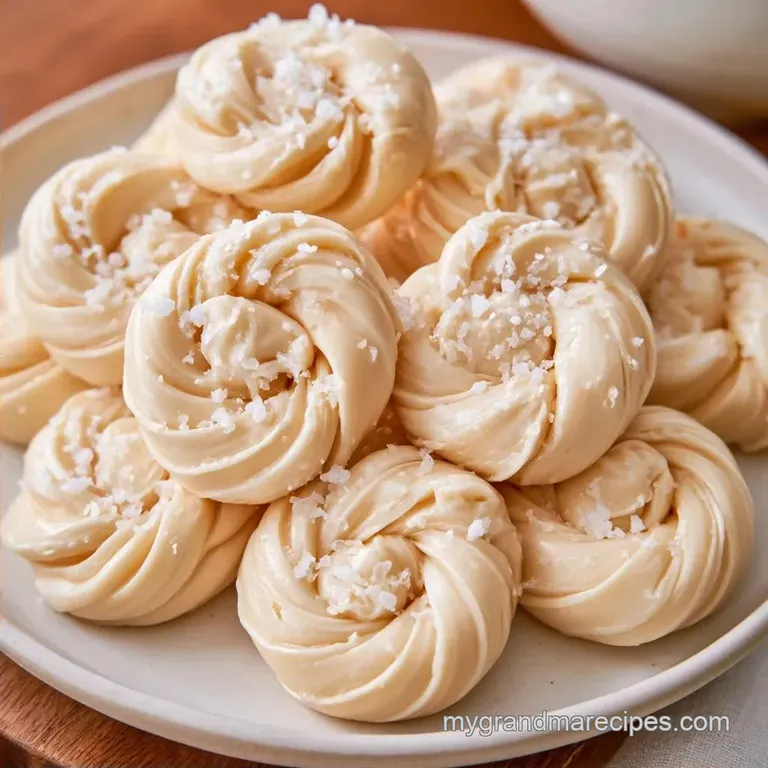
- Time: 20 min active + 1 hr chilling
- Flavor/Texture Hook: Chewy, pearlescent, and salty sweet
- Perfect for: Homemade gifting or nostalgic treat nights
The smell of hot, caramelized sugar and briny air always reminds me of the coast. I can still see the old-fashioned taffy pullers on the boardwalk, their arms moving in a steady rhythm to aerate the candy. That salty breeze is exactly what we're bottling up in this recipe.
Most people overthink this process, but it really comes down to patience and a thermometer. I spent years thinking you needed a professional machine to get the right chew, but a basic stand mixer does the heavy lifting for you.
This Sea Salt Taffy focuses on that contrast between the rich butter and the sharp sea salt. It's a budget friendly treat because it uses pantry staples, but the result tastes like something from a high end candy shop.
How to Actually Nail This
The Temp Threshold: Hitting exactly 254°F creates the "soft ball" stage where sugar is pliable but stays firm. If you miss this mark, you end up with syrup or a rock.
Starch Stabilization: Cornstarch stops the sugar from crystallizing into a grainy mess. It keeps the texture smooth and easy to pull.
Air Incorporation: Beating the candy with a mixer folds in tiny air bubbles. This is what turns a dense sugar block into a chewy, light candy.
Recipe Specs
This recipe makes about 36 individual pieces of candy. It requires 20 minutes of active prep and 30 minutes of cooking. You'll need to factor in the chilling time, bringing the total to 1 hour 50 minutes.
Since we're using basic ingredients like sugar and butter, it's a great way to make a large batch of gifts without spending a fortune. Trust me, the sea salt makes it feel much more expensive than it actually is.
Gathering Your Essentials
Fine sea salt is the key to this recipe. I prefer it over table salt for its clean, mineral profile, which tastes more like the sea than simple saltiness.
- 2 cups (400g) granulated white sugar Why this? Essential for sweetness and structure (Substitute: Cane sugar)
- 1 tbsp (8g) cornstarch Why this? Keeps the texture smooth (Substitute: None, critical for texture)
- 2/3 cup (160ml) light corn syrup Why this? Prevents crystallization (Substitute: Brown rice syrup)
- 1 cup (240ml) water Why this? Used to dissolve the sugar (Substitute: None)
- 1/2 cup (115g) unsalted butter, cubed Why this? Contributes richness and chew (Substitute: Vegan butter)
- 1 tsp (6g) fine sea salt Why this? Delivers the characteristic briny taste (Substitute: Kosher salt)
- 1 tsp (5ml) pure vanilla extract Why this? Balances the sugar (Substitute: Almond extract)
- Extra cornstarch or powdered sugar for dusting
Equipment Needed
While you don't need a commercial kitchen, a few specific tools are essential for success. Use a heavy bottomed saucepan, as thin pots often develop hot spots that can scorch the sugar.
I rely on a digital candy thermometer for accuracy; guessing the temperature is a quick way to spoil your Salt Taffy Candy. You will also need a stand mixer, such as a KitchenAid, equipped with a paddle attachment to handle the pulling stage.
Pro Tip: For those without a stand mixer, you can pull the candy manually using a greased hook, though it requires significant physical effort.
From Prep to Plate

Phase 1: The Precision Boil
Whisk the granulated white sugar and cornstarch in your heavy saucepan. Stir in the light corn syrup and water. Place the pan over medium high heat and stir until the sugar dissolves. Once it starts to boil, stop stirring and attach your digital thermometer.
Boil without stirring until it reaches exactly 254°F (123°C).
Phase 2: The Emulsion
Remove the pan from the heat immediately. Quickly stir in the cubed unsalted butter, fine sea salt, and pure vanilla extract. Stir vigorously until the butter is fully melted and the mixture looks glossy.
Phase 3: The Aeration Pull
Pour the mixture into the bowl of your stand mixer. Let it cool for 15-20 minutes. It should be warm to the touch but not scalding. Attach the paddle and mix on low speed. Continue this process until the taffy becomes pearlescent and chewy.
Phase 4: Shaping and Cutting
Dust a clean surface with cornstarch or powdered sugar. Turn the Sea Salt Taffy out onto the surface. Shape it into a log and let it cool completely for 1 hour. Cut into small pieces using a greased knife.
How to Fix Common Problems
If your candy feels off, it's usually a temperature or aeration issue. Taffy is temperamental, but most problems have a clear cause.
Taffy is too brittle
This happens when the sugar is overcooked. If you hit 260°F or higher, the water evaporates too much, leaving you with hard candy instead of chew. Use a digital thermometer to avoid this.
Taffy is too sticky
Under cooking the sugar is the culprit here. If you pull it off the heat at 240°F, the structure won't hold, and it will stick to everything. You can't really "fix" this once it's cooled, so precision during the boil is key.
Taffy feels grainy
Graininess comes from sugar crystals forming during the boil. This usually happens if you stir the mixture once it has started to boil. Keep the spoon out of the pot until the temperature is reached.
| Problem | Root Cause | Solution |
|---|---|---|
| Hard/Brittle | Overcooked sugar (>260°F) | Remove from heat at exactly 254°F |
| Sticky/Runny | Undercooked sugar (<250°F) | Use a digital thermometer for accuracy |
| Grainy Texture | Stirring during the boil | Stop stirring once the mixture boils |
Creative Twists and Swaps
Make these a holiday staple by adding a pinch of cinnamon or a touch of peppermint extract. For a citrusy alternative, stir in a teaspoon of lemon zest while mixing the butter.
Replacing vanilla with maple extract adds a lovely richness that complements the salt. These sweets are a great addition to a cozy dessert platter, especially when paired with something fruity like Maple Cinnamon Applesauce.
To explore more salt water taffy flavors, try using coconut extract or folding in crushed peppermint pieces. Remember to stir in any solids only after the pulling process is done.
Quick adjustments for different goals: More salt punch? → add 1/4 tsp extra sea salt Lighter color? → use clear corn syrup Floral notes? → swap vanilla for orange blossom water
Method Comparison
| Feature | Classic Stovetop | Quick Microwave |
|---|---|---|
| Texture | Pearlescent and stretchy | Denser, less air |
| Control | High (thermometer) | Low (easy to burn) |
| Effort | Medium (requires pulling) | Low (minimal stirring) |
Storage & Reheating
Keep your Sea Salt Taffy Candy in a cool, dry spot. To ensure the pieces don't stick together, wrap each one individually in wax paper. They will stay fresh for about 2 weeks at room temperature when kept in a sealed container.
In high moisture environments, the candy may become tacky; if so, keep your container in the refrigerator. Should you need to reshape the taffy, a quick 5-second burst in the microwave will soften it.
Save any leftover cornstarch used for dusting. If there is a bit of sugar syrup remaining in your pot, you can dilute it with water to use as a glaze for roasted parsnips or carrots to reduce waste.
Serving Suggestions
I love serving these on a "Boardwalk Platter" with a few other old-fashioned sweets. It brings back that seaside feeling. Pair your Sea Salt Taffy with a strong cup of black coffee to balance the sweetness.
For a nice presentation, wrap them in clear cellophane bags with a piece of twine. It makes a wonderful, budget friendly gift that looks like it came from a boutique.
Since this is a rich candy, a little goes a long way. I usually serve two or three pieces per person. If you're feeling adventurous, try pairing a piece of Salt Taffy Candy with a slice of crisp apple for a sweet, salty, and tart combination.
The beauty of Sea Salt Taffy Candy homemade is that you control exactly how much salt goes in. If you prefer a more subtle flavor, you can reduce the salt slightly, but the briny kick is what makes this recipe stand out from standard store-bought versions.
Recipe FAQs
Why is my taffy too soft?
You likely didn't reach the required 254°F soft ball stage.
Tip: Use a digital thermometer for precision rather than relying on visual cues.
How do I achieve a pearlescent texture?
Mix the candy on low speed with a paddle attachment as it cools to incorporate air.
Tip: Pull the taffy longer if it still looks translucent rather than opaque.
What stops the candy from sticking together?
Wrap each piece individually in wax paper after they have cooled for one hour.
Tip: Dust your workspace liberally with cornstarch or powdered sugar before shaping.
Is it true that microwave taffy has the same texture as stovetop?
This one's false: microwave versions are denser and lack the airy stretch of the pulled stovetop method.
Tip: Stick to the stovetop if you want that classic, stretchy pull.
Which salt works best for this recipe?
Fine sea salt provides the most consistent flavor distribution throughout the candy.
Tip: If you love balancing sweet and salty notes, see how we use similar flavor balancing in our savory plum sauce.
Can I fix taffy that became too hard?
Heat the candy in the microwave for five seconds to soften it for reshaping.
Tip: Work quickly once softened as the sugar sets rapidly upon cooling.
Sea Salt Taffy Candy