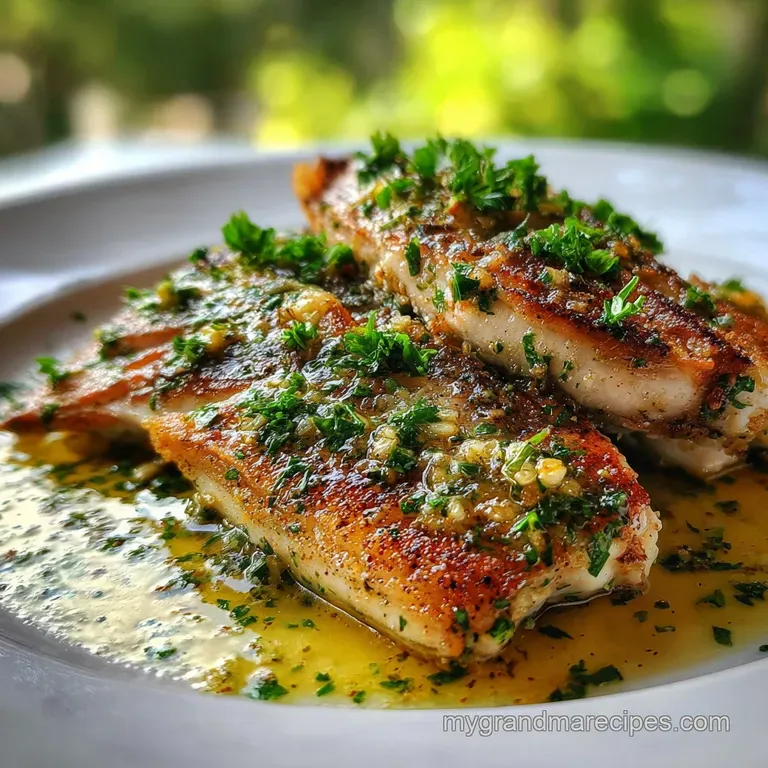
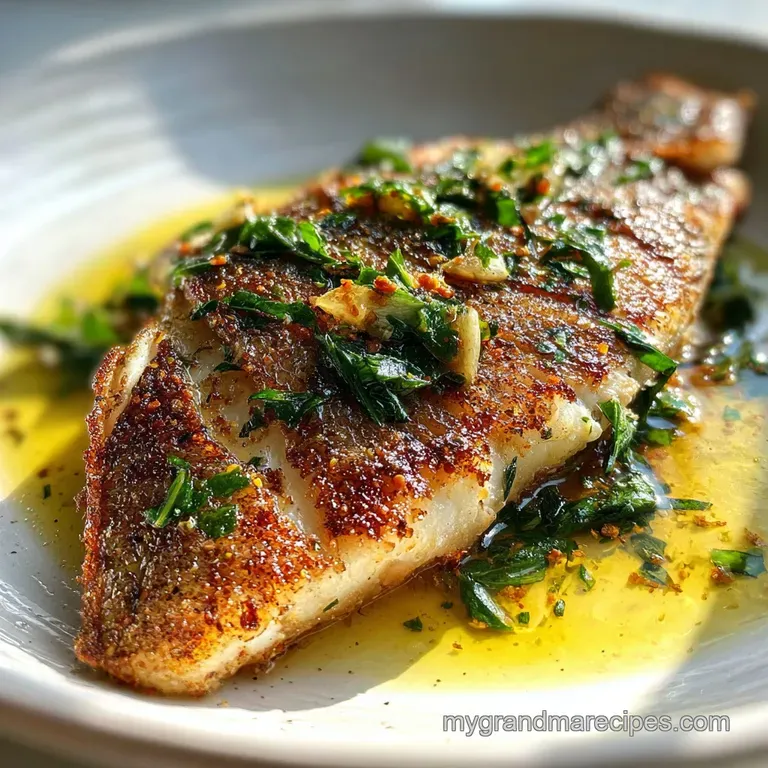
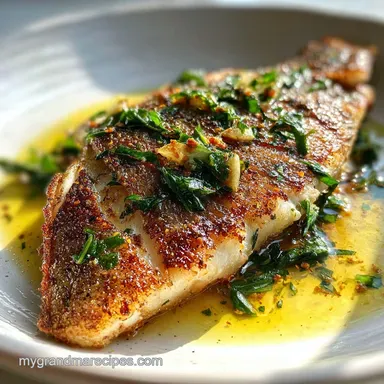
Pan Seared Snapper
- Time: Active 10 minutes, Passive 5 minutes, Total 15 minutes
- Flavor/Texture Hook: Shatteringly crispy skin with a velvety, lemon butter finish
- Perfect for: Quick weeknight dinners or showing off at a small dinner party
- Achieving the Perfect Crisp with Pan Seared Snapper
- Reasons This Simple Cooking Method Provides Reliable Flavor
- Understanding the Purpose of Every Single Recipe Component
- Choosing the Right Kitchen Tools for Success
- Step by Step Directions for a Golden Brown Finish
- Fixing Texture and Temperature Issues with Simple Solutions
- Modifying Your Meal for Specific Health and Diet Goals
- Keeping Your Seared Fish Fresh for the Next Meal
- Selecting the Best Side Dishes for This Southern Classic
- Recipe FAQs
- 📝 Recipe Card
Listen, I know cooking fish at home can feel like a high stakes gamble. There is nothing worse than watching a beautiful piece of snapper stick to the pan or, heaven forbid, turn into a rubbery mess.
I used to be terrified of it too, until I realized the secret isn't fancy equipment it's just about the sizzle and the silence.
When you lay that fish down and hear that aggressive crackle, your instinct is to move it. Don't. We're going for that old-fashioned, cast iron reliability I learned back in Tennessee. This isn't about some complicated fusion technique; it's about respecting the fish and letting the heat do the heavy lifting.
We are going to walk through exactly how to get that skin so crispy it sounds like a cracker when you bite into it. You'll get the hang of it quickly, and honestly, you'll never want to order fish out again. Let's get that pan hot and show you what real comfort food from the sea looks like.
Achieving the Perfect Crisp with Pan Seared Snapper
Getting the texture right is all about chemistry, even if we're keeping things simple. When that skin hits the hot oil, we are triggering the Maillard reaction, which is just a fancy way of saying we are browning the proteins and sugars to create flavor.
To make sure it happens perfectly, you have to start with a surface that is bone dry.
If there's even a hint of moisture on that skin, it will steam instead of sear, and you'll end up with something soggy. I always tell folks to press the fillets between paper towels like they’re trying to dry out an old map.
That dryness, combined with the high smoke point of avocado oil, allows the skin to dehydrate and crisp up before the delicate flesh underneath overcooks.
Science of Shattering Skin
Thermal Conductivity: Metal pans transfer heat directly into the fish skin, causing rapid evaporation of surface moisture. This creates a rigid, crispy structure known as "shattering" texture.
Heat Control and Timing
Protein Denaturation: As heat moves through the fillet, the translucent proteins turn opaque and firm up. We stop just as they begin to flake to ensure the moisture stays trapped inside the cells.
Finishing with Butter
Emulsification: Adding cold butter at the end creates a silky sauce when swirled with the lemon juice. This coats the fish in a velvety layer that balances the sharp saltiness of the sear.
Reasons This Simple Cooking Method Provides Reliable Flavor
The beauty of this dish is that it doesn't hide behind heavy sauces. We are using the "fond" those little brown bits stuck to the pan to build a quick glaze. This is the same way we do it with a Beef Hanger Steak recipe, where the pan itself becomes part of the seasoning.
| Preparation Type | Fresh Snapper Fillets | Frozen and Thawed Fillets |
|---|---|---|
| Texture | Firm and tight flakes | Softer, can be watery |
| Skin Crisp | High "shatter" factor | Requires extra drying |
| Flavor Profile | Clean, sweet, oceanic | Milder, slightly muted |
Using fresh fish is always the goal, but if you're using frozen, the trick is a long, slow thaw in the fridge. Never use the microwave to defrost these. You’ll ruin the cell structure, and the fish will just weep moisture into the pan, killing your chances of a good sear.
| Component | Science Role | Pro Secret |
|---|---|---|
| Avocado Oil | High Smoke Point | Don't use olive oil; it burns too fast for this heat. |
| Kosher Salt | Moisture Draw | Salt the skin 5 minutes early to pull out hidden water. |
| Cold Butter | Sauce Stability | Keep it chilled until the very second it hits the pan. |
Understanding the Purpose of Every Single Recipe Component
Every ingredient in this list has a job to do. We aren't just adding things for the sake of it. The garlic isn't chopped because we don't want it to burn; we just want it to perfume the butter.
- 4 (6 oz) snapper fillets: Get them skin on. The skin protects the meat and provides the texture.
- Substitute: Sea bass or Grouper. Why this? They have similar oil content and skin thickness.
- 1.5 tsp Kosher salt: It seasons and dries the surface.
- Substitute: Sea salt. Why this? Larger grains distribute more evenly than table salt.
- 0.5 tsp freshly cracked black pepper: Provides a subtle bite.
- Substitute: White pepper. Why this? It keeps the appearance "clean" without black flecks.
- 2 tbsp avocado oil: Our over high heat vehicle.
- Substitute: Grapeseed oil. Why this? Neutral flavor that won't smoke at 400°F.
- 3 tbsp unsalted butter: For the basting liquid.
- Substitute: Ghee. Why this? High smoke point with all the dairy flavor.
- 3 cloves garlic: Smashed to release oils without scorching.
- Substitute: Garlic confit. Why this? Adds a mellower, sweeter depth.
- 1 tbsp lemon juice: Cuts through the fat.
- Substitute: White wine vinegar. Why this? Provides the necessary acid for balance.
- 1 tsp fresh parsley: Adds a pop of color and earthy finish.
- Substitute: Chives. Why this? Adds a mild oniony brightness.
Choosing the Right Kitchen Tools for Success
You don't need a pantry full of gadgets, but a good pan is non negotiable. My grandma always used her heavy cast iron for everything, and it’s still the best tool for Pan Seared Snapper. It holds heat like a champion, meaning the pan won't cold down when the fish hits it.
If you don't have cast iron, a heavy bottomed stainless steel pan works too. Avoid non stick pans for this specific recipe. You can't get them hot enough to achieve that "shatter" texture without damaging the coating, and you won't get any of that delicious fond to make your butter sauce.
A thin metal spatula is also your best friend here; it slides under the skin without tearing it.
step-by-step Directions for a Golden Brown Finish
- Dry the fillets. Pat the 4 snapper fillets with paper towels until they feel completely dry to the touch. Note: This is the most important step for crispy skin.
- Season the fish. Sprinkle the 1.5 tsp Kosher salt and 0.5 tsp black pepper over both sides.
- Heat the oil. Add 2 tbsp avocado oil to a large skillet over medium high heat until the oil shimmers and barely wisps smoke.
- Place the fish. Lay the fillets skin side down in the pan, pressing them gently with a spatula for 30 seconds. Note: Pressing prevents the skin from curling up.
- Sear the skin. Cook for 3-4 minutes without moving the fish until the skin is golden and releases easily from the pan.
- Flip carefully. Turn the fillets over and cook for another 1-2 minutes.
- Add the aromatics. Drop in the 3 tbsp butter and 3 smashed garlic cloves.
- Baste the fillets. Tilt the pan and spoon the foaming butter over the fish for 1 minute until the meat is opaque and flaky.
- Deglaze with lemon. Pour in the 1 tbsp lemon juice and swirl it into the butter.
- Garnish and serve. Sprinkle with 1 tsp parsley and plate immediately while the skin is at its peak.
Fixing Texture and Temperature Issues with Simple Solutions
The biggest mistake folks make is panic flipping. If the fish feels stuck, it usually means it isn't done searing yet. The proteins need time to release from the metal. If you force it, you'll leave that delicious skin behind on the pan, which is a tragedy in my kitchen.
Fix for Sticking Skin
If your fish won't budge, give it another 30 seconds. The "release" happens naturally once the crust is fully formed. If it's still stuck after that, your pan likely wasn't hot enough when you started, or you didn't use enough oil.
Preventing Fillet Curling
Fish skin shrinks faster than the meat when it hits heat. This causes the edges to pull up. Using a heavy press or just holding it down firmly with your spatula for those first few seconds is the only way to keep the fillet flat and ensure even browning.
| Problem | Root Cause | Solution |
|---|---|---|
| Soggy skin | Excess moisture | Pat dry with paper towels twice before cooking. |
| Burnt garlic | Adding too early | Only add garlic during the last 2 minutes of basting. |
| Dry meat | Overcooking | Pull the fish when it reaches 135°F; carryover heat does the rest. |
When you're scaling this up for a crowd, work in batches. If you crowd the pan, the temperature drops and the fish will steam. I usually cook two fillets at a time, keeping the first batch in a warm oven at 200°F while I finish the rest.
It's better to take an extra ten minutes than to serve soggy fish.
Modifying Your Meal for Specific Health and Diet Goals
This recipe is naturally quite healthy, but we can tweak it if you're following a specific plan. For my friends on Paleo or Whole30, the transition is seamless. You'll just need to swap the butter for ghee or a high-quality clarified butter.
You still get that rich, nutty flavor without the dairy solids that aren't allowed on those plans.
Paleo and Whole30 Swaps
Using ghee provides a higher smoke point than regular butter, which is actually a nice little bonus. You can follow the How to Cook recipe method for general fish handling, but stick to the ghee for that final baste. It keeps the dish entirely compliant while maintaining the velvety mouthfeel.
Mediterranean Flavor Twist
If you want to move away from the Southern butter heavy style, try replacing the butter with a finishing drizzle of extra virgin olive oil and some capers. Add the lemon juice and parsley as usual. This lightens the dish considerably and pairs beautifully with a side of roasted tomatoes or olives.
Keeping Your Seared Fish Fresh for the Next Meal
Cooked snapper is best eaten immediately, mainly because that crispy skin starts to soften the moment it hits the plate. However, if you have leftovers, you can keep them in an airtight container in the fridge for up to 2 days.
I don't recommend freezing it after it's been cooked; the texture of the fish becomes quite mealy once thawed.
To reheat and save that skin, stay away from the microwave. That's a one way ticket to Rubber Town. Instead, put a tiny drop of oil in a skillet over medium heat. Place the fish skin side down and cover the pan for about 3 minutes.
This will crisp the bottom back up while the steam gently warms the center through.
Chef's Tip: Take any leftover fish and flake it into a salad the next day. The cold, seasoned snapper is surprisingly good with a light vinaigrette and some crunchy greens.
Selecting the Best Side Dishes for This Southern Classic
Since this Pan Seared Snapper is so light and zesty, I love pairing it with something that has a bit of weight to it. In my house, that usually means a side of Homemade Mac and recipe. The creamy cheese sauce and the panko crust on the mac play perfectly against the flaky, citrusy fish.
If you're looking for something a bit lighter, a simple bed of sautéed spinach or some roasted asparagus with garlic works wonders. The key is to avoid anything that will compete with the delicate flavor of the snapper. You want sides that support the star of the show, not overshadow it.
My grandma used to say that a good meal should cover all the bases: something crunchy, something soft, something salty, and something bright. This snapper hits the crunchy, salty, and bright notes it's up to your sides to bring the soft comfort to the table.
Trust your instincts, keep your pan hot, and you're going to do just fine.
- Myth
- You should flip fish multiple times to ensure it's cooked. Truth: Flipping more than once ruins the crust and increases the risk of the fillet breaking apart.
- Myth
- High heat will burn the fish before it's done. Truth: High heat is required for the skin; you can always lower the flame or finish with butter basting to cook the center gently.
- Myth
- "Fresh" fish shouldn't smell like anything. Truth: Truly fresh fish has a very mild scent of the ocean, but it should never smell "fishy" or like ammonia.

Recipe FAQs
How long do you cook snapper in a pan?
Generally 3-4 minutes per side for the skin side, and 1-2 minutes for the flesh side. Adjust based on fillet thickness; aim for opaque and flaky results.
Is it better to pan fry fish in oil or butter?
Start with oil, finish with butter. Use a high smoke point oil like avocado oil to sear the skin initially, then add butter towards the end for basting and flavor.
What is the most common way to cook snapper?
Pan-searing is a very popular and effective method. It allows for crispy skin and a moist interior, highlighting the fish's natural flavor with simple techniques.
How to perfectly pan sear fish?
Ensure the fish is bone dry and the pan is screaming hot with oil. Place the fish skin side down, press gently to prevent curling, and don't move it until the skin releases easily.
Should I use fresh or frozen snapper?
Fresh is always preferred for the best texture and crispy skin. If using frozen, thaw slowly in the refrigerator and pat extremely dry before cooking to mitigate moisture loss.
What's the secret to crispy snapper skin?
Achieving a perfectly dry surface and a searing hot pan are key. Pat the skin thoroughly with paper towels and use an oil with a high smoke point, like avocado or grapeseed oil.
Can I use a non-stick pan for searing snapper?
No, avoid non-stick pans for this method. You need a heavy pan, like cast iron or stainless steel, that can handle high heat to achieve the crucial crispy skin and develop fond for sauce.
Pan Seared Snapper
Ingredients:
Instructions:
Nutrition Facts:
| Calories | 312 kcal |
|---|---|
| Protein | 34.8 g |
| Fat | 17.7 g |
| Carbs | 1.1 g |
| Fiber | 0.1 g |
| Sugar | 0.2 g |
| Sodium | 855 mg |
