Fudge Recipe: Classic Chocolate
- Time: Active 10 minutes, Passive 2 hours, Total 2 hours 10 minutes
- Flavor/Texture Hook: Deeply bittersweet with a velvety, melt away finish
- Perfect for: Holiday gifting, budget-friendly dessert trays, or a late night chocolate craving
- Mastering This Rich Dark Chocolate Fudge Recipe
- The Physics of the Velvet Snap
- Essential Benchmarks for Your Batch
- Building Blocks for Budget Friendly Treats
- Necessary Tools for a Silky Set
- Key Steps for Achieving Fudgy Perfection
- Fixing Common Chocolate Texture Issues
- Simple Dietary Swaps and Variations
- Storage Secrets for Lasting Freshness
- Best Ways to Serve Your Fudge
- Fudge Recipe FAQs
- 📝 Recipe Card
Mastering This Rich Dark Chocolate Fudge Recipe
The kitchen is quiet, save for the rhythmic clack clack clack of a heavy knife hitting the cutting board as I break down the chocolate. There is something about the aroma of dark cocoa hitting warm milk that takes me right back to my grandma’s tiny kitchen in Tennessee.
She didn't have fancy candy thermometers or marble slabs; she had a wooden spoon, a heavy pot, and an instinct for when the mixture looked "just right."
I remember watching her stir a simmering pot, the steam carrying that heady, bittersweet scent through the house. She’d always say that the best treats didn't need a pantry full of ingredients, just a bit of patience and a heavy hand with the vanilla.
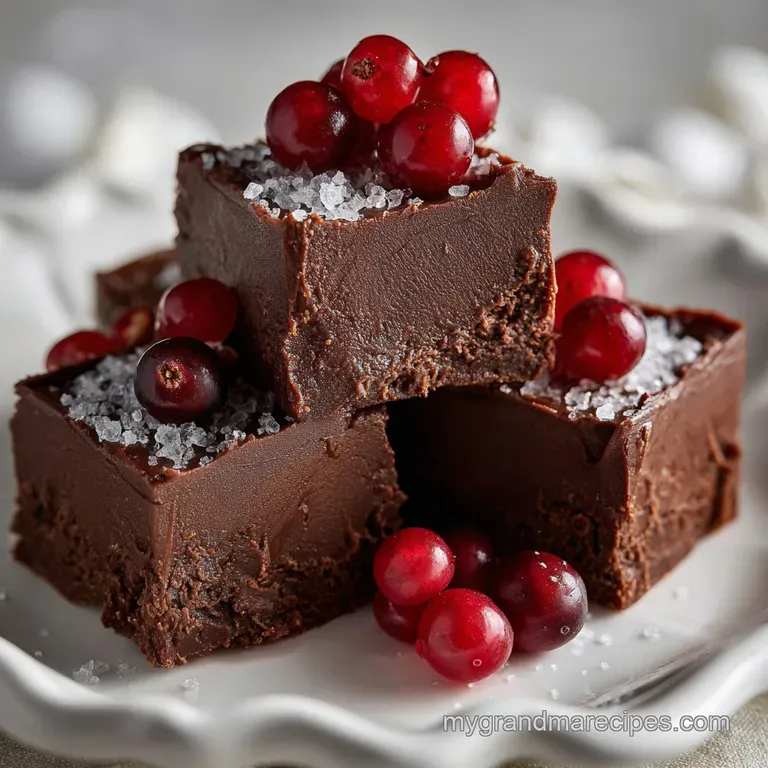
This version is a nod to those afternoons, stripped back to the essentials but refined to ensure you get that shatter crisp top and a center that feels like silk.
We are going for a texture that isn't grainy or cloying. It’s about that clean break when you bite into it, followed by a slow, rich dissolve. Whether you are making this for a church bake sale or just to have something sweet tucked away in the fridge, this method is virtually foolproof.
Let's get that pot on the stove and talk about why this simple combination works so well every single time.
The Physics of the Velvet Snap
Emulsification Stability: The sweetened condensed milk acts as a pre cooked syrup that prevents sugar crystals from growing, ensuring a smooth mouthfeel. When the fat from the 30g of butter integrates with the chocolate’s cocoa butter, it creates a stable matrix that sets firmly at room temperature.
| Method | Time | Texture | Best For |
|---|---|---|---|
| Stovetop | 5 minutes | Ultra glossy and smooth | Total control over heat |
| Microwave | 2 minutes | Dense and matte finish | Quick cravings or kids |
| Slow Cooker | 1 hours | Very soft and pliable | Large batches for parties |
Since we are focused on getting that traditional, deep flavor, the stovetop method is my go to. It allows you to see the exact moment the chocolate loses its shape and becomes a singular, flowing ribbon of silk. If you’ve ever tried the Strawberry Cake Truffles Recipe, you know how important that temperature control is for a clean set.
Essential Benchmarks for Your Batch
When you’re working with 400g of chocolate, you want to make sure the environment is ready before the heat starts. I’ve found that using a 8x8 inch square pan gives you the ideal thickness for those 24 servings.
If you go too large with the pan, the fudge ends up thin and loses that satisfying "chunk" factor.
| Component | Science Role | Pro Secret |
|---|---|---|
| Dark Chocolate (70%) | Provides structural cocoa solids | Chop into uniform shards for even melting |
| Condensed Milk | Inhibits sugar crystallization | Never boil; only warm to maintain moisture |
| Grass fed Butter | Lowers the melting point | Use cold butter to slow the initial heat |
| Sea Salt | Suppresses bitterness | Add half during mixing and half on top |
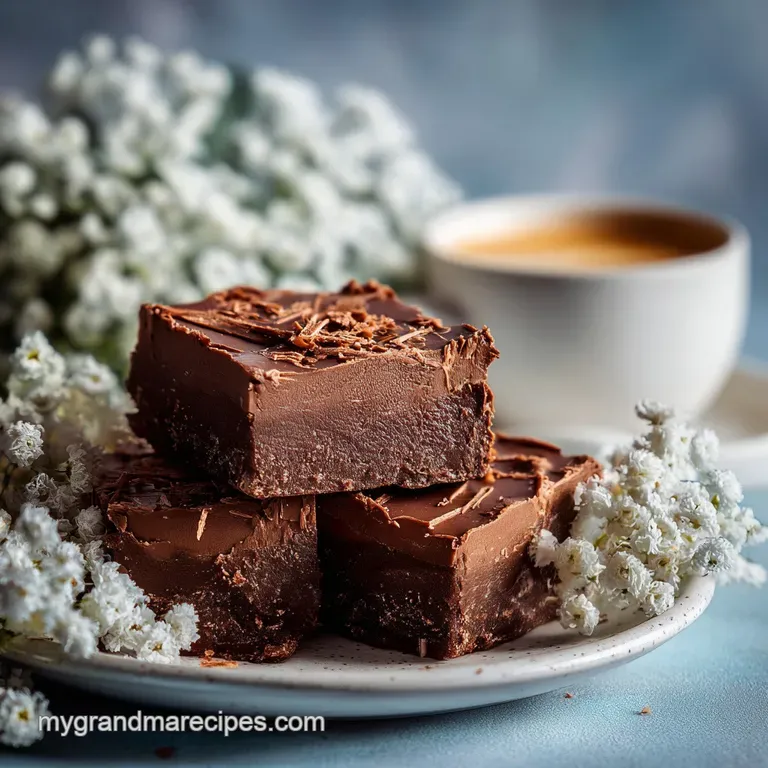
I reckon the most important thing to remember is that chocolate is temperamental. It doesn't like sudden changes. Keeping your butter at 30g exactly ensures the fudge stays firm enough to hold its shape at a summer picnic but soft enough to yield to a fork. If you're looking for something with a bit more crumb to pair with your coffee, my Cranberry Bread Recipe is a great companion for a dessert spread.
Building Blocks for Budget Friendly Treats
- Dark chocolate (400g): Look for 70% cacao for that sophisticated bite. Why this? Higher cocoa butter content ensures a firmer, professional set without extra stabilizers.
- Substitute: Semi sweet chocolate chips (note: will be significantly sweeter and softer).
- Sweetened condensed milk (397g): This is your sugar and liquid in one. Why this? The milk solids are already caramelized, adding a deep milky undertone.
- Substitute: Coconut condensed milk (adds a subtle tropical nuttiness).
- Unsalted grass fed butter (30g): Adds a velvety sheen. Why this? Grass fed butter has a higher yellow pigment and richer fat profile.
- Substitute: Refined coconut oil (maintains a similar melt point but lacks dairy notes).
- Vanilla bean paste (1 tsp): For those beautiful black specks. Why this? Paste offers more concentrated flavor than extract without adding excess liquid.
- Substitute: Pure vanilla extract (standard flavor, less visual impact).
- Flaked sea salt (0.5 tsp): To wake up the tongue. Why this? Large flakes provide a crunch that contrasts the soft fudge.
- Substitute: Fine kosher salt (use half the amount to avoid over salting).
Necessary Tools for a Silky Set
You don't need a laboratory, but a heavy bottomed saucepan is non negotiable here. Thin pots have "hot spots" that will scorch your 397g of condensed milk before the chocolate even thinks about melting.
I always reach for my old enameled cast iron pot because it holds a steady, gentle heat that protects the delicate fats in the chocolate.
A silicone spatula is your best friend for this task. Unlike a wooden spoon, it can scrape every last bit of that glossy mixture from the corners of the pot, ensuring nothing gets left behind to overcook. You'll also want some parchment paper.
Don't just grease the pan; the parchment acts as a sling so you can lift the entire block out once it's cured, making those clean, sharp cuts much easier to achieve.
Chef's Tip: Put your vanilla bean paste into the condensed milk before adding the chocolate. This ensures the flavor is evenly distributed through the liquid base rather than clumping in the thick chocolate.
Key Steps for Achieving Fudgy Perfection
- Prep the pan. Line a square baking dish with parchment paper, leaving an inch of overhang on the sides.
- Chop the chocolate. Break the 400g of dark chocolate into small, uniform pieces. Note: Small pieces melt faster and prevent the milk from overheating.
- Combine liquids. Pour the 397g of sweetened condensed milk into your saucepan over low heat.
- Add fat. Drop in the 30g of grass fed butter and stir until the butter completely vanishes into the milk.
- Introduce chocolate. Tip all the chocolate shards into the warm milk at once.
- Gentle stir. Use a folding motion with your spatula until the mixture is glossy and smooth.
- Final seasoning. Remove from heat and quickly fold in the 1 tsp of vanilla bean paste and half the salt.
- The pour. Scrape the mixture into your prepared pan, smoothing the top with the back of a spoon.
- Salt finish. Sprinkle the remaining flaked sea salt over the surface until it looks like a starry night.
- The cure. Let it sit on the counter for 30 minutes, then refrigerate until the center is firm to the touch (about 2 hours).
Fixing Common Chocolate Texture Issues
Why Your Fudge Is Grainy
If the mixture feels sandy on your tongue, the sugar in the condensed milk likely crystallized because the heat was too high. This usually happens if the pot was boiling rather than just steaming. Once the crystals form, they act as seeds for more crystals, ruining that velvety finish.
Why Your Fudge Won't Set
Usually, this is a ratio problem or a humidity issue. If you used a lower percentage chocolate (like milk chocolate), the fat to liquid ratio might be off. Milk chocolate has more dairy and less cocoa butter, which means it needs more time or a little less condensed milk to hold its shape.
| Problem | Root Cause | Solution |
|---|---|---|
| Seized Chocolate | Water got into the pot | Add 1 tsp of warm milk and stir vigorously |
| Oil Separation | Heat was too high | Remove from heat and whisk in 1 tbsp of cold milk |
| Sticky Surface | Not enough chilling time | Freeze for 20 mins then cut with a hot knife |
Common Mistakes Checklist
- ✓ Never let even a single drop of water touch the melting chocolate.
- ✓ Resist the urge to turn up the heat to "speed things up."
- ✓ Use a sharp, thin knife dipped in hot water for the cleanest slices.
- ✓ Don't skip the parchment paper "sling" or you'll be digging fudge out with a spoon.
Simple Dietary Swaps and Variations
If you're looking to scale this down for a solo treat, you can halve the recipe easily. Just use a smaller loaf pan and reduce the setting time by about 20%. When scaling up for a big holiday party, I suggest making two separate batches rather than one giant one.
Large volumes of chocolate are harder to melt evenly, and you risk scorching the bottom of a massive pot.
| Premium Ingredient | Budget Alternative | Flavor Impact | Savings |
|---|---|---|---|
| Valrhona Chocolate | Baker's Brand Bar | Slightly less complex fruit notes | Save $12-15 |
| Vanilla Bean Paste | Imitation Vanilla | Loss of "speckled" look and depth | Save $8 |
| Grass fed Butter | Standard Store Brand | Slightly less creamy mouthfeel | Save $3 |
If you want a different flavor profile, the Maple Fudge Variation is a dream. Replace the vanilla paste with 1 teaspoon of maple extract and fold in a half cup of toasted pecans at the very end.
The salt still works beautifully here, cutting through the sweetness of the maple and creating a very "Old Fashioned" Tennessee vibe.
Storage Secrets for Lasting Freshness
Fudge is surprisingly hardy if you treat it right. You can keep these squares in an airtight container at room temperature for about 1 week. However, if your kitchen is warm, they might get a bit tacky. I prefer keeping mine in the fridge, where they stay perfectly firm for up to 3 weeks.
Just make sure to place a piece of parchment between layers so they don't fuse together into a giant chocolate brick.
For zero waste enthusiasts, don't throw away those "shards" left over from cutting the squares. I keep a jar in the freezer for the odd ends. They are incredible when chopped up and stirred into a morning bowl of oatmeal or melted down to make a quick ganache for a weekend cake.
You can even freeze the entire block for up to 3 months just wrap it tightly in plastic wrap and then foil to prevent freezer burn.
Best Ways to Serve Your Fudge
When it comes to serving, temperature is everything. If you take the fudge straight from the fridge, it will have a firm, truffle like bite. If you let it sit at room temperature for 15 minutes, the fats soften, and it becomes much more decadent and creamy.
I personally love serving these on a wooden board alongside some tart dried cherries or a handful of roasted almonds to balance the richness.
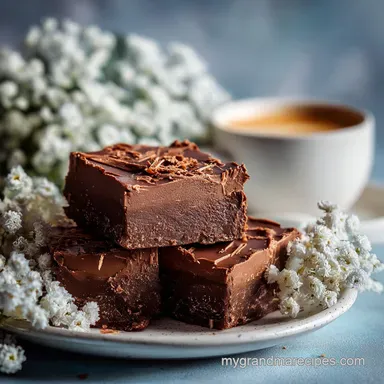
If you’re gifting these, little parchment lined tins are the way to go. There’s something so charming about opening a small box to find perfectly uniform squares of dark chocolate topped with those sparkling salt flakes.
It looks like you spent hours at a confectionary, but we’ll keep the 15 minute secret between us. Just remember to keep them out of direct sunlight, or your beautiful gift will turn into a delicious puddle before the party even starts!

Fudge Recipe FAQs
What is the secret to making good fudge?
Control the heat and ensure proper emulsification. Use a heavy bottomed saucepan to prevent scorching and stir consistently until the mixture is glossy and smooth. If you enjoyed mastering temperature precision here, apply it to our Homemade Tomato Soup Recipe: Velvety & Quick for equally smooth results.
What are the ingredients for fudge?
Classic fudge typically requires dark chocolate, sweetened condensed milk, and butter. Vanilla bean paste and flaked sea salt are also key for flavor enhancement and texture contrast.
What are the common mistakes when making fudge?
Graininess from sugar crystallization and a lack of setting are most common. Graininess often occurs from overheating, while a failure to set can be due to incorrect ingredient ratios or high humidity.
How to make really easy fudge?
Melt chocolate and condensed milk together gently over low heat. Stir until smooth, add vanilla and salt, then pour into a parchment lined pan to set.
Can I substitute the dark chocolate in fudge?
Yes, you can substitute semi sweet chocolate chips, but expect it to be sweeter and softer. This substitution is similar to using a different fat source in a recipe like Christmas Coconut Balls: No-Bake Condensed Milk Recipe, where the base ingredients significantly alter the final texture.
Why is my fudge grainy?
Graininess typically results from the sugar in the condensed milk crystallizing due to excessive heat. If you enjoyed controlling texture here, you'll find similar principles apply to achieving the perfect crumb in our Creamy Mashed Potatoes Recipe in 35 Minutes | Velvety & Rich.
How do I get my fudge to set properly?
Ensure accurate ingredient ratios and avoid high humidity environments. Proper chilling time is also critical for the fats and solids to solidify into a firm, sliceable treat.
Easy Fudge Recipe
Ingredients:
Instructions:
Nutrition Facts:
| Calories | 162 kcal |
|---|---|
| Protein | 2.6 g |
| Fat | 9.6 g |
| Carbs | 16.8 g |
| Fiber | 1.8 g |
| Sugar | 13.1 g |
| Sodium | 73 mg |
