Chocolate Covered Strawberry Cupcakes: Moist and Decadent
- Time: Active 45 minutes, Passive 20 minutes, Total 65 minutes
- Flavor/Texture Hook: Velvety crumb meets snappy chocolate
- Perfect for: Anniversary celebrations or weekend baking
- Mastering Chocolate Covered Strawberry Cupcakes
- Logic Behind This Recipe Choice
- Essential Timeline and Recipe Stats
- Selecting Your Best Kitchen Staples
- Necessary Gear for Success
- Executing the Detailed Baking Stages
- Fixing Common Baking Problems Directly
- Creative Flavor Adaptations to Explore
- Handling Leftovers and Proper Storage
- Presentation Ideas for Your Guests
- Culinary Myths Debunked
- Recipe FAQs
- 📝 Recipe Card
Mastering Chocolate Covered Strawberry Cupcakes
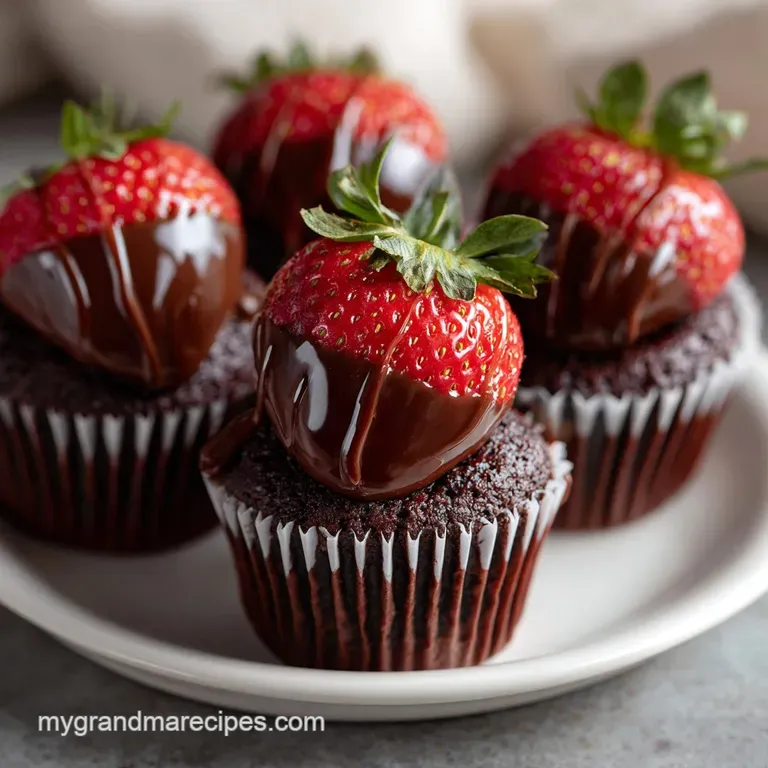
Imagine biting into a cupcake that feels like a luxury gift. The first thing you hit is that snappy, dark chocolate shell on a fresh berry, followed by a cloud of strawberry buttercream that actually tastes like fruit, not just sugar. Then, you reach the base: a chocolate cake so moist it almost behaves like a truffle.
Most versions of this dessert rely on fake extracts or oily frostings, but we're using a specific reduction technique to keep things authentic and vibrant.
You won't believe how much better a cupcake tastes when you take twenty minutes to properly handle the fruit. I remember the first time I tried making these; I just tossed chopped berries into the batter and the whole thing turned into a soggy, purple mess. It was a disaster.
Since then, I've learned that controlling moisture is the secret to getting that professional, sky high swirl and a crumb that doesn't fall apart when you peel the liner.
We're going to use a few clever tricks today, like "blooming" our cocoa in hot coffee to unlock hidden flavor notes and using a specific temperature for our butter to ensure the frosting stays stable. Whether you're a first time cook or a seasoned pro, the payoff here is huge.
You’re getting thirteen perfect servings of pure indulgence that look like they cost a fortune at a boutique shop, but you made them right in your own kitchen.
Logic Behind This Recipe Choice
Reduction Intensifies the Berry Flavor
When we simmer two cups of strawberry puree down to just a half cup, we're removing the excess water that usually ruins buttercream. This concentrated syrup provides a vibrant pink color and a punchy, tart flavor without the need for artificial dyes.
It's the difference between a frosting that tastes "pink" and one that tastes like a summer harvest.
Coffee Blooms the Cocoa Powder
Adding warm coffee to the dry ingredients isn't about making the cake taste like a latte; it's about the heat. The hot liquid dissolves the cocoa particles instantly, a process called blooming, which releases the full aromatic potential of the chocolate.
This creates a much deeper, more complex chocolate profile than using cold water or milk alone.
Buttermilk Creates a Velvety Texture
The acidity in buttermilk does two things: it breaks down long gluten strands for a more tender bite and reacts with the baking soda to give the cupcakes a beautiful, airy lift. This ensures the cake is sturdy enough to hold a heavy chocolate dipped strawberry garnish without being dense or dry.
| Method | Time | Texture | Best For |
|---|---|---|---|
| Classic Oven | 20 minutes | Fluffy & airy | Traditional results |
| Air Fryer | 15 minutes | Crispy top | Small batches |
| Convection | 17 minutes | Even dome | Professional look |
Choosing the right method depends on your gear, but the classic oven approach remains the gold standard for getting that specific, soft set crumb. If you're looking for something slightly different for your next party, you might also enjoy the texture of these Neapolitan Cupcakes which use a similar layering technique.
Essential Timeline and Recipe Stats
Precision is your best friend when working with chocolate and fruit. Because we are dealing with a reduction, your prep time includes the simmering and cooling phase, which is non negotiable for the frosting's structural integrity.
You'll need about 45 minutes of active prep to get the puree ready, the batter mixed, and the strawberries dipped.
The baking itself is a quick 20 minutes at 350°F. I always set my timer for 18 minutes just to check the spring back of the cake. Total time from start to finish is 65 minutes, provided you have your ingredients staged.
If you rush the cooling of the strawberry reduction, your butter will melt, and the frosting will turn into a puddle, so plan for that "passive" time accordingly.
| Component | Science Role | Pro Secret |
|---|---|---|
| Dutch Process Cocoa | Neutralized acidity | Sift it twice |
| Full fat Buttermilk | Gluten tenderizer | Use room temp |
| Strawberry Puree | Natural flavoring | Reduce by 75% |
| Dark Chocolate | Structural garnish | Add coconut oil |
The ratio of fat to sugar in the frosting is also calculated to support the weight of the garnish. Using full fat buttermilk is essential here; low-fat or skim versions lack the viscosity needed to keep the cocoa suspended in the batter, which can lead to a "layered" look where the bottom of the cupcake is denser than the top.
Selecting Your Best Kitchen Staples
For the base, you'll need 1.5 cups of all purpose flour and 0.75 cup of Dutch process cocoa powder. I highly recommend Dutch process over natural cocoa because it’s less acidic and provides that dark, Oreo like color that contrasts beautifully with the pink frosting.
You'll also need 1.5 cups of granulated sugar, 1.5 teaspoons of baking soda, and 0.75 teaspoon of baking powder to ensure a proper rise. Don't forget the 1 teaspoon of salt; it balances the sweetness of the berries.
Moving to the wet ingredients, grab 2 large eggs (ensure they are room temperature), 0.75 cup of full fat buttermilk, and 0.25 cup of neutral vegetable oil. For the flavor boost, use 2 teaspoons of pure vanilla extract and 0.75 cup of warm water or hot coffee.
For the frosting and garnish, you’ll need 2 cups of fresh strawberries for the puree, 1 cup of unsalted butter softened to exactly 65°F, 3.5 cups of sifted powdered sugar, and 1 teaspoon of lemon juice to brighten the fruit notes.
Finally, have 13 small strawberries ready for the top, along with 6 oz of dark chocolate and 1 teaspoon of coconut oil for that perfect, snappy dip.
| Original Ingredient | Substitute | Why It Works |
|---|---|---|
| Dutch Process Cocoa | Natural Cocoa | Add 1/4 tsp extra baking soda to balance acid |
| Full fat Buttermilk | Yogurt + Milk | Similar fat and acid profile. Note: Slightly tangier. |
| Dark Chocolate | Semi sweet Chips | Higher sugar content. Note: Wont snap as cleanly. |
If you find yourself with extra berries after the garnish, they are a fantastic addition to other desserts. I often use leftovers when making a Strawberry Layer Cake because the flavors are so compatible. Just make sure your fruit is dry before you start any dipping process.
Necessary Gear for Success
You don't need a professional laboratory, but a few specific tools make these chocolate covered strawberry cupcakes much easier to manage. A small, heavy bottomed saucepan is vital for the strawberry reduction to prevent scorching.
For the batter, a standard muffin tin with 12-14 cavities and paper liners is the way to go. I prefer high-quality greaseproof liners so they don't peel away from the cake as it cools.
A stand mixer or a sturdy hand mixer is a must for the buttercream. You need to whip it for several minutes to get it fluffy enough to hold the chocolate strawberries. A sifter is also non negotiable for the powdered sugar and cocoa; lumps are the enemy of a velvety finish.
Finally,, a small microwave safe bowl for the chocolate and a cooling rack will ensure your cupcakes don't get soggy bottoms while they wait for their frosting crown.
Chef's Tip: Freeze your butter for 10 minutes before letting it come to room temperature. This creates a specific crystalline structure that makes the buttercream hold its shape better in warm rooms.
Executing the Detailed Baking Stages
1. Reduction for More Intense Flavor
Start by pureeing your 2 cups of strawberries in a blender until smooth. Pour this into your small saucepan over medium low heat. You want to simmer this gently until the liquid reduces to exactly 1/2 cup. This usually takes about 15-20 minutes.
It should be thick, like a loose jam, and deep red. Let this cool completely before even thinking about the frosting.
2. Sifting and Preparing Dry Ingredients
Preheat your oven to 350°F (175°C) and line your muffin tin. Take your flour, cocoa, sugar, baking soda, baking powder, and salt and sift them together into a large bowl.
Note: Sifting prevents those tiny white pockets of unmixed flour or bitter clumps of cocoa powder. Give it a quick whisk to make sure the leavening agents are evenly distributed.
3. Emulsifying the Wet Ingredients
In a separate medium bowl, whisk together the room temperature eggs, buttermilk, oil, and vanilla extract. You want the eggs fully broken down. Gradually pour the wet mixture into the dry ingredients while mixing on your lowest setting.
Note: Mixing on low prevents too much gluten from developing, keeping the cake tender.
4. Blooming with Hot Coffee
Once the batter is mostly combined, stir in your warm water or hot coffee by hand using a spatula. The batter will be very thin don't panic! This is exactly what we want for a moist crumb. Stir until no streaks of dry flour remain and the batter is glossy. Fill your liners about 2/3 full.
5. The Oven and Doneness Cues
Bake for 18-20 minutes. You’ll know they are done when the tops spring back when lightly touched and a toothpick comes out with just a few moist crumbs. Avoid overbaking, or the cocoa will start to taste bitter.
Let them cool in the pan for 5 minutes, then move to a wire rack to cool completely.
6. Whipping the Strawberry Frosting
While the cakes cool, beat your softened butter (65°F) for about 3 minutes until it’s pale and creamy. Gradually add the 3.5 cups of powdered sugar, followed by the cooled strawberry reduction, lemon juice, and a pinch of salt.
Whip on high for another 2 minutes until the frosting is light, airy, and holds a stiff peak.
7. Dipping the Garnish Berries
Melt your 6 oz of dark chocolate and 1 teaspoon of coconut oil in 30 second bursts in the microwave, stirring in between. Dip each of your 13 strawberries into the chocolate, letting the excess drip off. Place them on parchment paper until the chocolate is matte and set firm.
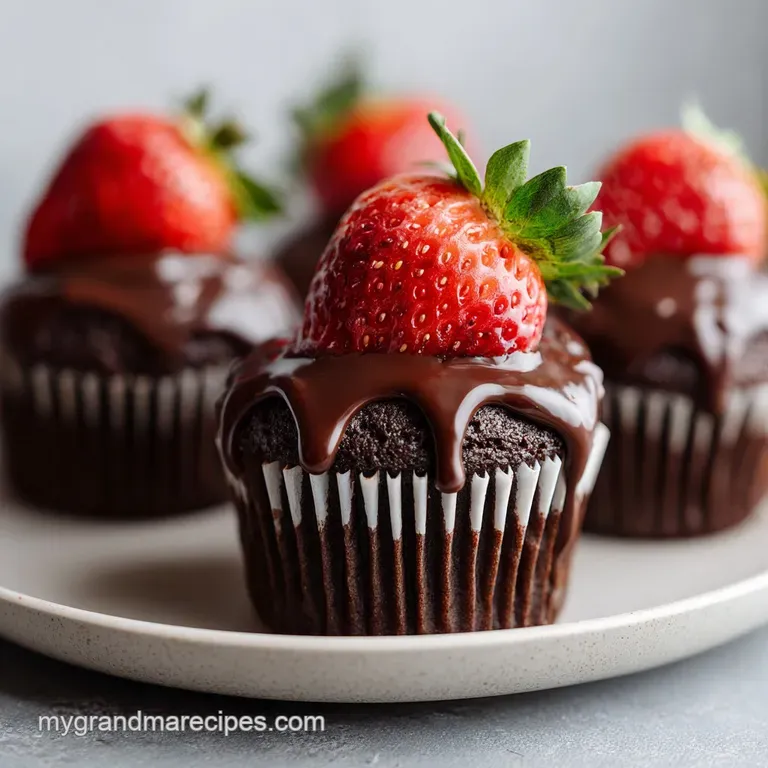
8. Final Assembly and Presentation
Fit a piping bag with a large star tip and swirl a generous amount of frosting onto each cooled cupcake. Crown each one with a chocolate covered strawberry. If your kitchen is warm, you might want to chill the cupcakes for 10 minutes after frosting but before adding the berry to make sure the "pedestal" is stable.
Fixing Common Baking Problems Directly
Correcting a Sinking Cupcake Center
If your cupcakes look great in the oven but collapse as soon as you pull them out, you likely have one of two problems. First, check your leavening agents; old baking soda loses its "oomph." Second, you might be over mixing once the liquid hits the flour.
Over mixing creates too much air that the structure can't support, leading to a crash.
How to Fix Broken Frosting
If your frosting looks curdled or grainy after adding the strawberry reduction, the temperatures were mismatched. Usually, the reduction was still too warm, or the butter was too cold.
You can often fix this by taking a half cup of the frosting, microwaving it for 5 seconds, and then whipping it back into the main batch to stabilize the emulsion.
| Problem | Root Cause | Solution |
|---|---|---|
| Chocolate Seizing | Water touched the bowl | Add 1 tsp warm oil and stir vigorously |
| Cupcakes Overflowing | Liners filled too high | Only fill 2/3 full (about 3 tbsp) |
| Frosting is Runny | Puree wasn't reduced enough | Add 1/4 cup more powdered sugar at a time |
Common Mistakes Checklist
- ✓ Pat your garnish strawberries bone dry before dipping (water causes chocolate to seize).
- ✓ Never add the strawberry reduction while it's even slightly warm.
- ✓ Use a kitchen scale for the 190g of flour to avoid a dry, bready cupcake.
- ✓ Ensure eggs are room temperature so the batter doesn't break.
- ✓ Sift the powdered sugar even if it looks fine; it makes the frosting much silkier.
Creative Flavor Adaptations to Explore
If you want to put a spin on the classic chocolate covered strawberry cupcakes, try swapping the dark chocolate dip for white chocolate. It provides a much creamier, sweeter finish that balances the tartness of the strawberry buttercream beautifully.
You can also add a teaspoon of espresso powder to the dry ingredients of the cake for an even more intense "mocha" chocolate base.
For a boozy version, you can reduce 2 tablespoons of champagne along with the strawberry puree. This adds a sophisticated, slightly floral note that is perfect for weddings or New Year's Eve.
If you're feeling adventurous, a tiny pinch of black pepper in the strawberry reduction can actually make the fruit taste even "redder" and more vibrant, though keep it subtle!
| Premium | Budget | Flavor Impact | Savings |
|---|---|---|---|
| Valrhona Cocoa | Store Brand Cocoa | Less intense color | Save $5-8 |
| Vanilla Bean Paste | Imitation Extract | Missing black flecks | Save $10-15 |
| Organic Berries | Frozen (thawed/drained) | Slightly less tart | Save $4-6 |
Handling Leftovers and Proper Storage
Because these cupcakes contain fresh fruit and a high moisture buttercream, they are best enjoyed within 24 hours. However, you can store them in an airtight container in the refrigerator for up to 3 days.
Just be aware that the chocolate covered strawberry on top will eventually start to "weep" or leak juice into the frosting as the fruit softens.
If you need to make them ahead of time, I recommend storing the cupcakes and frosting separately. You can freeze the unfrosted cupcakes for up to 2 months; just wrap them tightly in plastic wrap and then foil. When you're ready to serve, thaw them at room temperature, whip the frosting back to life, and assemble fresh.
For zero waste, if you have leftover strawberry reduction, stir it into your morning yogurt or use it as a base for a vinaigrette.
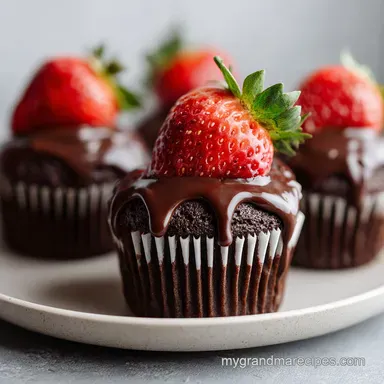
Presentation Ideas for Your Guests
For a professional bakery look, use a large round piping tip instead of a star tip. This creates a smooth, "soft serve" look that feels modern and sleek. You can also drizzle any leftover melted chocolate over the frosting before placing the berry on top for a "double chocolate" effect.
It adds a bit of messy elegance that guests always love.
If you're serving these at a party, try placing them on a white marble slab. The dark chocolate and pink frosting pop beautifully against a light background. You can also sprinkle a tiny bit of Maldon sea salt over the chocolate berries while they are still wet to give that "salted chocolate" vibe that is so popular right now.
Trust me, people will think you spent all day at a high end patisserie.
Culinary Myths Debunked
Sifting is Optional for Cocoa
Many people think sifting is just an "extra" step, but with cocoa powder, it is mandatory. Cocoa is naturally clumpy because of its fat content. If you don't sift it, you'll end up with bitter, dry balls of chocolate inside your cake.
It isn't just about lumps; it's about ensuring every grain of flour is coated in cocoa for a consistent flavor.
Hot Coffee Makes Cake Bitter
I hear this all the time from people who don't like coffee. The truth is, the small amount of coffee used here serves only to enhance the chocolate. You won't taste "coffee" at all.
The heat helps the chocolate fats melt and distribute, which actually results in a sweeter tasting chocolate profile because the bitterness of the cocoa is properly balanced by the heat blooming process.
Butter Must Be Softened to Room Temp
"Room temperature" is a lie. Most kitchens are around 72°F, but for the best buttercream, your butter should be closer to 65°F. It should be soft enough to leave a fingerprint but still feel slightly cool to the touch.
If it’s too warm, it won't hold the air bubbles you're trying to whip into it, leading to a heavy, greasy frosting rather than a fluffy one.

Recipe FAQs
What is the secret to perfect chocolate covered strawberries?
Use a small amount of coconut oil. Mixing one teaspoon of coconut oil with six ounces of melted dark chocolate ensures the coating is thin, glossy, and sets with a satisfying snap.
Should strawberries be dry before dipping in chocolate?
Yes, they must be bone dry. Any lingering water droplets will cause the melted chocolate to seize and turn grainy immediately upon contact.
Do you use cupcake liners for chocolate covered strawberries?
No, dip them on a separate surface. Place the dipped garnish strawberries on parchment paper to harden completely before crowning your cupcakes, as the liners are only for the cake portion.
Can you fill cupcakes with melted chocolate?
No, the batter is designed for stability. If you enjoyed mastering the crumb structure here, you can see how we apply similar techniques in our moist chocolate fudge cake.
How to ensure the strawberry frosting is silky?
Sift the powdered sugar before whipping. Even if it appears smooth, sifting removes tiny clumps that prevent the strawberry reduction and butter from emulsifying into a perfectly fluffy frosting.
Is it true I should add the strawberry reduction while it is warm?
No, this is a common misconception. You must let the two cups of reduced strawberry puree cool completely; adding it while warm will melt your butter and collapse the frosting structure.
How to avoid dry cupcakes?
Use a kitchen scale for exactly 190g of flour. Measuring by volume often leads to packing the flour, which dries out the crumb, so precise weight is critical for the best texture.
Chocolate Covered Strawberry Cupcakes
Ingredients:
Instructions:
Nutrition Facts:
| Calories | 554 kcal |
|---|---|
| Protein | 5.1 g |
| Fat | 25.8 g |
| Carbs | 80.8 g |
| Fiber | 3.8 g |
| Sugar | 64.2 g |
| Sodium | 312 mg |
