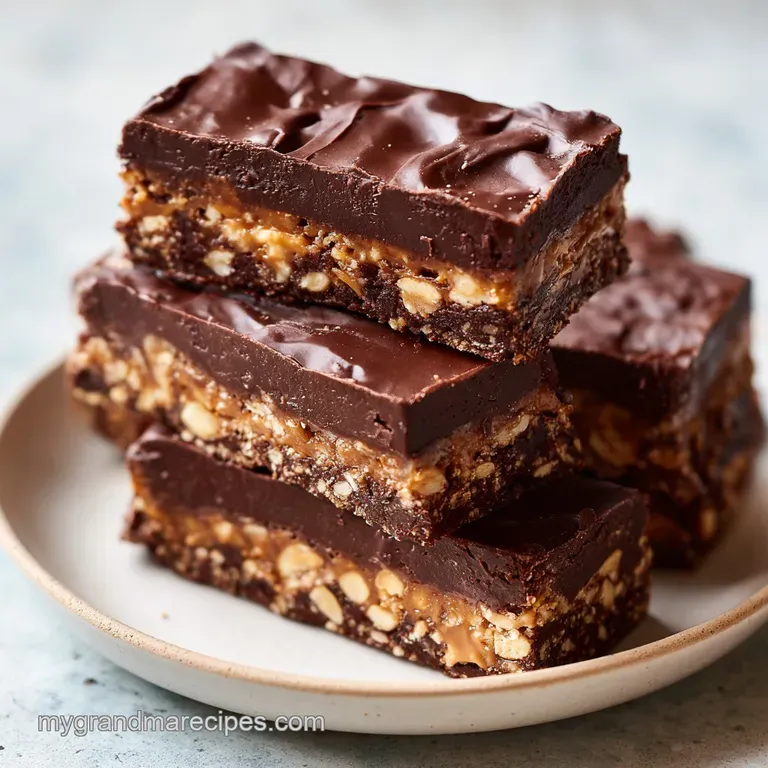
No Bake Chocolate Peanut Butter Bars: Fudgy and Rich
- Time: Active 15 minutes, Passive 60 minutes, Total 75 minutes
- Flavor/Texture Hook: Fudgy peanut butter base with a snappy, chocolatey finish
- Perfect for: Summer potlucks, busy weeknights, or beginner bakers
- Creating the Ultimate No Bake Chocolate Peanut Butter Bars
- Why This No Bake Treat Always Sets Perfectly
- Evaluating the Specs of These Peanut Butter Treats
- Component Analysis of the Key Flavor Players
- What You Need from the Pantry and Fridge
- Essential Kitchen Tools for Smooth Bars
- Step-by-Step Guide to Creating the Perfect Layer
- Fixing Crumbly Bases and Grainy Chocolate Toppings
- How to Scale These Bars for a Crowd
- Busting Common Myths About Cold Desserts
- Storage Guidelines and Reducing Kitchen Waste
- Best Ways to Serve and Present Your Treats
- Recipe FAQs
- 📝 Recipe Card
Creating the Ultimate No Bake Chocolate Peanut Butter Bars
There is a specific sound that echoes through a Tennessee kitchen on a humid July afternoon, and it isn't the hum of the air conditioner. It is the rhythmic clack clack clack of a wooden spoon hitting the side of a heavy ceramic bowl.
Growing up in my grandma's kitchen, that sound meant one thing: we were making a batch of no bake chocolate peanut butter bars because it was simply too hot to even think about preheating the oven.
The air would fill with the scent of toasted graham crackers and that unmistakable, salty sweet aroma of creamy peanut butter being folded into warm, melted butter.
You’ll love how quickly these come together when you need a "quick win" for a bake sale or a late night craving. The beauty of this recipe lies in its honesty it doesn't pretend to be a fancy French pastry.
It is pure, unadulterated comfort food that uses humble ingredients to achieve a result that feels far more indulgent than the effort suggests. We aren't looking for perfection here; we are looking for that perfect ratio of salt to sugar and that satisfying "shatter" of the chocolate topping when you bite into the fudgy foundation.
Right then, let's talk about the payoff. Within 15 minutes of actual work, you've got a tray of treats that rivals any store-bought candy bar. But the real magic happens during that hour in the fridge. You'll go from a bowl of what looks like wet sand to a solid, sliceable masterpiece.
Trust me on this: the hardest part of this entire process isn't the mixing it's waiting for the chocolate to set while the smell of peanut butter lingers in your kitchen.
Why This No Bake Treat Always Sets Perfectly
Understanding the "why" behind this dessert helps you get that professional finish every single time without needing a degree in food science. It’s all about how the ingredients behave when they transition from room temperature to the cold environment of your refrigerator.
- The Chill Factor: The unsalted butter and peanut butter act as the "glue" for the graham cracker crumbs; as they cool, the fats solidify, turning a crumbly mixture into a sturdy, sliceable base.
- Sugar Structure: Sifted powdered sugar doesn't just add sweetness; it absorbs moisture from the butter, creating a dough like consistency that holds its shape under the weight of the chocolate.
- The Snap Secret: Adding a small amount of peanut butter to the semi sweet chocolate chips prevents the topping from becoming too brittle, ensuring it has a velvety mouthfeel rather than cracking into a million pieces when sliced.
- Sand Texture Success: Pressing the mixture firmly into the pan forces the graham cracker particles together, removing air pockets that would otherwise cause the bars to fall apart.
| Premium Ingredient | Budget Alternative | Flavor Impact | Savings |
|---|---|---|---|
| Name Brand Honey Grahams | Store Brand Graham Crackers | Virtually no difference once crushed | Save $1.50-2.00 |
| Organic Valencia Peanut Butter | Standard Creamy Peanut Butter | Standard is actually creamier and more stable | Save $3.00-4.00 |
| High End Couverture Chocolate | Semi Sweet Chocolate Chips | Chips hold their shape better during melting | Save $5.00+ |
Choosing the budget friendly options here isn't just about saving money it's actually smarter for the texture. Standard creamy peanut butter has stabilizers that prevent the oil from separating, which is exactly what we want when we’re aiming for a consistent, fudgy bar.
Evaluating the Specs of These Peanut Butter Treats
When we look at the logistics of this recipe, it’s designed for efficiency. We are using a standard 8x8-inch square baking pan, which is the "gold weaver" of the kitchen for small batch desserts.
This size ensures that the layers are thick enough to be substantial but thin enough to set completely within our 60 minutes window.
One thing I've learned over the years is that precision in the crumb size matters more than you might think. If the graham cracker crumbs are too chunky, the bars will crumble. If they are pulverized into a dust, the base becomes dense and heavy.
Aim for a texture that looks like coarse beach sand this allows the melted butter to coat every single particle, creating a structural web that holds everything together beautifully.
Component Analysis of the Key Flavor Players
| Ingredient | Science Role | Pro Secret |
|---|---|---|
| Creamy Peanut Butter | Primary Binder & Flavor | Use "no stir" varieties to ensure the base doesn't become oily or soft at room temperature. |
| Graham Cracker Crumbs | Structural Foundation | Pulse your own crackers in a blender for a fresher flavor than the pre boxed dust. |
| Powdered Sugar | Texture Refiner | Always sift before adding to prevent tiny white "pebbles" from marring the fudgy base. |
| Semi Sweet Chocolate Chips | Protective Top Layer | Semi sweet provides the best balance against the salty peanut butter; milk chocolate can be cloying. |
If you ever find yourself looking for other ways to use up that jar of peanut butter, you might enjoy making some peanut butter protein balls which use a similar flavor profile but in a bite sized, portable form.
What You Need from the Pantry and Fridge
To get these no bake chocolate peanut butter bars onto your table, you only need a handful of staples. These are likely sitting in your cupboard right now, waiting to be put to work.
- 1.5 cups (170g) graham cracker crumbs: These provide the toasted, malty flavor. Why this? They absorb butter perfectly while maintaining a slight, pleasant grit.
- 1 cup (250g) creamy peanut butter (for the base): This is the star of the show. Why this? Provides the fat and protein needed for a satisfying, rich texture.
- 1 cup (120g) powdered sugar: Also known as confectioners' sugar. Why this? It dissolves instantly into the butter without any gritty granules.
- 0.5 cup (115g) unsalted butter, melted: The liquid gold that binds it all. Why this? Unsalted allows you to control the saltiness of the final dessert.
- 1.5 cups (255g) semi sweet chocolate chips: For the crowning glory. Why this? They melt predictably and provide a deep, cocoa contrast.
- 2 tbsp (32g) creamy peanut butter (for the topping): A tiny but vital addition. Why this? Softens the chocolate so it doesn't "snap" and break poorly when cold.
For the base, you can use gluten-free graham crackers if you have guests with dietary restrictions. The texture remains remarkably similar, though you might need an extra tablespoon of butter if the crumbs seem particularly dry.
Essential Kitchen Tools for Smooth Bars
You don't need a stand mixer or any high tech gadgets for this. In fact, a simple bowl and a sturdy spatula are your best friends here. I prefer using a glass or ceramic mixing bowl because they don't retain odors like plastic can nobody wants their chocolate bars tasting like the garlic shrimp you made last night!
A good 8x8-inch pan is non negotiable. If you use a 9x9-inch pan, your bars will be significantly thinner and might feel a bit flimsy. If you only have a 9x13-inch pan, you'll need to double the recipe to get that classic, thick look we're going for. Finally,, don't forget the parchment paper.
It's the "insurance policy" for your dessert, allowing you to lift the whole block out for clean, sharp cuts.
step-by-step Guide to Creating the Perfect Layer
- Prep the pan. Line an 8x8-inch square baking pan with parchment paper, leaving an overhang on two sides to act as a sling. Note: This prevents the base from sticking to the corners.
- Combine the dry base. In a large mixing bowl, combine the melted butter, finely ground graham cracker crumbs, and sifted powdered sugar.
- Incorporate the peanut butter. Fold in the 1 cup of creamy peanut butter and stir until the mixture is uniform and resembles wet sand.
- Compress the foundation. Transfer the mixture to the prepared pan and press down firmly using the bottom of a measuring cup to create a flat, compressed foundation. Note: Compression is key to preventing crumbling.
- Prepare the topping. In a medium microwave safe bowl, combine the semi sweet chocolate chips and the remaining 2 tablespoons of peanut butter.
- Melt the chocolate. Microwave in 30 second intervals, stirring vigorously between each session, until the chocolate is completely melted and glossy.
- Spread the layer. Pour the chocolate mixture over the peanut butter base and spread evenly with an offset spatula.
- The long wait. Refrigerate for at least 1 hour until the fats are emulsified and the chocolate is matte and firm.
When you're melting the chocolate, patience is your greatest virtue. It’s tempting to just set the timer for two minutes and walk away, but chocolate is finicky. Those 30 second bursts ensure you don't scorch the cocoa solids, which would leave you with a bitter, grainy mess.
Fixing Crumbly Bases and Grainy Chocolate Toppings
Even the most seasoned home cooks run into a snag now and then. The most common issue people report is the base falling apart. Usually, this happens because the crumbs weren't pressed down hard enough or the butter to crumb ratio was slightly off because of how the crumbs were measured.
Why Your Peanut Butter Base Is Too Soft
If your bars are more like a pudding than a solid block, it’s likely that the peanut butter you used was too oily. Natural peanut butters (the kind you have to stir) are delicious on toast, but they can be a nightmare in no bake desserts because the oil stays liquid even when cold.
To fix this, you can try adding another 1/4 cup of powdered sugar to absorb the excess oil, but your best bet is using a standard, stabilized creamy peanut butter next time.
| Problem | Root Cause | Solution |
|---|---|---|
| Cracking Chocolate | Topping is too brittle | Stir in 2 tbsp of peanut butter or a tsp of coconut oil to the melted chocolate. |
| Grainy Texture | Chocolate scorched in microwave | Melt in shorter 15-30 second bursts and stir more frequently. |
| Soggy Bottom | Too much melted butter | Ensure you measure the butter after melting, not before, for accuracy. |
If you ever find yourself craving that cookie dough flavor but don't want to make a whole tray, you should definitely check out this cookie dough for one which solves that "I need a treat right now" problem in about 6 minutes.
Common Mistakes Checklist
- ✓ Never skip sifting the powdered sugar; lumps are impossible to stir out later.
- ✓ Don't use a wet measuring cup for the graham crumbs moisture leads to sogginess.
- ✓ Avoid over microwaving the chocolate; stop when a few small lumps remain and stir them until they melt from residual heat.
- ✓ Let the bars sit at room temperature for 5 minutes before slicing to prevent the chocolate from cracking.
- ✓ Ensure your parchment paper "sling" is secure so you don't drop the bars when lifting them out.
How to Scale These Bars for a Crowd
Scaling this recipe is straightforward because the ratios are quite forgiving. If you're hosting a big family reunion or a church social, doubling the recipe is your best move. You'll move from an 8x8-inch pan to a 9x13-inch pan.
You don't need to worry about adjusting the temperature, but you should extend the chilling time by about 20-30 minutes just to ensure the center of the larger pan sets as firmly as the edges.
To scale down for just two people, you can halve the ingredients and use a small loaf pan. This results in the same thickness and "mouthfeel" without having 16 bars staring at you from the fridge.
When halving, just be careful with the microwave times for the chocolate smaller amounts melt much faster and are easier to burn.
| Method | Time | Texture | Best For |
|---|---|---|---|
| Microwave Melting | 1-2 minutes | Silky and fast | Quick weeknight cravings |
| Stovetop (Double Boiler) | 5-7 minutes | Extremely smooth and glossy | When you want total control over heat |
| Room Temp Set | 4+ hours | Very soft and fudgy | When your fridge is completely full |
Busting Common Myths About Cold Desserts
A big misconception in grandma’s kitchen was that you had to use "real" sugar to get things to set. In reality, the powdered sugar works better here because it contains a tiny bit of cornstarch, which helps stabilize the fats in the peanut butter.
Some folks also think that you can't freeze no bake bars, but that's simply not true. They freeze beautifully and can even be eaten straight from the freezer for a texture that's almost like a frozen candy bar.
Another myth is that you need to grease the pan before putting down the parchment paper. While it helps the paper stay in place, it’s not strictly necessary for the bars themselves. The high fat content in the base ensures nothing is going to stick to that parchment anyway.
Just focus on getting those corners nice and square so your end pieces look just as good as the center cuts.
Storage Guidelines and Reducing Kitchen Waste
These bars are surprisingly hardy. You can keep them in an airtight container in the refrigerator for up to a week if they last that long! Because of the butter and peanut butter, they will soften if left out on a warm counter for more than an hour, so it's always best to keep them "chilled until thrill" time.
- Fridge: Store in a single layer with parchment between them for up to 7 days.
- Freezer: Wrap individual bars in plastic wrap and store in a freezer bag for up to 3 months.
- Zero Waste: If you have leftover graham cracker crumbs that didn't make it into the 1.5 cups measurement, save them in a jar! They are fantastic sprinkled over vanilla ice cream or mixed into your morning yogurt for a bit of crunch. Don't throw away those "ugly" edge scraps either they can be crumbled up and used as a topping for a cheesecake or a chocolate pudding.
Best Ways to Serve and Present Your Treats
When it comes to serving, presentation is everything. To get those sharp, clean lines you see in bakeries, use a large chef's knife that has been dipped in hot water and wiped dry between every single cut.
The heat from the blade slices through the chocolate topping like a hot wire through butter, preventing that jagged, broken edge that can happen when the chocolate is cold.
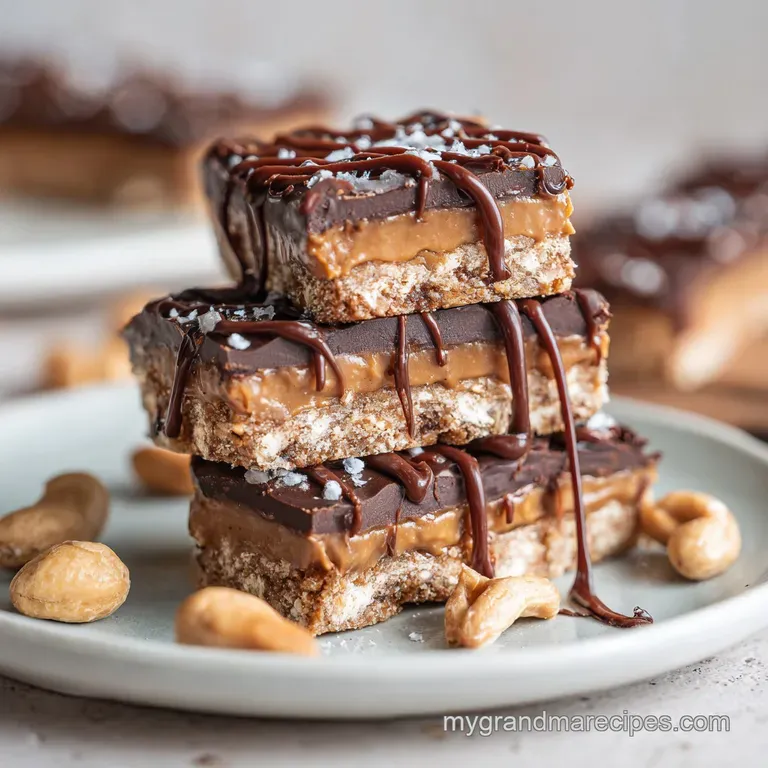
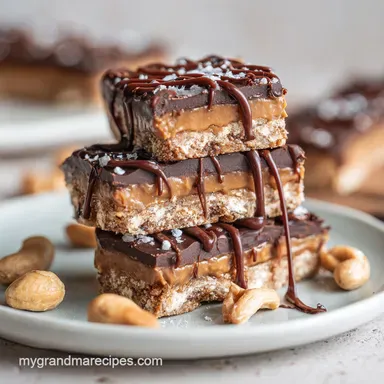
I love serving these on a vintage milk glass platter if I'm feeling fancy, but they are just as home on a simple paper plate at a backyard barbecue. If you want to "dress them up" for a holiday, a tiny sprinkle of flaky sea salt on top of the chocolate before it sets adds a sophisticated touch that balances the sweetness perfectly.
They pair wonderfully with a cold glass of milk or a strong cup of black coffee, which helps cut through the richness of the peanut butter.
However you choose to enjoy them, remember that the best part of these no bake chocolate peanut butter bars is sharing them. There’s something about the combination of chocolate and peanut butter that just makes people smile, and knowing you made them in 15 minutes makes that smile even sweeter for you.
Let's get to mixing!

Recipe FAQs
How to ensure the chocolate topping doesn't crack when slicing?
Let the bars sit at room temperature for 5 minutes before slicing. This slight softening of the chocolate layer prevents it from splintering while you press the knife through.
Is it true that I should use a wet measuring cup for the graham cracker crumbs?
No, this is a common misconception. Always use a dry measuring cup, as any extra moisture introduced into the crumb mixture will result in soggy bars rather than a firm, buttery foundation.
How to fix lumps in the peanut butter base?
Sift your powdered sugar before mixing it with the other ingredients. Because the mixture is designed to resemble wet sand, sifting is the only way to ensure a perfectly smooth texture throughout the base.
How to melt the chocolate chips without scorching them?
Microwave in 30-second intervals and stir vigorously between each session. If you enjoyed mastering this controlled melting technique, you will find it incredibly useful for maintaining the integrity of delicate ingredients in other rich desserts.
What is the best way to remove the bars from the pan?
Leave an overhang of parchment paper on two sides when lining your pan. This creates a secure sling that allows you to lift the entire chilled block out of the pan cleanly before slicing into 16 individual squares.
Can I store these at room temperature?
No, the refrigerator is best for storage. Because the recipe relies on butter and peanut butter for structure, the bars will lose their shape and soften if left on a warm counter for more than an hour.
How to achieve a perfectly flat foundation?
Press the mixture down firmly using the bottom of a measuring cup. Compressing the foundation this way ensures the bars remain compact and hold together beautifully once the chocolate layer is added.
No Bake Peanut Butter Bars
Ingredients:
Instructions:
Nutrition Facts:
| Calories | 306 kcal |
|---|---|
| Protein | 5.8 g |
| Fat | 20.2 g |
| Carbs | 28.5 g |
| Fiber | 2.5 g |
| Sugar | 20.4 g |
| Sodium | 168 mg |
