Mini Oreo Cheesecakes: Creamy and Classic
- Time: Active 15 minutes, Passive 20 minutes, Total 35 minutes
- Flavor/Texture Hook: Silky smooth cream cheese filling with a crunchy, chocolatey cookie snap.
- Perfect for: Last minute dinner parties, office potlucks, or beginner bakers wanting high reward results.
- Master the crowd-pleasing Mini Oreo Cheesecakes
- Structural Success and Texture Mechanics
- Comparing Traditional Oven and Stovetop Methods
- Component Analysis and Functional Ingredients
- Essential Ingredients and Practical Substitutions
- Minimal Kitchen Tools for Reliable Results
- Step-By-Step Guide for Silky Success
- Troubleshooting Common Textural and Visual Flaws
- Scaling Ratios for Different Batch Sizes
- Correcting Popular Myths About Cheesecake Baking
- Storage Guidelines and Food Waste Reduction
- Creative Flavor Tweaks and Visual Garnishes
- Serving Ideas for Better Party Presentation
- Recipe FAQs
- 📝 Recipe Card
Master the crowd pleasing Mini Oreo Cheesecakes
The sharp snap of a chocolate cookie being pressed into a muffin liner is the first signal that something great is happening in your kitchen. There's a specific, nostalgic aroma that fills the room the second you crack open a fresh pack of Oreos, a mix of cocoa and sweet cream that instantly makes me feel like a kid again.
I remember the first time I tried to make a full sized cheesecake for a friend's birthday, it was a mess of cracked surfaces and soggy crusts because I over thought every single step. This recipe is the direct result of learning that sometimes, the simplest approach actually produces the most velvety results.
We're focusing on the Oreo cookie as our MVP here, not just for flavor, but for the architecture of the dessert itself. In most baking, you're fighting against gravity or moisture, but here, the cookie acts as a built in shield that keeps the base from getting mushy while the cheesecake sets.
It's a reliable, low stress way to get that professional, individual portion look without needing specialized springform pans or a degree in pastry arts. You'll find that these little bites disappear from a cooling rack faster than you can say "cookies and cream."
What you can expect from this process is a straightforward, no fuss method that values your time. We aren't going to spend forty minutes crushing crackers and melting butter for a crust that might crumble anyway. Instead, we're leaning into the logic of the ingredients themselves.
If you've ever felt intimidated by the idea of a water bath or the precision of a cheesecake, this is the recipe that will change your mind. It’s about getting that perfect, tangy, rich filling to sit right on top of a chocolatey foundation with minimal tools and maximum impact.
Structural Success and Texture Mechanics
The physics of this dish depends on the balance between fat content and temperature control. Because we are making individual portions, the heat reaches the center of the batter much faster than it would in a large pan, which significantly reduces the risk of the dreaded "sinkhole" in the middle.
- Integrated Foundation: The whole cookie at the base creates a moisture barrier, absorbing just enough fat from the cheesecake to soften slightly while maintaining a distinct crunch.
- Emulsification Stability: Using full fat sour cream introduces extra acidity, which helps break down the protein chains in the cream cheese for a silkier mouthfeel.
- Low Aeration Mixing: Beating the eggs on a low speed prevents air bubbles from being trapped, which is the primary reason cheesecakes puff up and then collapse.
- Thermal Momentum: The small surface area of a muffin tin allows for rapid setting, meaning we can achieve a "set edge" with a "jiggle center" in exactly 20 minutes.
Comparing Traditional Oven and Stovetop Methods
| Method | Time | Texture | Best For |
|---|---|---|---|
| Traditional Oven | 20 minutes | Dense and velvety with a slightly set top | Achieving a classic, clean look and predictable firmness. |
| Stovetop Steamer | 15 minutes | Ultra moist and soft, almost like a custard | Those without a reliable oven or who want a fluffier, mousse like bite. |
| Air Fryer | 12 minutes | Crispy cookie base with a fast setting center | Very small batches (4-6) when you don't want to heat the whole kitchen. |
Choosing the right method depends entirely on your available gear, but for this specific batch of 12, the oven provides the most consistent air circulation. While a stovetop steam method can result in a very moist cake, it often leaves the cookie base feeling a bit more damp than most people prefer. If you’re looking for more inspiration for easy, crowd pleasing desserts, you might also enjoy this No Bake Oreo Cheesecake for those days when you don't want to turn the oven on at all.
Component Analysis and Functional Ingredients
| Ingredient | Science Role | Pro Secret |
|---|---|---|
| Full Fat Cream Cheese | Provides the structural "backbone" through milk solids and fat. | Always use the brick form, never the spreadable tub variety, for better density. |
| Large Eggs | Act as the primary binder, coagulating under heat to set the liquid. | Crack them into a separate bowl first to ensure no shell fragments enter the batter. |
| Granulated Sugar | Interferes with protein bonding to keep the texture soft rather than rubbery. | Whisk it into the cream cheese until the grit disappears to avoid a grainy finish. |
| Full Fat Sour Cream | Lowers the pH of the batter, which softens the "tight" proteins of the cheese. | Ensure it is at room temperature so it incorporates without creating cold lumps. |
Essential Ingredients and Practical Substitutions
To get the best results, you'll want to stick to high-quality basics. I've found that the brand of Oreo doesn't matter as much as the fat content of your dairy. If you try to go low-fat here, the cheesecakes will likely end up watery or grainy.
- 18 standard Oreo Cookies: These provide both the base and the flavor inclusions.
- Substitute: Chocolate sandwich cookies from any brand. Why this? They provide the essential cocoa to cream ratio for the base.
- 16 oz full fat cream cheese, softened: This is exactly two standard bricks.
- Substitute: Neufchâtel cheese. Why this? It has lower fat but similar tang, though the texture will be slightly softer.
- 0.5 cup granulated sugar: Standard white sugar is best here.
- Substitute: Caster sugar. Why this? It dissolves even faster, ensuring a perfectly smooth batter.
- 0.5 cup full fat sour cream: This adds that signature cheesecake tang.
- Substitute: Full fat Greek yogurt. Why this? It provides the same acidity and thickness for a similar set.
- 1 tsp vanilla extract: Pure vanilla is always the best choice for depth.
- Substitute: Vanilla bean paste. Why this? It adds those beautiful little black specks to the filling.
- 2 large eggs, room temperature: Essential for binding the fats together.
- Substitute: 0.5 cup silken tofu (blended). Why this? A decent plant based binder, though the bake time may increase.
- 0.125 tsp salt: Just a pinch to balance the sugar.
- Substitute: Sea salt. Why this? Adds a very subtle mineral depth to the chocolate notes.
Minimal Kitchen Tools for Reliable Results
The beauty of this recipe is that it doesn't require a kitchen full of gadgets. I usually make these using just a standard 12 cup muffin tin and a hand mixer. If you don't have a mixer, you can actually do this with a sturdy whisk and some elbow grease, provided your cream cheese is truly soft.
Using paper liners is non negotiable here; they make removal effortless and keep the sides of your cheesecakes looking clean.
You'll also want a flexible spatula. This is for the final step where you fold in the crushed cookies. A mixer would pulverize the cookie pieces too much, turning your batter a muddy grey color instead of that beautiful speckled "cookies and cream" look.
A simple bowl and a set of measuring cups are the only other things you need to have on hand.
step-by-step Guide for Silky Success
- Prep the base. Line a standard 12 cup muffin tin with paper liners. Place one whole Oreo cookie at the bottom of each cavity to create the crust. Note: No need to grease the liners; the cookie fat prevents sticking.
- Cream the foundation. In a large mixing bowl using a hand mixer or stand mixer, beat the 16 oz of softened cream cheese and 0.5 cup sugar for approximately 2 minutes until smooth and matte.
- Incorporate aromatics. Mix in the 0.5 cup sour cream, 1 tsp vanilla extract, and 0.125 tsp salt until fully incorporated and velvety.
- Add the binders. Add the 2 eggs one at a time on low speed, mixing just until the yellow streaks disappear. Note: This prevents over aerating which causes cracks.
- Fold in the flavor. Gently fold the 6 crushed Oreo cookies into the batter by hand using a spatula until evenly distributed.
- Fill the cups. Divide the batter evenly among the 12 muffin cups, filling them nearly to the top.
- Bake to perfection. Bake at 325°F (160°C) for 18–22 minutes until the edges are set but the centers still have a slight jiggle.
- Chill and set. Allow to cool to room temperature before refrigerating for at least 3 hours to set completely and firm up.
Troubleshooting Common Textural and Visual Flaws
If your cheesecakes don't look exactly like the ones in a magazine, don't panic. Most issues in cheesecake baking come down to temperature either the ingredients were too cold when you started, or the oven was a bit too hot.
Why Your Mini Oreo Cheesecakes Cracked
The most common reason for cracking is over beating the eggs. When you whip eggs into a thick batter like cream cheese, you're introducing tiny air bubbles. In the heat of the oven, those bubbles expand, causing the cheesecake to rise like a soufflé.
When it cools, the air escapes, the cake collapses, and the surface tears. To fix this, always add eggs last and mix them on the lowest possible setting.
| Problem | Root Cause | Solution |
|---|---|---|
| Lumpy Batter | Cream cheese or eggs were too cold. | Use room temperature ingredients; if lumpy, strain through a fine mesh sieve. |
| Sunken Centers | Underbaked or cooled too rapidly in a drafty area. | Bake until the "jiggle" is minimal and let cool in the pan away from vents. |
| Grainy Texture | Sugar didn't fully dissolve before eggs were added. | Beat sugar and cheese together for a full 2 minutes before adding liquids. |
Common Mistakes Checklist
- ✓ Always use room temperature cream cheese (leave it out for at least 2 hours).
- ✓ Don't skip the sour cream; it's essential for that smooth, creamy finish.
- ✓ Avoid opening the oven door repeatedly, as this drops the temperature and slows the set.
- ✓ Use a standard muffin tin, not a "mini" tin, or the cookies won't fit as a base.
- ✓ Allow the cheesecakes to cool completely at room temperature before moving to the fridge.
Scaling Ratios for Different Batch Sizes
When you need to make a bigger batch for a party, doubling this recipe is quite simple. Because the portions are individual, you don't need to worry about the center not cooking through like you would with a giant 10 inch cake. You just need more muffin tins!
If you're scaling UP (2x), you can simply double all ingredients. However, be careful with the salt and vanilla; I recommend using 1.5x the salt and vanilla first, then tasting, as these flavors can become overwhelming in larger volumes. If you're scaling DOWN (1/2), the tricky part is the eggs. To use half an egg, crack it into a small bowl, whisk it well, and then use exactly 2 tablespoons of the mixture. This ensures your fat to protein ratio remains perfect. For a citrusy alternative that scales beautifully for smaller gatherings, check out these Mini Key Lime Cheesecakes.
Correcting Popular Myths About Cheesecake Baking
One of the most persistent myths is that you must use a water bath for all cheesecakes. While this is true for large cakes where you need to regulate heat over a long period, it's completely unnecessary for mini versions.
The small volume of batter cooks so quickly that the ambient heat of the oven isn't enough to dry out the edges before the center is done.
Another misconception is that the "jiggle" means the cake is raw. In reality, cheesecake is a custard. If it's solid in the oven, it's overbaked and will likely be dry or cracked once it cools. The residual heat (carryover cooking) will finish the job as it sits on the counter.
Trust the timer and the visual cue of a slight wobble in the very center.
Storage Guidelines and Food Waste Reduction
Storing these treats is easy because they are quite robust. They stay fresh in the refrigerator for up to 5 days if kept in an airtight container. This makes them an incredible make-ahead dessert for busy weeks. If you want to keep them longer, they freeze beautifully.
Wrap each individual cheesecake in plastic wrap and then place them in a freezer bag; they'll stay perfect for up to 2 months. Just thaw them in the fridge overnight before serving.
To reduce waste, don't throw away any broken Oreos at the bottom of the bag. I usually collect all the crumbs and "ugly" cookie bits to use as an extra topping. If you have leftover cream cheese batter but ran out of cookies, you can bake the remaining batter in greased ramekins for a crustless version.
Even the leftover sour cream can be used in your next batch of tacos or mixed with a little honey for a fruit dip.
Creative Flavor Tweaks and Visual Garnishes
If you want to switch things up, the Oreo family offers plenty of variety. You can easily swap the classic cookies for Golden Oreos to create a "White Chocolate" style cheesecake. The vanilla base of the Golden Oreo pairs perfectly with the tangy cream cheese filling.
If you go this route, consider adding a few white chocolate chips to the batter for extra texture.
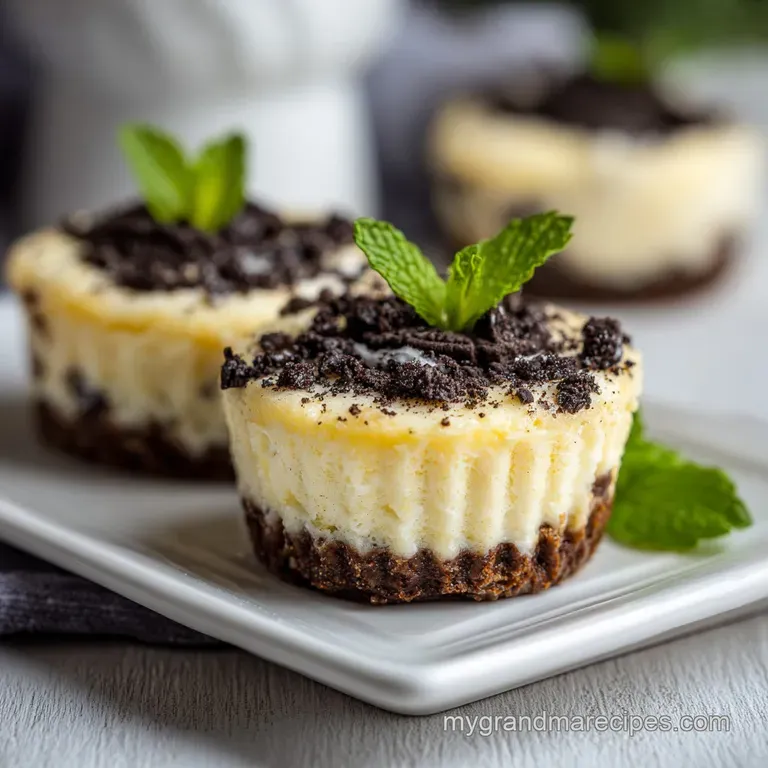
For a more refreshing version, try using Mint Oreos. The green filling adds a lovely color to the batter, and the chocolate mint combination is a classic for a reason. I've even seen people use Peanut Butter Oreos, which results in a much richer, saltier dessert.
Regardless of the flavor, a small dollop of whipped cream and half a mini Oreo on top right before serving makes these look like they came straight from a high end bakery.
Serving Ideas for Better Party Presentation
When it's time to serve, presentation can turn these simple bites into a centerpiece. I like to plate them on a dark slate board or a white ceramic pedestal to make the chocolate colors pop. If you're feeling fancy, a quick drizzle of dark chocolate ganache over the top adds a glossy, professional finish.
Simply melt some chocolate chips with a splash of heavy cream and flick it over the cheesecakes with a fork.
For a holiday themed spread, you could surround the cheesecakes with fresh raspberries or strawberries. The tartness of the berries cuts through the richness of the cream cheese perfectly.
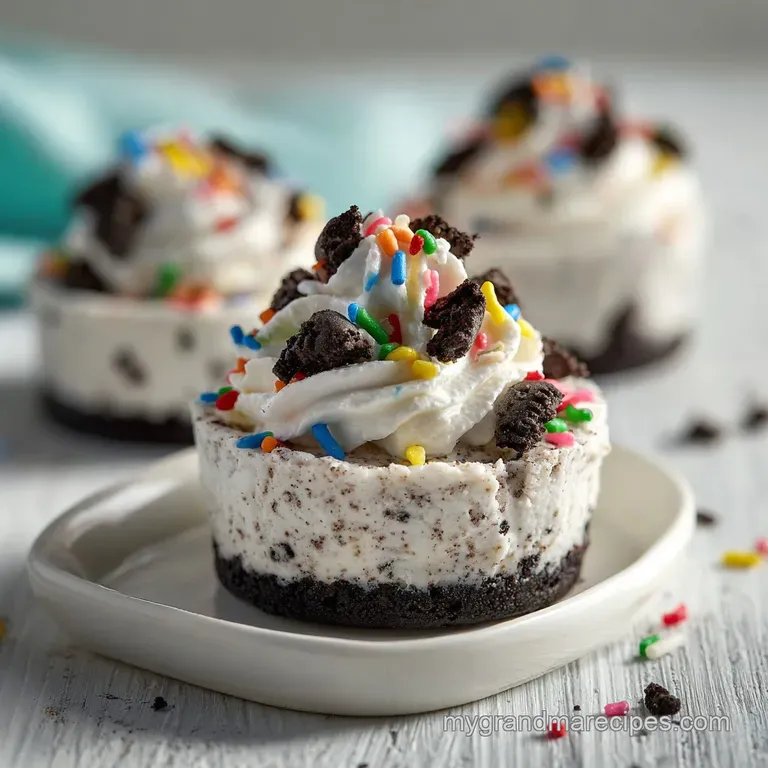
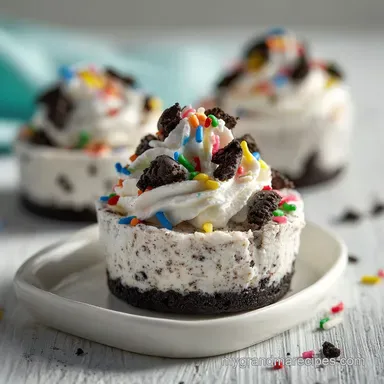
If you are serving these at a kid's birthday party, a sprinkle of colorful nonpareils or crushed candy bars on top of the batter before baking adds a fun, festive touch that always wins people over. Honestly, they are so good that they don't need much, but a little extra effort on the garnish goes a long way.

Recipe FAQs
How to ensure the cheesecake batter is perfectly smooth?
Beat the softened cream cheese and sugar for at least 2 minutes. This process is critical for achieving a matte, uniform texture before you add your other liquid ingredients.
Is it possible to overmix the batter once the eggs are added?
Yes, overmixing after adding eggs introduces excess air, which causes cracks. Use a low speed and stop immediately once the yellow streaks disappear to maintain a dense, silky interior similar to the texture achieved in our easy fudge recipe.
How to tell when the mini cheesecakes are fully baked?
Look for set edges and a slight jiggle in the center. Bake them at 325°F for 18 22 minutes; the centers will firm up completely while cooling in the refrigerator.
Is it true that I should use a water bath to prevent cracks?
No, this is a common misconception. Because these are small format cheesecakes, the 325°F oven temperature is gentle enough to prevent cracking without the need for a water bath.
How to store leftovers for the best texture?
Place them in an airtight container in the refrigerator for up to 5 days. For longer storage, wrap each unit individually in plastic and freeze for up to 2 months, thawing overnight in the fridge before eating.
How to prevent the paper liners from sticking to the cake?
Use the whole Oreo cookie at the base as a natural barrier. The fat content in the cookie prevents the cheesecake batter from adhering to the paper liner, making them easy to peel once chilled.
Can I use low-fat cream cheese for this recipe?
No, stick with full fat cream cheese. low-fat versions contain too much water and won't set into the dense, rich consistency required for these mini desserts.
Mini Oreo Cheesecakes
Ingredients:
Instructions:
Nutrition Facts:
| Calories | 276 kcal |
|---|---|
| Protein | 5 g |
| Fat | 19 g |
| Carbs | 22 g |
| Fiber | 1 g |
| Sugar | 16 g |
| Sodium | 295 mg |
