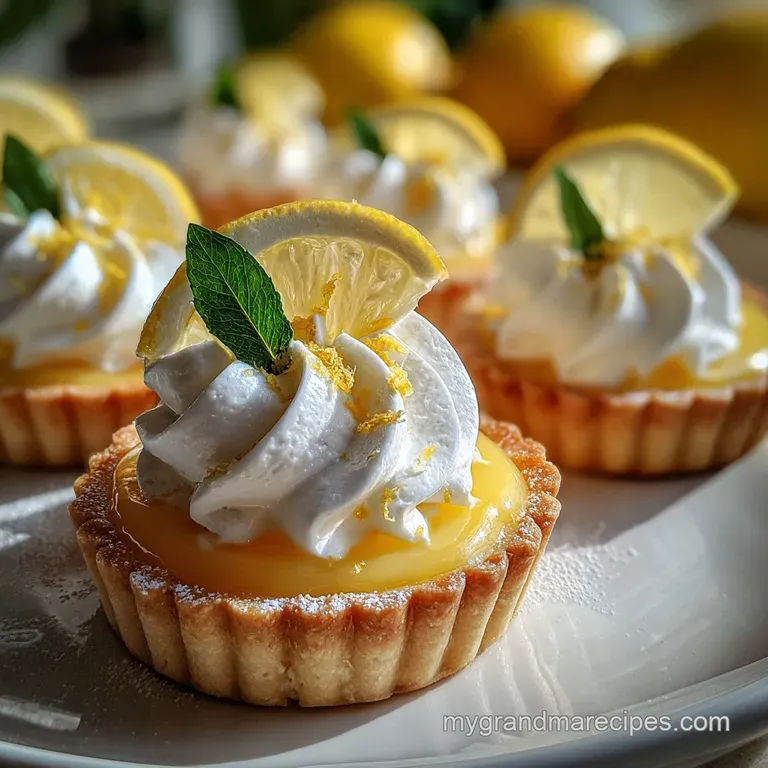
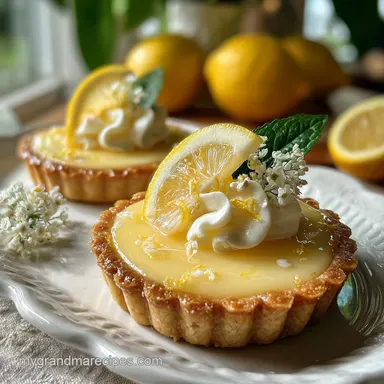
Mini Lemon Tarts
- Time: Active 20 minutes, Passive 15 minutes, Total 35 minutes
- Flavor/Texture Hook: A buttery crust that provides a crisp shatter followed by a velvety, zingy citrus center.
- Perfect for: Sunday luncheons, spring garden parties, or a sweet treat for beginner bakers.
- Everything You Need for Incredible Mini Lemon Tarts
- Understanding the Balance of Citrus Flavors
- Essential Components for a Flaky Shell
- Must Have Gear for Small Batch Baking
- Preparing the Perfect Bite-Sized Dessert
- Preventing Common Pastry and Curd Errors
- Customizing Your Zesty Mini Treats
- Keeping Your Tarts Fresh and Crisp
- Ideal Pairings for Refreshing Citrus Bites
- Useful Answers for Home Bakers
- Recipe FAQs
- 📝 Recipe Card
You know that feeling when you walk into a kitchen and the air just smells like sunshine? That is exactly what happens when you start zesting lemons for these treats. I remember my grandma in Tennessee always had a bowl of citrus on her wooden counter, even in the middle of winter.
She used to say that a good lemon tart was the best way to wake up the palate after a heavy meal, and she was right.
The problem most people face with these little gems is the dreaded soggy bottom or a filling that tastes more like a sugar cube than a lemon. We have all been there, pulling a tray out of the oven only to find the crust has turned into a sponge.
It is frustrating, but I have spent years tweaking this process to ensure every single bite is as crisp as the first.
What you are getting here is a reliable, no fuss method for mini lemon tarts that actually hold their shape. We are going to use a press in crust - no rolling pins required - and a stovetop curd that is so smooth it practically glows.
Trust me on this, once you master the temperature of your butter and the timing of your whisk, you will never go back to store-bought versions.
Everything You Need for Incredible Mini Lemon Tarts
The magic of this recipe lies in the contrast between the richness of the fat and the sharpness of the fruit. In grandma’s kitchen, we didn't use fancy gadgets; we used our hands to feel the dough and our eyes to watch the curd thicken.
These mini lemon tarts rely on basic pantry staples, but the way we handle them makes all the difference in the world.
The Science of Why it Works
Fat Encapsulation: Cold butter pieces are coated in flour, and as they bake, the water in the butter evaporates, creating tiny steam pockets that lead to a shattering, flaky texture.
Protein Coagulation: The acid in the lemon juice works with the heat to gently uncoil the egg yolk proteins, allowing them to bond and trap moisture into a thick, glossy emulsion.
| Component | Science Role | Pro Secret |
|---|---|---|
| 125g Flour | Provides structural lattice | Sift twice for a lighter crumb |
| 115g Butter | Shortens gluten strands | Keep it below 40°F for maximum flake |
| 3 Egg Yolks | Emulsifies the filling | Strain through a sieve for a silky finish |
When you are working with the crust, the goal is to keep the gluten from getting too excited. If you overwork it, the tart shells will be tough and chewy instead of melting in your mouth. Think of the dough as something you are gently coaxing into place rather than forcing.
Understanding the Balance of Citrus Flavors
Achieving that signature zing requires fresh ingredients. Honestly, don't even bother with the bottled juice you find in the plastic lemon. It lacks the bright enzymes and essential oils found in the skin of a fresh fruit.
For these mini lemon tarts, we want that sharp, clean finish that only comes from a lemon you've zested yourself.
- 125g all purpose flour: This is the backbone of our crust.
- 155g granulated sugar, divided: You'll use some for the crust and the rest for the curd.
- 115g cold unsalted butter: This needs to be firm enough to hold its shape when you pinch it.
- 1g fine sea salt: Just a pinch to make the sweetness pop.
- 3 large egg yolks: These provide the richness and the golden color of the filling.
- 80ml freshly squeezed lemon juice: Usually about 2 to 3 medium lemons.
- 1 tbsp lemon zest: This is where the floral aroma lives.
- 45g unsalted butter, cubed and chilled: We whisk this in at the end for extra shine.
| Original Ingredient | Substitute | Why It Works |
|---|---|---|
| Granulated Sugar | Honey (use 115g) | Adds floral notes. Note: Crust will brown much faster. |
| All Purpose Flour | Almond Flour | Moisture rich but results in a denser, nuttier crumb. |
| Unsalted Butter | Coconut Oil (solid) | Same fat ratio. Note: Adds a distinct tropical flavor profile. |
If you have some lemons left over after juicing, they would be a perfect addition to a refreshing Mango Lemon Drink recipe. It is a great way to use up the fruit and keep the citrus theme going throughout your afternoon.
Essential Components for a Flaky Shell
The crust for our mini lemon tarts is a traditional shortbread style. It is meant to be sturdy enough to hold the curd but delicate enough to break apart easily with a fork. In Tennessee, we call this a "press in" crust because it saves you the headache of chilling, rolling, and cutting circles.
You simply crumble the dough into your tin and use your thumb to create the shape.
Chef's Tip: Freeze your butter for 10 minutes before grating it into the flour. This keeps the fat from melting into the dough, ensuring those little steam pockets we talked about earlier.
When you mix the 125g of flour with the 115g of cold butter and part of the sugar, you are looking for a texture that resembles wet sand. It should hold together when you squeeze a handful, but crumble away if you poke it. This balance is what gives the tart shells their signature "short" texture.
Must Have Gear for Small Batch Baking
You don't need a professional pastry kitchen to make this recipe work. However, having the right pans will make the removal process much easier. I prefer using a non stick mini muffin tin or a dedicated tartlet pan with removable bottoms.
If you're using a standard muffin tin, a little trick I learned is to use strips of parchment paper as "lifters" so you can pull the tarts out without cracking the sides.
- Mini muffin tin: Standard 12 or 24 cup tray.
- Medium saucepan: For simmering the curd over low heat.
- Fine mesh sieve: Absolutely vital for removing any accidental bits of cooked egg.
- Whisk: To keep the curd moving and prevent scorching.
- Zester: A Microplane is best for getting just the yellow skin and none of the bitter white pith.
| Method | Texture Outcome | Difficulty Level |
|---|---|---|
| Stovetop (Curd) | Velvety, glossy, and spreadable | Moderate (requires constant attention) |
| Oven (Custard) | Firm, matte, and more uniform | Easy (set the timer and walk away) |
For those nights when you don't want to bake anything at all and just want something sweet immediately, my Edible Cookie Dough recipe is a real lifesaver. It uses similar pantry staples but requires zero time near a hot stove.
Preparing the Perfect Bite Sized Dessert

Now, let's get into the flow of things. The secret to a stress free bake is getting your "mise en place" ready. Juice your lemons, zest them, and cube that extra 45g of butter before you even turn on the stove. This keeps you from scrambling while the curd is thickening.
Creating the Press In Base
Mix the 125g flour, a portion of the sugar, and the 1g of salt in a bowl. Work in the 115g of cold butter with your fingertips until it looks like coarse crumbs. Press about a tablespoon of the mixture into each well of your mini muffin tin, pushing it up the sides to create a wall.
Baking the Shells
Place the tin in a preheated oven at 350°F. Bake for 12 to 15 minutes until the edges are lightly golden and the centers look dry. Note: This "blind bake" ensures the crust stays crisp once the wet filling is added.
Simmering the Velvety Curd
In a small saucepan, whisk the 3 egg yolks, the remaining sugar, and the 80ml of lemon juice. Cook over medium low heat, whisking constantly. You are looking for it to thicken until it coats the back of a spoon and leaves a clear trail when you run a finger through it.
Assembling the Tarts
Once the curd is thick, remove it from the heat and whisk in the 1 tbsp of zest and the 45g of chilled butter cubes. The butter will melt and create a beautiful shine. Pour the warm curd into the pre baked shells and let them sit at room temperature for a bit before moving them to the fridge to set completely.
Preventing Common Pastry and Curd Errors
Even the most seasoned home cooks have bad days. I once rushed the curd and ended up with something that looked more like scrambled eggs than a dessert. It happens! The trick is knowing how to spot the trouble before it ruins your whole batch of mini lemon tarts.
Non Thickening Lemon Curd
If your filling stays watery after 10 minutes of whisking, the heat might be too low. The egg yolks need to reach about 170°F to properly bond. If you're worried about overcooking it, just keep the heat low and be patient.
It will eventually turn into a thick, custard like consistency.
Stopping the Soggy Bottom
The most common mistake is filling the tarts while the crust is still cold or the curd is too cold. If you let the shells sit out for hours before filling, they can absorb moisture from the air.
Fill them while the shells are still slightly warm, or re crisp them in the oven for 2 minutes before adding the filling.
| Problem | Root Cause | Solution |
|---|---|---|
| Runny Curd | Under cooked yolks | Whisk over low heat until it coats a spoon. |
| Shrunken Crust | Over stretched dough | Press dough gently; do not pull it into the corners. |
| Lumpy Filling | Cooked egg bits | Pour through a fine mesh sieve immediately after cooking. |
Removing Tarts From Tins
If your tarts are stuck, don't panic and try to pry them out with a knife. That is a one way ticket to a broken crust. Instead, wrap a warm, damp towel around the bottom of the tin for 30 seconds. The heat will slightly soften the butter in the crust, allowing the tarts to slide right out.
Customizing Your Zesty Mini Treats
Once you have the base recipe down, you can start getting creative. These little tarts are like a blank canvas. While the classic version is hard to beat, sometimes a little extra flair makes them stand out on a dessert table.
- Transforming into Meringue Tarts: Use the 3 leftover egg whites to make a quick Swiss meringue. Pipe it on top and give it a quick toast with a kitchen torch for that toasted marshmallow look.
- Using Graham Cracker Crusts: If you want an even faster version, swap the flour crust for a mix of crushed graham crackers and melted butter. It creates a sweeter, crunchier base that pairs beautifully with the tart lemon.
- Boosting the Fruit Flavor: Drop a single fresh raspberry or a blueberry into the center of each tart before the curd sets. The burst of berry juice against the citrus is incredible.
If you're hosting a big crowd and want to scale this up, remember that the curd can be doubled easily, but the crust should be made in separate batches. Doubling a dough recipe often leads to over mixing because of the sheer volume in the bowl.
For the spices and salt, only increase those by 1.5 times to keep the flavors from becoming overwhelming.
Keeping Your Tarts Fresh and Crisp
Proper storage is the difference between a great dessert and a disappointing one. Because these contain fresh eggs and butter, they need to stay chilled. However, the refrigerator is a humid place, and humidity is the enemy of a crisp crust.
Store your mini lemon tarts in an airtight container for up to 3 days. To keep them from getting soft, place a piece of paper towel at the bottom of the container to absorb any excess moisture. If you want to freeze them, do so without the filling. The baked shells will last for 2 months in the freezer.
When you're ready to serve, just thaw the shells and whip up a fresh batch of curd.
For zero waste, those leftover egg whites are pure gold. Don't toss them out! You can use them for an omelet, or better yet, make some light and airy macarons. If you are feeling extra fancy, you could even use them to make a foam for a citrus themed cocktail.
Ideal Pairings for Refreshing Citrus Bites
Lemon has a way of cutting through rich flavors, which makes these tarts perfect for serving alongside something decadent. If you are hosting a winter gathering, try serving these with a cup of dark coffee or even a hot chocolate. If you want to go all out for a party, stir your coffee with these Chocolate Spoons for recipe alongside a tart. The mix of bitter chocolate and bright lemon is a classic combination.
For a lighter pairing, a glass of iced herbal tea or a dry sparkling wine works wonders. The bubbles in the wine help cleanse the palate between bites of the buttery crust. Whatever you choose, make sure the drink isn't sweeter than the tart itself, or you'll lose the nuanced flavor of the fresh zest.
Useful Answers for Home Bakers
Using Bottled Lemon Juice
While you can technically use it, I strongly advise against it. Bottled juice often contains preservatives that give it a metallic aftertaste. Fresh juice has natural oils that contribute to the "shimmer" and the bright aroma of the finished mini lemon tarts.
Making These gluten-free
You can substitute the all purpose flour with a high-quality 1:1 gluten-free flour blend. Just be aware that gluten-free crusts tend to be more fragile, so you might want to add an extra tablespoon of melted butter to help the "sand" stick together in the tin.
Crust Tasting Like Flour
If the crust tastes "pasty," it likely wasn't baked long enough. The flour needs to reach a certain temperature to toast and lose that raw grain flavor. Make sure the shells are a clear golden brown before you pull them out of the oven.
One final myth to bust: Searing or "blind baking" the crust doesn't just prevent sogginess; it also develops the Maillard reaction. This is what gives the shortbread its nutty, toasted flavor. Without that initial bake, you're just eating sweetened flour paste.
Trust the process, watch the clock, and you'll have a tray of sunshine filled treats that would make any grandma proud.

Recipe FAQs
How do you keep mini lemon tarts from cracking?
Avoid over baking the curd. The curd should just be set and coat the back of a spoon, not fully firm in the oven. It will continue to thicken as it cools, and over baking is the primary cause of cracking.
How long do you cook mini tarts for?
Bake the crusts for 12 to 15 minutes. Look for the edges to be lightly golden and the centers to appear dry. The curd itself isn't baked in the traditional sense; it thickens on the stovetop and then sets in the shells.
What are common lemon tart baking mistakes?
Common mistakes include a soggy bottom, watery curd, or a cracked filling. A soggy bottom often stems from under baking the crust or filling it while too cold. Watery curd is usually due to undercooking, and cracking from over baking the filling.
What are popular mini tart fillings?
Lemon is classic, but other popular fillings include lime, passion fruit, and berries. For a richer option, consider chocolate ganache or a creamy custard. The tart shell is versatile enough for many flavor profiles.
Should I use fresh lemon juice or bottled?
Always use fresh lemon juice. Bottled juice often contains preservatives that can impart a metallic aftertaste and lacks the vibrant essential oils found in fresh lemons, which contribute significantly to the aroma and flavor.
How do I get a smooth lemon curd?
Whisk constantly over low heat and strain the curd. Continuous whisking prevents the eggs from scrambling, and cooking gently allows the proteins to thicken gradually. Straining through a fine mesh sieve will remove any small bits of cooked egg, ensuring a silky smooth texture.
Can I make the crust ahead of time?
Yes, you can blind bake the tart shells ahead. Store them in an airtight container at room temperature for up to 2 days, or freeze them for longer storage. Ensure they are completely cooled before storing to prevent condensation.
Mini Lemon Tarts
Ingredients:
Instructions:
Nutrition Facts:
| Calories | 170 kcal |
|---|---|
| Protein | 1.6 g |
| Fat | 10.4 g |
| Carbs | 18.3 g |
| Fiber | 0.2 g |
| Sugar | 11.1 g |
| Sodium | 29 mg |
