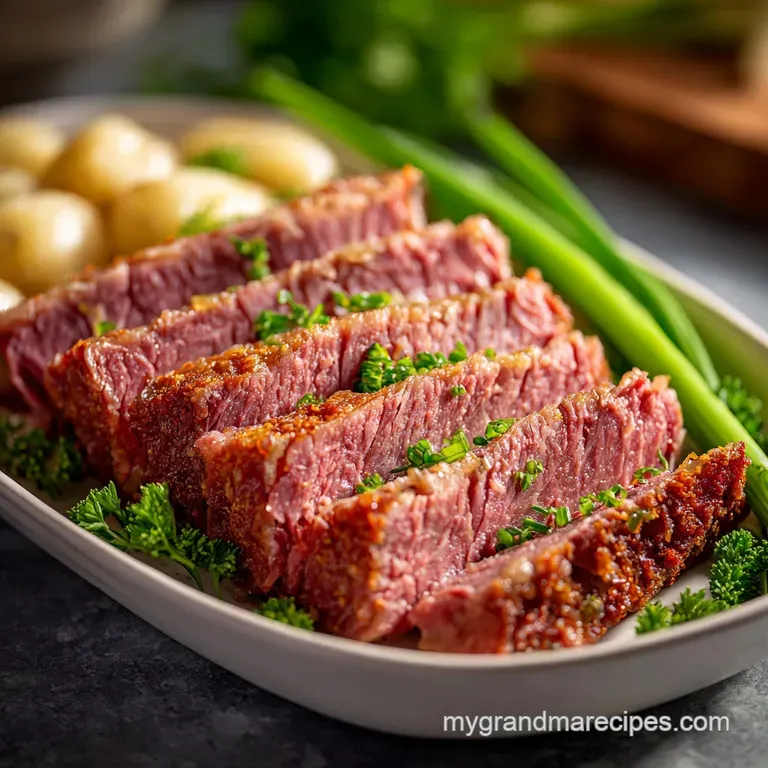
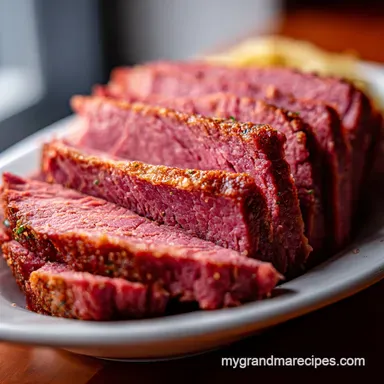
Instant Pot Corned Beef: Fork Tender
- Time: Active 15 minutes, Passive 2 hours, Total 2 hours 15 mins
- Flavor/Texture Hook: Velvety, salt cured beef that yields to a fork with a buttery, spice forward finish.
- Perfect for: St. Patrick’s Day celebrations or a comforting Sunday supper with the family.
- Mastering My Grandma’s Easy Instant Pot Corned Beef
- The Science of Pressure Tenderizing
- Choosing Your Meat and Spices
- Kitchen Tools You Actually Need
- How to Cook Your Brisket
- Fixing Common Corned Beef Issues
- Dietary Changes for Every Guest
- Storing and Reheating Your Leftovers
- The Perfect Sides to Serve
- Critical High in Sodium
- Recipe FAQs
- 📝 Recipe Card
Mastering My Grandma’s Easy Instant Pot Corned Beef
The first thing you’ll notice isn't the sight of the meat, but that unmistakable, mouth watering aroma wafting from the steam vent a heady mix of toasted coriander, spicy peppercorns, and the deep, earthy scent of cloves.
Back in my grandma’s kitchen in Tennessee, this smell meant the heavy cast iron pot had been simmering on the back of the stove since dawn. We’d wait all day for that first salty, savory bite, listening to the rhythmic bubble of the water while the kitchen windows fogged up from the heat.
I used to think you couldn't rush a good corned beef without ending up with something as tough as a leather boot. I was wrong. The first time I tried this in my pressure cooker, I held my breath, worried I was betraying generations of slow cooker devotees.
But when I lifted the lid and saw that brisket practically glowing in its dark, malty broth, I knew I’d found a way to keep the tradition alive without the five hour wait. It’s the kind of meal that feels like a warm hug on a cold afternoon.
We're going to use a few simple tricks I’ve picked up over the years to ensure your brisket is never rubbery and your cabbage doesn't turn into a soggy mess. From the specific way we layer the vegetables to the essential resting period that prevents all those precious juices from running off your cutting board, I’ve got you covered.
This is the foolproof way to get that old-fashioned flavor with the modern convenience we all need.
The Science of Pressure Tenderizing
The magic happens when we harness the physics of high pressure steam to transform tough muscle into a tender masterpiece. Here is why this method is actually superior to the stovetop:
- Rapid Collagen Conversion: High pressure raises the boiling point of water, which accelerates the breakdown of tough connective tissue into silky gelatin.
- Forced Flavor Infusion: The sealed environment creates a pressure gradient that literally pushes the aromatic compounds of the stout and spices into the center of the meat.
- Moisture Retention: Because the liquid cannot evaporate in a sealed pot, the meat remains hydrated throughout the intensive cooking process.
- Starch Gelatinization: The baby Yukon Gold potatoes absorb the salty, spiced broth under pressure, seasoning them all the way to their creamy cores.
| Thickness of Meat | Internal Temp | Rest Time | Visual Cue |
|---|---|---|---|
| 1.5 inch (3.8 cm) | 145°F (63°C) | 10 mins | Meat holds shape when sliced |
| 2.5 inch (6.3 cm) | 145°F (63°C) | 15 mins | Slices are fork tender and moist |
| 3.5 inch (8.9 cm) | 145°F (63°C) | 20 mins | Fat cap is translucent and soft |
To Break Down Tough Collagen Fast
The brisket is a hardworking muscle, which means it’s packed with collagen. In a standard pot, you have to wait hours for that collagen to melt. By using the "Manual" or "Pressure Cook" setting, we create an environment where the heat penetrates the dense fibers much faster.
This ensures that the fat renders out beautifully, coating the meat and giving it that signature velvety mouthfeel we all crave.
Choosing Your Meat and Spices
Before we start, let's look at what is going into the pot. The quality of your ingredients determines the depth of the final sauce. Much like the technique used in my Pot Roast recipe, we are building layers of flavor starting with a strong aromatic base.
| Component | Science Role | Pro Secret |
|---|---|---|
| 1 cup Irish stout | Acidic tenderizer | Adds a malty, coffee like depth that balances the salt. |
| 2 bay leaves | Enzyme release | Releases herbal notes that cut through the richness of the beef fat. |
| 4 cloves garlic | Allium base | Smashed cloves release more allicin, providing a sharper, savory backbone. |
| 1 lb baby Yukon Gold potatoes | Starch stability | These hold their shape better than Russets under high pressure. |
When selecting your meat, always look for a "flat cut" brisket. It’s more uniform in thickness than the "point cut," which means it cooks evenly and is much easier to slice into those beautiful, clean pieces for serving.
If you see a lot of extra liquid in the package, don't worry that's just the brine, but you'll want to rinse it off thoroughly to prevent the dish from becoming an absolute salt bomb.
For the Brisket Base
The brisket is the star, but it needs the right supporting cast. I always use a 3.5 lb corned beef brisket, flat cut, because it fits perfectly in a 6 quart or 8 quart pot without being crowded.
The pickling spice packet that comes with the meat is okay, but adding your own extra tablespoon of pickling spice ensures the flavor isn't washed out by the broth.
For the Aromatic Braising Liquid
Instead of just using water, we use a combination of 2 cups low sodium beef bone broth and 1 cup Irish stout. This creates a braising liquid that is rich, dark, and full of character. The bone broth adds a level of body (thanks to the natural gelatin) that you just can't get from a standard bouillon cube. If you're looking for a similar depth in other dishes, it reminds me of the rich base used in this Creamy Ground Beef recipe.
Kitchen Tools You Actually Need
One of the reasons I love this recipe is that it doesn't require a kitchen full of gadgets. I'm a big believer in Grandma's philosophy: use what you have and keep it simple. You’ll need a 6 quart or 8 quart electric pressure cooker any reliable brand will do.
The most important accessory is the stainless steel trivet that came with your pot.
The trivet keeps the meat off the bottom of the liner. This is crucial because it prevents the dreaded "Burn" notice and allows the steam to circulate entirely around the brisket. You'll also need a sharp carving knife.
Don't even think about using a serrated bread knife; you want a long, smooth blade that can glide through the meat in one motion to keep those slices looking professional.
Chef's Tip: Freeze your butter for 10 minutes before grating it over the finished vegetables. This creates a "shatter" effect of cold fat hitting hot food, resulting in a much silkier glaze than just melting a knob of room temperature butter.
How to Cook Your Brisket

Ready to get started? This process is straightforward, but the order of operations is everything. We aren't just throwing things in a pot; we're orchestrating a two stage cook that ensures the meat is tender and the vegetables are still vibrant and firm.
Step 1: The Desalting Prep
First, take your 3.5 lb corned beef brisket out of the package and rinse it under cold running water. You'll see a lot of cloudy brine wash away this is good. We want the flavor of the cure, but not the overwhelming salinity that comes from the packing liquid.
Pat it dry with paper towels so the spices stick to the surface rather than sliding off.
Step 2: The High Pressure Infusion
- Place 1 large yellow onion (quartered) and 4 cloves of smashed garlic into the bottom of the Instant Pot liner.
- Pour in 2 cups low sodium beef bone broth and 1 cup Irish stout.
- Stir in 1 tbsp pickling spice and 2 bay leaves.
- Place the trivet into the pot and set the rinsed brisket on top, fat side up.
- Secure the lid and set to "High Pressure" for 85 minutes (for a 3.5 lb brisket).
- Once the timer beeps, let the pressure release naturally for 15 minutes. This "Natural Pressure Release" is non negotiable it keeps the meat from seizing up and becoming tough.
Step 3: The Critical Rest
After the 15 minute wait, vent any remaining steam and carefully lift the brisket out. Place it on a cutting board and tent it loosely with foil. Let it rest for at least 15 to 20 minutes. While it rests, the fibers relax and reabsorb the juices.
If you slice it now, all the moisture will end up on the board, leaving you with dry meat.
Step 4: The Vegetable Steam
While the meat rests, it's time for the vegetables. Leave the liquid in the pot but remove the bay leaves if you spot them.
- Add 1 lb baby Yukon Gold potatoes and 3 large carrots (cut into 2 inch chunks) into the broth.
- Place the 8 cabbage wedges on top of the carrots and potatoes.
- Seal the lid again and cook on "High Pressure" for 3 to 4 minutes.
- Perform a "Quick Release" immediately when the time is up to prevent the cabbage from turning into mush.
| Fresh Ingredient | Shortcut Substitute | Why It Works |
|---|---|---|
| Fresh Garlic | Jarred Minced Garlic | Same aromatic profile; 1 tsp equals 1 clove. |
| Whole Carrots | Bagged Baby Carrots | Saves peeling time; cook for 1 minute less to avoid mushiness. |
| Bone Broth | Beef Bouillon + Water | Provides the necessary liquid; Note: May increase saltiness significantly. |
Fixing Common Corned Beef Issues
Even with the best intentions, things can go sideways. But don't panic! Most issues with corned beef are easily fixed if you know what caused them. The most common complaint is the texture, which almost always comes down to timing or slicing technique.
Why Your Brisket Is Tough
If you open the pot and the meat feels like a rubber ball, it simply hasn't cooked long enough. Pressure cooking is fast, but it’s not magic. If your brisket is particularly thick, it might need an extra 10 or 15 minutes.
Just put the lid back on, ensure there is still liquid in the bottom, and set it for a few more minutes. On the flip side, if it’s falling apart like pulled pork, you’ve overcooked it it’ll still taste great, but you won't get those clean slices.
Why Your Vegetables Are Mushy
This usually happens if you try to cook the vegetables at the same time as the meat. Brisket needs 90 minutes; cabbage needs 3 minutes. Always do the two stage cook method described above.
If your cabbage still feels too soft, try cutting the wedges larger next time or reducing the cook time by 60 seconds.
| Problem | Root Cause | Solution |
|---|---|---|
| Meat is too salty | Skipped the rinsing step | Soak meat in cold water for 30 mins before cooking. |
| Broth is bitter | Stout was too hoppy | Add a teaspoon of brown sugar to balance the bitterness. |
| Slices are stringy | Sliced with the grain | Always slice perpendicular to the long muscle fibers. |
Common Mistakes Checklist
- ✓ Always rinse the brisket under cold water to remove excess surface salt.
- ✓ Never skip the 15 minute natural pressure release; it’s the key to tenderness.
- ✓ Place the cabbage on top of the other vegetables to steam rather than boil.
- ✓ Check the grain of the meat before you cook it so you know which way to slice later.
- ✓ Use low sodium broth to avoid an oversalted final dish.
Dietary Changes for Every Guest
I know we all have different needs at the table these days. Whether you're avoiding gluten or looking for a way to cut down on the carbs, this recipe is surprisingly flexible. Because we are making this from scratch, we have total control over the ingredients.
For a Paleo/Keto Version
To make this keto friendly, you'll need to swap out the potatoes. I find that large chunks of cauliflower or even radishes work surprisingly well. When radishes are pressure cooked, they lose their peppery bite and take on a texture very similar to a potato.
Also, replace the Irish stout with more beef bone broth or a splash of apple cider vinegar to keep the acidity without the grain based alcohol.
For a gluten-free Variation
Standard corned beef is usually gluten-free, but you must check the label on your pickling spice and the broth. The biggest culprit is the stout. Simply swap the 1 cup of Irish stout for a gluten-free beer or extra broth. The flavor will be slightly less malty, but the meat will still be incredibly tender. If you're looking for other gluten-free ideas, you might enjoy the natural flavors in my Beef Hanger Steak recipe.
If you want X, do Y
- If you want a crispy crust, place the cooked brisket under the broiler for 5 minutes after resting.
- If you want a sweeter profile, rub 2 tablespoons of brown sugar onto the fat cap before pressure cooking.
- If you want spicier vegetables, add an extra teaspoon of black peppercorns directly to the vegetable steaming stage.
Storing and Reheating Your Leftovers
Leftover corned beef is arguably better the next day. The flavors have had time to meld, and the meat becomes even easier to slice thinly for sandwiches. Store the beef and vegetables in an airtight container with a splash of the cooking liquid to keep everything moist.
It will stay fresh in the fridge for up to 4 days.
For longer storage, you can freeze the sliced beef in a freezer safe bag for up to 3 months. I don't recommend freezing the cooked potatoes or cabbage, as their texture becomes grainy and watery upon thawing.
When you're ready to eat, reheat the beef gently in a pan with a little broth over medium heat until it's warmed through.
Zero Waste Tip: Don't throw away those small, shredded bits of leftover beef! Chop them up with the leftover potatoes and fry them in a skillet with some butter and onions to make the most incredible Instant Pot corned beef hash for breakfast the next morning.
The Perfect Sides to Serve
While this is a complete one pot meal, sometimes you want to round out the table with a few extras. In my house, a thick slice of Irish soda bread is mandatory for soaking up that delicious, malty broth. The crusty exterior and soft, dense middle are the perfect foil for the salty beef.
If you're looking for a bit of brightness to cut through the richness, a side of spicy stone ground mustard or a quick horseradish cream sauce (sour cream, horseradish, and a squeeze of lemon) is fantastic. It provides a sharp, tangy contrast that wakes up the palate. For a different take on beef and vegetables, you might also enjoy the traditional flavors of this Braised Cabbage with recipe.
Making this dish always reminds me that some traditions are worth keeping, even if we update the method. There's something deeply satisfying about sitting down to a plate of fork tender beef and velvety carrots, knowing that you've managed to capture that old-fashioned Sunday dinner magic in just a couple of hours.
I hope this becomes a staple in your kitchen just like it has in mine!

Critical High in Sodium
1185 mg mg of sodium per serving (52% % of daily value)
The American Heart Association recommends limiting sodium intake to about 2,300mg per day for overall cardiovascular health.
Sodium Reduction Tips for Corned Beef and Cabbage
-
Broth Swap-30%
Replace the 2 cups of low-sodium beef bone broth with an equal amount of homemade or truly sodium free beef broth. Many 'low sodium' options still contain a significant amount of sodium.
-
Rinse the Corned Beef-25%
Corned beef is cured in a high sodium brine. Thoroughly rinsing the brisket under cold water before cooking can remove some of the surface salt. Consider soaking it in water for several hours, changing the water frequently, to draw out even more sodium.
This will affect the overall flavor, but the sodium reduction can be significant.
-
Homemade Pickling Spice-15%
Prepare your own pickling spice blend! Many pre-made blends contain added salt. Creating your own allows you to control the sodium content and customize the flavor profile. Common spices used are coriander seeds, mustard seeds, black peppercorns, allspice berries, and dried chilies.
-
Water it Down-10%
Consider substituting some of the Irish stout with water. Using only 1/2 cup of Irish stout and 1/2 cup of water will reduce the sodium content slightly, while still contributing flavor.
-
Boost Flavor Naturally
Enhance the flavor of your corned beef and cabbage with fresh herbs and spices! Experiment with garlic powder, onion powder, black pepper, smoked paprika, or red pepper flakes to add depth and complexity without relying on salt.
Recipe FAQs
Is corned beef good in the Instant Pot?
Yes, it is superior for speed and moisture retention. The pressure cooker accelerates the breakdown of tough connective tissues into gelatin, making the meat extremely tender in under two hours compared to stovetop methods.
How many minutes to cook corned beef in a pressure cooker?
Cook for 85 minutes at High Pressure for a standard 3.5 lb cut. After the cooking time, you must allow a crucial 15-minute Natural Pressure Release before venting the remaining steam.
Should corned beef be covered in liquid in an Instant Pot?
No, it should be partially submerged, not fully covered. Place the meat on the trivet above the braising liquid (broth and stout) so that the steam does the work, which prevents the top of the meat from becoming waterlogged.
Why is my corned beef tough Instant Pot?
It is tough usually because it was rushed or sliced incorrectly. Ensure you allow the full 15-minute Natural Pressure Release and let the meat rest for 20 minutes after cooking before you slice it against the grain.
What is the most critical resting step for Instant Pot corned beef?
Resting the meat for 15 20 minutes tented in foil is non-negotiable. This allows the muscle fibers to relax and reabsorb the flavorful internal juices, which otherwise would run out when you cut it, resulting in dry meat.
Can I cook the vegetables at the same time as the brisket?
No, attempt a two-stage cook to avoid mushy vegetables. The brisket requires 85 minutes, while carrots and cabbage only need 3 4 minutes; cook the meat first, remove it, and then pressure cook the vegetables separately in the flavorful broth.
Is it true that using stout instead of water makes the beef too bitter?
No, this is a common misconception, provided you balance the flavor. The malty stout adds essential depth; if the final product tastes bitter, add a teaspoon of brown sugar to the braising liquid to counteract the hops acidity, similar to balancing flavors in a Hearty Lazy Day recipe.
Instant Pot Corned Beef
Ingredients:
Instructions:
Nutrition Facts:
| Calories | 458 kcal |
|---|---|
| Protein | 31.4 g |
| Fat | 25.2 g |
| Carbs | 24.6 g |
| Fiber | 4.8 g |
| Sugar | 5.2 g |
| Sodium | 1185 mg |
