Red Velvet Cheesecake: Velvety and Tangy
- Time: Active 25 minutes, Passive 75 minutes, Total 100 minutes
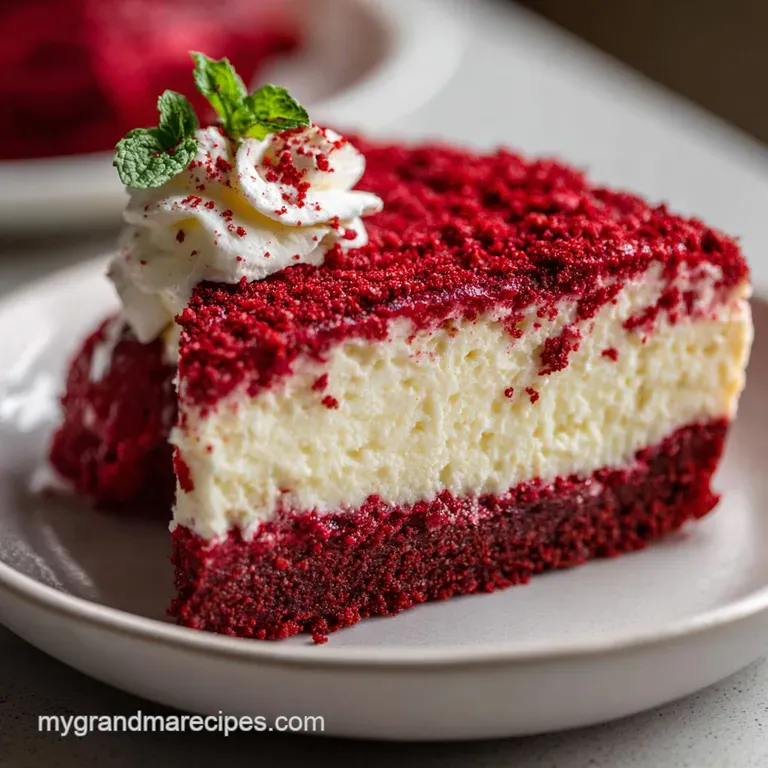
- Flavor/Texture Hook: Tangy, silky filling with a snappy chocolate wafer crust
- Perfect for: Holiday gatherings, Sunday dinners, or a "just because" Southern treat
- Busting Myths About Red Food Dye
- The Secrets Behind a Silky Texture
- Deep Dive Into Key Components
- Selecting Your Classic Southern Elements
- Vital Tools for Your Kitchen
- Creating the Crimson Batter Stepwise
- Fixing Common Baking Stumbles Easily
- Adapting for Bars or Special Diets
- Storage and Using Leftover Crumbs
- Serving Tips and Beverage Pairings
- Recipe FAQs
- 📝 Recipe Card
Whenever I pull a fresh Red Velvet Cheesecake out of the oven, the first thing that hits me isn't the sugar - it's the smell of that bloomed cocoa. It’s a deep, earthy aroma that swirls through the kitchen, mingling with the slight tang of the cream cheese.
Growing up in Tennessee, red velvet wasn't just a flavor; it was a celebration. My grandma always said that a real red velvet shouldn't taste like a chocolate bar, but like a "velvet whisper" with just enough cocoa to keep things interesting.
I remember one specific Sunday when I tried to rush the cooling process by sticking the pan in the freezer. Let’s just say the resulting crack looked like a map of the Grand Canyon. Since then, I’ve learned that patience is the most important ingredient in any Southern kitchen.
This recipe is the result of years of finding that sweet spot where the texture is light enough to eat a second slice but rich enough to feel like a true indulgence.
You’re going to love how the Greek yogurt and Neufchâtel play together here. Instead of the heavy, mouth coating feeling of a traditional cheesecake, this version has a brightness that cuts right through the sweetness. It’s the kind of dessert that makes people quiet down and focus on every bite.
We're going to walk through the prep flow together so you can feel confident when that springform pan clicks shut.
Busting Myths About Red Food Dye
One of the biggest misconceptions I hear is that the red color in a Red Velvet Cheesecake is just for show. While the liquid red food coloring certainly provides that iconic visual pop, the soul of the dish actually comes from the reaction between the cocoa, the vinegar, and the dairy.
In the old days, cocoa powder was more acidic, and it would react with buttermilk or vinegar to create a natural reddish tint. Today’s cocoa is processed differently, so we use a little help from the bottle, but that vinegar is still essential for the flavor profile.
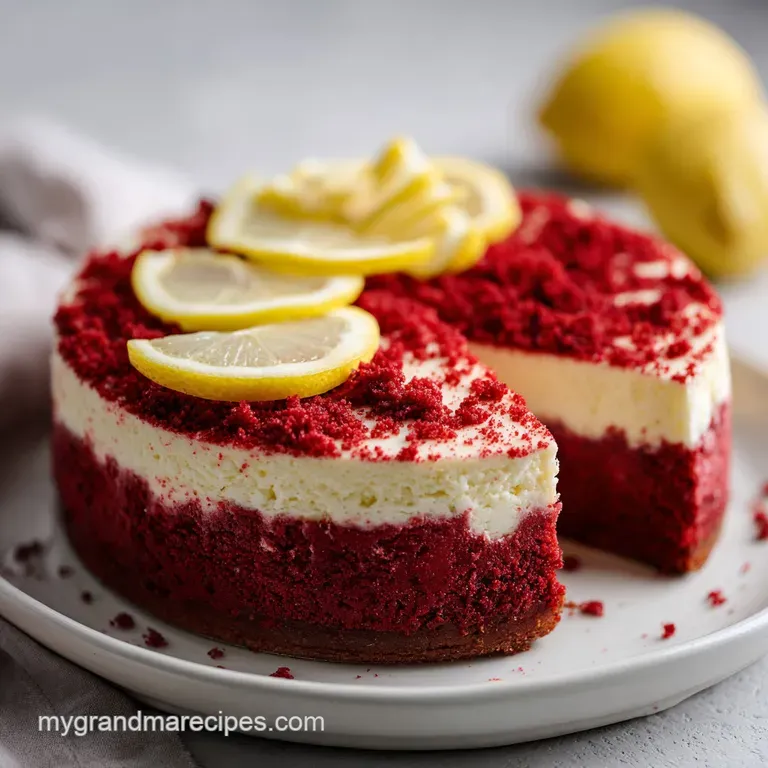
Another tall tale is that you absolutely must use full fat heavy cream to get a creamy result. Trust me, my grandma would disagree. By using Neufchâtel and a bit of Greek yogurt, you actually get a tighter, more stable protein structure. This means your cheesecake won't "slump" when it hits room temperature.
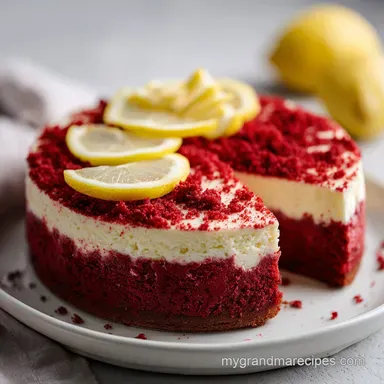
It stays tall, proud, and perfectly sliceable.
Finally, don't believe anyone who tells you a water bath is optional. Without that gentle steam, the edges of your cheesecake will cook much faster than the center, leading to a rubbery ring around a liquid middle. We want a consistent, velvety texture from the very edge of the crust to the dead center.
The water bath acts like a cozy blanket, keeping the temperature steady while the eggs do their magic.
The Secrets Behind a Silky Texture
The key to this recipe's success lies in how we treat the cocoa and the eggs. Most people just toss dry cocoa powder into the batter, which can lead to little bitter clumps and a muted flavor. Instead, we "bloom" the cocoa.
By mixing the 2 tablespoons of unsweetened cocoa powder with a tiny bit of hot water, you essentially wake up the chocolate solids, making the flavor more intense and the color more vibrant without having to add more dry ingredients.
Temperature control is the other secret weapon. If your Neufchâtel is even slightly cold, you'll end up with lumps that no amount of beating can fix. I like to leave my ingredients on the counter for at least two hours.
If you're in a hurry, you can submerge the sealed cream cheese blocks in warm water for 15 minutes. This ensures that when you beat the cheese and the 0.75 cup of sugar together, they create a smooth, airy base that can support the rest of the wet ingredients without breaking.
| Finish Style | Internal Temp | Jiggly Test | Visual Cue |
|---|---|---|---|
| Soft & Creamy | 145°F (63°C) | Center 3" wobbles | Edges are puffed and matte |
| Firm & Dense | 155°F (68°C) | Center 1" wobbles | Top looks dry across the whole surface |
| Overbaked | 165°F+ (74°C) | No wobble at all | Top begins to brown or crack |
The "jiggle" is the most reliable way to tell when your Red Velvet Cheesecake is done. You want the edges to look set and stable, but the very center should move like Jell O when you gently nudge the side of the pan. This is exactly why we turn the oven off and let it sit with the door cracked for an hour.
That carryover heat finishes the cooking process gently, preventing the protein in the eggs from tightening up too fast and causing those dreaded surface cracks.
Deep Dive Into Key Components
Understanding your ingredients is the first step toward becoming a better baker. This isn't just about following a list; it's about knowing what each player brings to the table. When you look at the 24 oz of Neufchâtel cream cheese, realize it’s there for both structure and that signature Southern "twang" that pairs so well with chocolate.
| Ingredient | Science Role | Pro Secret |
|---|---|---|
| Neufchâtel | High protein to fat ratio | Provides a sturdy structure that holds its shape without being greasy. |
| Distilled Vinegar | Color stabilizer | Reacts with the cocoa to deepen the red hue and cuts through the sugar's sweetness. |
| Greek Yogurt | Moisture & Acid | Adds a velvety mouthfeel and replaces the need for heavy cream while providing extra lift. |
| Cocoa Powder | Flavor Foundation | Use "natural" cocoa rather than Dutch processed for a more traditional red velvet flavor profile. |
The interaction between the acid in the vinegar and the proteins in the Neufchâtel creates a very specific crumb. If you're a fan of Southern baking, you might also enjoy the rich textures found in a Cream Cheese Pound Cake recipe, which uses similar principles of fat and air incorporation to achieve a dense but tender bite.
Selecting Your Classic Southern Elements
To get started, you'll need to gather your ingredients. Make sure you're using a high-quality cocoa powder and real vanilla extract. Imitation vanilla just doesn't have the depth to stand up to the cocoa.
- 1.5 cups chocolate wafer crumbs: These provide a much deeper chocolate base than standard graham crackers.
- 3 tbsp granulated sugar: Just enough to sweeten the crust.
- 4 tbsp unsalted butter, melted: Why this? Acts as the "glue" that binds the crumbs into a solid, snappy base. (Substitute: Melted coconut oil for a slightly nuttier finish).
- 1 pinch sea salt: To balance the richness.
- 24 oz low-fat Neufchâtel cream cheese: Why this? Lower fat content makes for a lighter, tangier cheesecake that isn't overly heavy. (Substitute: Regular full fat cream cheese for a denser cake).
- 0.75 cup plain Greek yogurt (2% fat): Why this? Adds a creamy texture and necessary acidity for the "velvet" flavor. (Substitute: low-fat sour cream).
- 0.75 cup granulated sugar: For the filling.
- 2 tbsp unsweetened cocoa powder: The heart of the red velvet flavor.
- 3 large eggs: Room temperature is mandatory for a smooth emulsion.
- 1 tbsp liquid red food coloring: For that classic visual.
- 1 tsp distilled white vinegar: Essential for the traditional flavor and color setting.
- 1 tsp pure vanilla extract: For floral depth.
- 0.5 cup light sour cream: For the topping.
- 1 tbsp maple syrup: Why this? A Southern twist that adds a hint of caramel flavor to the topping. (Substitute: Honey or agave).
Vital Tools for Your Kitchen
You don't need a professional bakery setup, but a few specific tools make the process of making a Red Velvet Cheesecake much smoother. First and foremost is a 9 inch springform pan. This allows you to remove the sides without disturbing the delicate cake.
If you don't have one, a deep dish pie plate can work, but you won't get those beautiful tall sides.
A stand mixer or a sturdy hand mixer is your best friend here. You need to beat the cheese and sugar until they are "smooth and airy," which takes about 3-4 minutes of consistent mixing. Doing this by hand is a workout you probably don't want on a Sunday afternoon.
I also highly recommend heavy duty aluminum foil. Standard foil is often too thin and can tear, leading to water leaking into your crust during the water bath.
Chef's Tip: To ensure a 100% waterproof seal, place your springform pan inside a slow cooker liner or a large silicone cake mold before wrapping it in foil. It's an extra layer of insurance against a soggy crust.
Finally,, a large roasting pan is needed for the water bath. It should be wide enough to hold the 9 inch springform with at least an inch of space all around. If you don't have a roasting pan, a large, deep baking sheet can work in a pinch, but be very careful when moving it in and out of the oven so the water doesn't splash.
Creating the Crimson Batter Stepwise
- Preheat your oven to 325°F (163°C). Combine the 1.5 cups chocolate wafer crumbs, 3 tbsp sugar, 4 tbsp melted butter, and a pinch of salt. Press this firmly into the bottom of your 9 inch springform pan. Note: Use the bottom of a flat measuring cup to get an even, compacted layer.
- In your large bowl, beat the 24 oz of room temperature Neufchâtel and 0.75 cup sugar. Do this for about 3 minutes until the mixture looks like soft clouds.
- Mix in the 0.75 cup Greek yogurt, 1 tsp vinegar, and 1 tsp vanilla extract. Stop the mixer and scrape the sides to ensure no lumps are hiding at the bottom.
- Bloom the 2 tbsp cocoa powder by mixing it with a teaspoon of hot water. Add this dark paste to the batter along with the 1 tbsp of red food coloring. Mix until the color is a uniform, vibrant crimson.
- Add the 3 eggs one at a time. Beat on low speed until the yellow yolk just disappears. Note: Overbeating here adds too much air, which causes the cake to puff up and then collapse.
- Wrap the outside of the pan in heavy duty foil. Place it in the roasting pan and fill the roasting pan with hot water until it reaches halfway up the sides of the cheesecake pan.
- Bake for 1 hour 15 minutes. Check for the "jiggle" in the center before turning off the oven.
- Crack the oven door and let the cake cool in the water bath for one hour. This gradual cooling is vital for a crack free finish.
- Whisk together 0.5 cup light sour cream and 1 tbsp maple syrup. Spread this smoothly over the cooled cake.
- Refrigerate for at least 6 hours (preferably overnight). This allows the fats to solidify and the flavors to fully marry.
Fixing Common Baking Stumbles Easily
Even the most experienced home cooks run into trouble sometimes. If your Red Velvet Cheesecake comes out with a giant crack across the top, don't panic. This usually happens because of a sudden temperature change or overbeating the eggs. The good news? That's exactly what the sour cream topping is for.
It’s the ultimate "baker's eraser."
Why Your Cheesecake Cracked
If you find a crack, it’s often because the cake stuck to the sides of the pan as it cooled and shrunk. Next time, try running a thin knife around the edge of the cake after it has sat in the cracked open oven for 30 minutes.
This releases the tension and allows the cake to settle toward the center.
Dealing With Lumpy Batter
Lumps are almost always caused by cold cream cheese. If you’ve already started mixing and notice "beads" of cheese, stop. Place the bowl over a pot of simmering water (making a double boiler) for 2 minutes while whisking by hand. The gentle heat will soften the lumps without cooking the eggs.
| Problem | Root Cause | Solution |
|---|---|---|
| Soggy Crust | Water leaked through foil | Wrap pan in a slow cooker liner before the foil next time. |
| Grainy Texture | Eggs were overbeaten | Mix eggs on the lowest setting and stop immediately when incorporated. |
| Dull Color | Cocoa wasn't bloomed | Always mix cocoa with hot liquid first to release the pigments and oils. |
Common Mistakes Checklist
- ✓ Leave Neufchâtel and eggs out for 2+ hours (prevents lumps and ensures even mixing)
- ✓ Use hot water for the water bath (starting with cold water messes with the bake time)
- ✓ Don't open the oven door during the first 60 minutes (prevents temperature drops)
- ✓ Let the cake cool completely in the water bath (prevents surface cracking)
- ✓ Use a hot, wet knife for slicing (ensures those clean, professional looking edges)
Adapting for Bars or Special Diets
If you're hosting a larger party and don't want to deal with the fuss of slicing a whole cake, you can easily turn this recipe into red velvet cheesecake bars. Use a 9x13 inch rectangular pan lined with parchment paper. Press the crust into the bottom and bake for 10 minutes.
Pour the batter on top and bake for about 40-45 minutes at the same 325°F. Since the layer is thinner, it sets much faster. Once cooled and chilled, you can lift the whole block out by the parchment and cut it into perfect squares.
For those looking for a different bite sized option, red velvet cheesecake cookies are a fun twist. You can scoop small rounds of the cheesecake batter onto a pre baked chocolate cookie base and bake them in a muffin tin. If you're feeling particularly indulgent, you could even swirl this batter into a batch of Millionaire Shortbread for a truly decadent fusion of caramel and red velvet.
| Original Ingredient | Substitute | Why It Works |
|---|---|---|
| Neufchâtel | Cashew Cream Cheese | Provides a similar tang. Note: Texture will be slightly softer. |
| Chocolate Wafers | gluten-free Oreos | Keeps the chocolate flavor while being safe for gluten sensitivities. |
| Red Food Coloring | Beet Juice Concentrate | Natural alternative. Note: Color will be more "earthy" and less "electric." |
Between the different ways you can serve this, the most important thing is keeping the ratios consistent. If you double the recipe for a massive crowd, work in batches. Overloading a standard stand mixer can prevent proper aeration, leading to a heavy, gummy cake.
Storage and Using Leftover Crumbs
Your Red Velvet Cheesecake will stay fresh in the fridge for up to 5 days. Make sure it’s tightly covered with plastic wrap or stored in an airtight container so it doesn't pick up any "fridge smells" from onions or leftovers. If you have leftovers (lucky you!), this cake actually freezes beautifully.
Wrap individual slices in plastic wrap and then foil. They’ll stay perfect for up to 2 months. To eat, just thaw a slice in the fridge for a few hours.
Don't toss those leftover chocolate wafer crumbs! If you have a few tablespoons left over from the crust, they make an excellent "dirt" topping for the sour cream layer. You can also mix them into softened vanilla ice cream for a quick treat.
If you have extra batter that didn't fit in the pan, bake it in a small ramekin alongside the main cake for a "chef's snack" to enjoy while you wait for the big one to chill.
Serving Tips and Beverage Pairings
When it's time to serve, presentation is everything. I love to garnish each slice with a few fresh raspberries or a sprig of mint to contrast the deep red of the cake. For the cleanest slices, dip a long, sharp knife into a tall glass of hot water, wipe it dry, make one cut, and repeat.
It sounds like a lot of work, but the "shatter" of the crust and the "velvety" smooth face of the filling are worth the effort.
In terms of pairings, a strong, dark roast coffee is the classic choice. The bitterness of the coffee perfectly balances the sweet and tangy notes of the Neufchâtel. If you’re serving this at a celebration, a glass of cold milk or even a slightly sweet sparkling rosé works wonderfully.
The bubbles in the wine help cleanse the palate after each rich, creamy bite.
If you enjoy this flavor profile, you might find that a No Bake Oreo Cheesecake satisfies that chocolate and cream craving on days when you don't want to turn the oven on. But for those special Sundays in Tennessee, nothing beats the slow baked, bloomed cocoa goodness of a true Red Velvet. Enjoy every bite, and don't forget to share a slice with a neighbor it’s the Southern way!

Recipe FAQs
Is it true the cream cheese must be at room temperature?
Yes, this is essential. Using room temperature Neufchâtel cream cheese and eggs prevents lumps in your batter and ensures a smooth, silky texture that won't crack during baking.
How to ensure the cheesecake doesn't crack?
Cool the cheesecake slowly inside the oven. After baking for 1 hour 15 minutes, turn the oven off and crack the door to let it sit in the water bath for one hour before removing it.
Can I speed up the baking process by increasing the oven temperature?
No, avoid higher temperatures. The recipe specifically requires 325°F to ensure the custard sets evenly without curdling. If you enjoyed the patience required for this slow bake process, see how we apply similar timing logic in our Chocolate Crack Pie.
How to get clean slices when serving?
Dip your knife in hot water and wipe it clean between every single slice. This prevents the cream cheese filling from dragging or sticking to the blade, giving you perfect edges every time.
Is it necessary to bloom the cocoa powder with hot water?
Yes, it releases the oils in the cocoa. This simple step intensifies the chocolate flavor and ensures the powder incorporates smoothly into the batter without leaving any gritty clumps.
Should I open the oven door to check on the cheesecake?
No, keep the door closed for the first 60 minutes. Opening the door early causes temperature drops that can ruin the rise and structure of your cheesecake.
How to store leftovers?
Keep it in an airtight container in the refrigerator for up to 5 days. For longer storage, wrap individual slices in plastic wrap and foil to freeze them for up to 2 months.
Homemade Red Velvet Cheesecake
Ingredients:
Instructions:
Nutrition Facts:
| Calories | 348 kcal |
|---|---|
| Protein | 8.9 g |
| Fat | 19.8 g |
| Carbs | 28.7 g |
| Fiber | 0.8 g |
| Sugar | 18.2 g |
| Sodium | 342 mg |
