Easy Homemade Cinnamon Rolls
- Time: Active 25 mins, Passive 1 hours 40 mins, Total 2 hours 5 mins
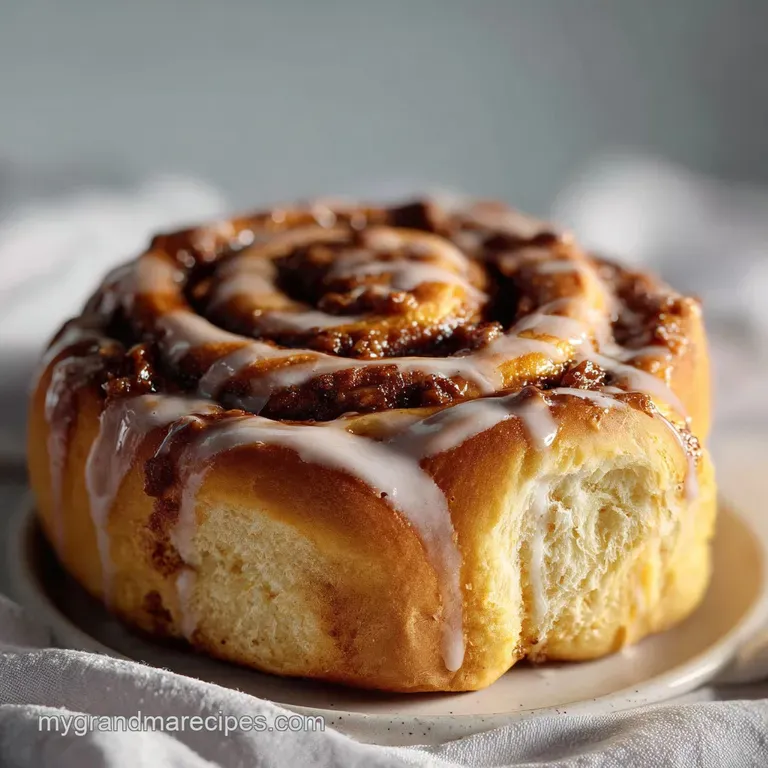
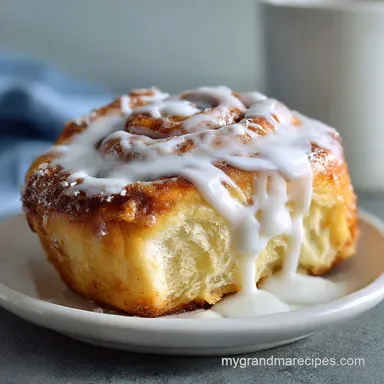
- Flavor/Texture Hook: Velvety crumb with buttery spirals
- Perfect for: Lazy Sunday brunch or beginner bakers
- Making Fluffy Homemade Cinnamon Rolls
- The Heavy Cream Steam Trick
- Essential Recipe Numbers
- High Impact Ingredients
- Modern Kitchen Essentials
- Step by Step Method
- Fixing Common Baking Errors
- Smart Recipe Swaps
- Preserving That Fresh Texture
- Ideal Serving Ideas
- Debunking Baking Myths
- Recipe FAQs
- 📝 Recipe Card
Making Fluffy Homemade Cinnamon Rolls
The air in my kitchen currently smells like a warm hug, thanks to a tray of yeast risen dough and spicy cinnamon sugar. I used to be terrified of yeast - I thought one wrong move would result in a pan of sweet hockey pucks, and honestly, my first three attempts were exactly that.
I once tried to rush the rise by putting the dough near a heater, and I ended up with a melted, oily mess that never quite recovered.
But then I learned the secret of patience and the specific "soak" method that completely changed my baking game. This recipe is designed to be approachable even if you have never touched a rolling pin before.
We are going for that specific texture where the center of the roll is almost like a custard, while the outer layers remain light and airy.
We are going to skip the complex professional techniques and focus on what actually works in a normal, busy kitchen. You do not need a fancy proofing box or expensive specialized flour to get these results. We will use simple pantry staples to create something that looks like it came from a high end bakery.
The Heavy Cream Steam Trick
The Steam Mechanism: Pouring heavy cream over the rolls before they hit the oven creates a localized steam environment that forces the dough to expand rapidly. This prevents the outer crust from setting too early, ensuring the centers stay velvety rather than browning into a hard shell.
Chef Tip: Use a piece of unflavored dental floss to "cut" your rolls instead of a knife. Simply slide the floss under the log, cross it over the top, and pull quickly - it prevents the dough from squishing and keeps those spirals beautiful.
| Method | Total Time | Texture | Best For |
|---|---|---|---|
| Standard Oven | 2 hours 5 mins | Plush and airy | Maximum fluffiness |
| Stovetop (Skillet) | 1 hours 50 mins | Crispy bottom | Smaller batches |
| Overnight Cold Rise | 12 hours | Deep flavor | Stress free mornings |
The choice of method usually depends on how much time you have, but for the most consistent rise, the oven is your best friend. If you are looking for other sweet treats to add to your brunch spread, you might love my Peach Tartlets Recipe which uses a similar fruit forward sweetness.
Essential Recipe Numbers
| Ingredient | Science Role | Pro Secret |
|---|---|---|
| Whole Milk | Softens the crumb | Keep it at 110°F to wake yeast without killing it. |
| Active Dry Yeast | Carbon dioxide producer | If it does not foam in 10 minutes, toss it and start over. |
| Heavy Cream | Moisture barrier | Pouring this cold over warm dough is the secret to gooeyness. |
High Impact Ingredients
- Whole Milk (1 cup): Full fat is necessary here for the fat content that tenderizes the gluten. Why this? Provides the liquid base and fat for a soft, supple dough.
- Substitute: 2% milk works, but the crumb will be slightly less rich.
- Active Dry Yeast (1 packet): This is our leavening agent. Why this? Offers a reliable rise and that classic bakery aroma.
- Substitute: Instant yeast (use same amount, but skip the 10 minute foaming step).
- All Purpose Flour (4 cups): Gives the rolls structure without being too chewy. Why this? More accessible and cheaper than bread flour while still providing enough protein.
- Substitute: Bread flour, but add 2 extra tablespoons of milk to compensate for absorption.
- Heavy Cream (1/3 cup): This is poured over the rolls just before baking. Why this? It creates the signature "Cinnabon" style gooey texture.
- Substitute: Half and half, though it will be slightly less decadent.
- Cream Cheese (4 oz): The base for our velvety icing. Why this? The tang balances the intense sugar in the filling.
- Substitute: Greek yogurt (thickened) for a sharper, lighter glaze.
Modern Kitchen Essentials
You will want a large mixing bowl and a sturdy whisk for the initial dough stage. A stand mixer is great if you have one, but I usually just use my hands because I like to feel when the dough becomes elastic.
A 9x13 inch baking pan is the standard size here, which fits all 12 rolls perfectly so they can lean on each other for support while rising.
step-by-step Method

- Warm the milk. Heat 1 cup whole milk to exactly 110°F. Note: Too hot and you will kill the yeast; too cold and it won't wake up.
- Bloom the yeast. Stir in 1 packet active dry yeast and 1/4 cup granulated sugar. Wait 10 mins until it looks like bubbly foam.
- Mix the fats. Add 1/3 cup melted butter and 1 large egg. Whisk until the yellow yolk disappears.
- Incorporate the flour. Fold in 4 cups flour and 1 tsp sea salt. Stir until a shaggy ball forms.
- Knead the dough. Work the dough for 5 to 7 minutes. Stop when it feels smooth and bounces back when poked.
- First rise. Place in a greased bowl and cover. Wait 1 hour until it doubles in size.
- Roll and fill. Roll dough into a 12x18 inch rectangle. Spread 1/2 cup softened butter, then sprinkle 1 cup brown sugar and 2.5 tbsp cinnamon.
- Cut the rolls. Roll into a log and cut into 12 pieces using dental floss. Arrange in the pan without crowding too much.
- Second rise and soak. Let rise for 30 minutes. Pour 1/3 cup heavy cream over the tops. Bake 25 mins until golden and fragrant.
- Glaze them. Whisk cream cheese, butter, powdered sugar, vanilla, and milk. Spread over the rolls while they are still warm.
Fixing Common Baking Errors
Why Your Dough Never Rose
If your dough stays flat and dense, your yeast was likely expired or the milk was too hot. Yeast is a living organism, so treat it gently. Always check the expiration date on the packet before you even start the oven.
Why Your Rolls Are Hard
Over baking is the usual culprit for a dry, hard roll. The rolls should look pale gold, not deep brown. The heavy cream soak helps prevent this, but you still need to pull them out the moment they look set in the center.
| Problem | Root Cause | Solution |
|---|---|---|
| Filling leaks out | Butter was too melted | Use "room temp" butter that holds its shape. |
| Centers pop up | Rolled too tight | Leave a little breathing room when rolling the log. |
| Frosting melts off | Rolls were too hot | Wait 10 minutes before applying the cream cheese glaze. |
Common Mistakes Checklist
- ✓ Check yeast freshness by letting it foam for a full 10 minutes before adding flour.
- ✓ Measure flour using the "spoon and level" method to avoid packing too much into the cup.
- ✓ Ensure the egg is at room temperature so it does not seize the melted butter.
- ✓ Don't skip the second rise in the pan; this is where the airy texture is born.
- ✓ Pour the heavy cream carefully so it gets into the crevices between the rolls.
Smart Recipe Swaps
If you find yourself short on time or ingredients, do not worry. This recipe is flexible. For instance, if you want a quicker project, you could look into an Easy Cinnamon Rolls Recipe with ready-made Pastry style approach, though the texture will be more flaky than pillowy.
| Original Ingredient | Substitute | Why It Works |
|---|---|---|
| Brown Sugar | Coconut Sugar | Similar caramel notes but slightly less sweet. |
| Butter | Margarine | High fat content maintains the structure. Note: Flavor is less rich. |
| Cream Cheese | Mascarpone | Provides a much silkier, less tangy finish to the icing. |
For a similar vibe with less prep, I often make my Cranberry Bread Recipe when I want that sweet, bready comfort but don't want to deal with rolling dough.
Preserving That Fresh Texture
Storage: Keep these in an airtight container at room temperature for up to 2 days. If you want them to last longer, the fridge will keep them for 5 days, but they must be reheated to restore the softness.
Freezing: You can freeze the baked rolls (unfrosted) for up to 3 months. Wrap them tightly in plastic wrap and then foil. To serve, thaw overnight and warm in the oven at 300°F before glazing.
Zero Waste: If you have leftover frosting, save it! It is incredible spread on toast or used as a dip for apple slices. Any stale rolls can be chopped up and turned into the most luxurious French toast casserole you have ever tasted.
Ideal Serving Ideas
These rolls are a powerhouse on their own, but they play well with others. A sharp, acidic coffee is the best way to cut through the heavy sugar and fat. If you are hosting a full brunch, serve these alongside a savory protein like thick cut bacon or a veggie frittata to balance the sweetness.
For the kids (or the kids at heart), I love serving these with a side of fresh fruit. It makes the whole meal feel a bit lighter. If you are really feeling decadent, a small bowl of extra glaze on the side for dipping never hurt anyone. They are best served warm, just minutes after the icing has been swirled on.
Debunking Baking Myths
Myth: You must use bread flour for "real" cinnamon rolls. Truth: All purpose flour actually creates a more tender, melt in-your mouth crumb. Bread flour has more protein, which can make the rolls slightly too chewy or "bready" for this specific gooey style.
Myth: Salt kills yeast instantly. Truth: While high concentrations of salt can inhibit yeast, the small amount in this recipe is vital for controlling the rise and enhancing the flavor of the dough. Just avoid pouring the salt directly onto the dry yeast pile.
Myth: The "windowpane test" is required for success. Truth: While the windowpane test (stretching dough until translucent) is a great tool, for enriched doughs like this, simply kneading until the dough is smooth and slightly tacky is more than enough for a beautiful rise.

Recipe FAQs
What is the secret to the best cinnamon rolls?
Pouring heavy cream over the rolls before baking. This creates a localized steam environment that keeps the centers incredibly moist and gooey while the tops set.
What does pouring cream on cinnamon rolls before baking do?
It guarantees a velvety, custard like interior. The cold cream hitting the hot dough creates immediate steam, slowing down the crust formation so the inside cooks slowly and stays moist.
What are the common cinnamon roll mistakes?
Overbaking and using water that is too hot for the yeast. Overbaking dries out the crumb immediately, turning it hard, while water over 120°F will kill the yeast, preventing any rise.
How do I get the filling to stay put when I roll the dough?
Ensure your butter spread is softened to room temperature, not fully melted. If the butter is too liquid, it soaks into the dough immediately instead of acting as an adhesive for the sugar and spice mixture.
Is it true I must use a stand mixer to achieve fluffy dough?
No, this is a common misconception. You can achieve the necessary elasticity by hand kneading for 5 to 7 minutes until the dough feels smooth and passes the poke test.
What makes canned cinnamon rolls better than homemade?
Nothing, commercially canned rolls prioritize shelf stability over texture. They contain preservatives and stabilizers that prevent the rich, airy texture achievable through fresh yeast activation, which is the same delicate process we use when handling dough for our Pizza Dough Recipe.
How to achieve that perfect thick cream cheese icing that doesn't melt off?
Wait 10 minutes after removing the rolls from the oven before icing them. Apply the glaze when the rolls are still warm, but not piping hot, which allows the icing to melt just enough to spread evenly without completely dissolving into the pastry.
Easy Homemade Cinnamon Rolls
Ingredients:
Instructions:
Nutrition Facts:
| Calories | 512 kcal |
|---|---|
| Protein | 6.8 g |
| Fat | 24.2 g |
| Carbs | 69 g |
| Fiber | 1.9 g |
| Sugar | 38 g |
| Sodium | 235 mg |
