Basic Homemade Bread Recipe: Soft Sandwich Loaf
- Time: Active 20 mins, Passive 2 hours 30 mins, Total 2 hours 50 mins
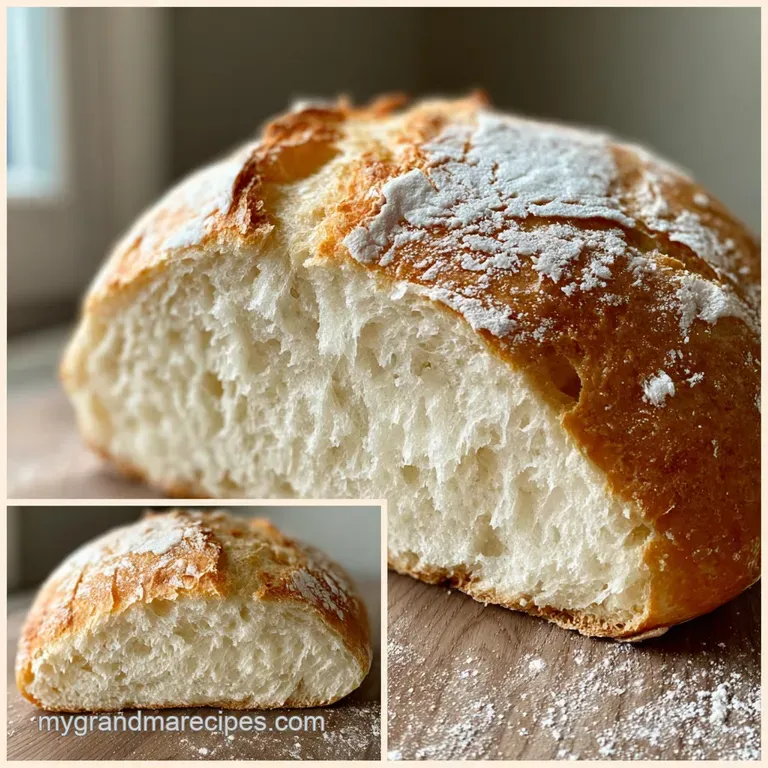
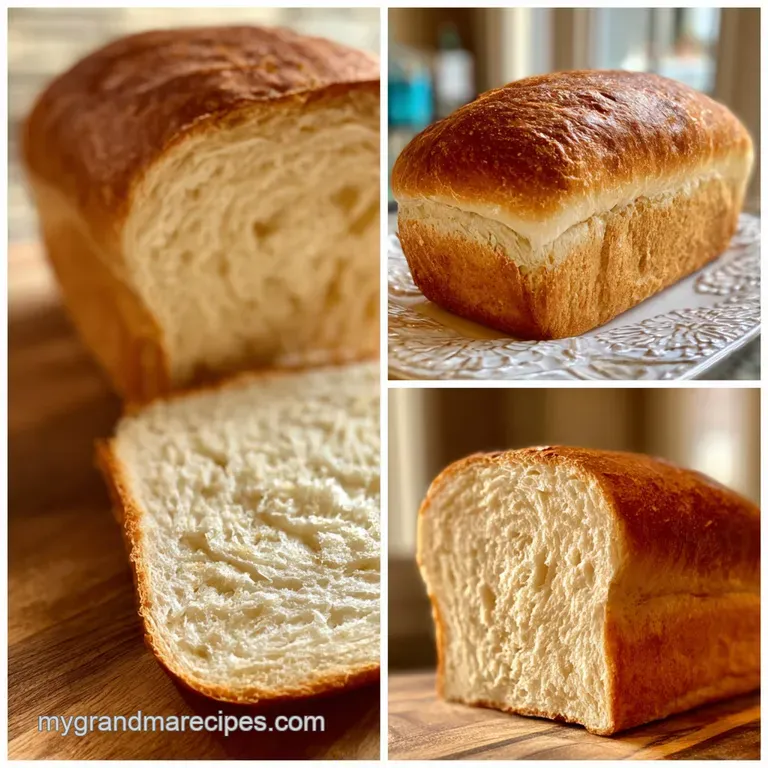
- Flavor/Texture Hook: Fluffy, cloud like interior with a golden, buttery crust
- Perfect for: Beginner bakers or weekend meal prep for sandwiches
- The Chemistry of the Golden Rise
- Essential Ingredients for Your Best Loaf
- Simple Tools for Beginner Bread Bakers
- Step-by-Step Instructions for Your First Loaf
- Solving Common Bread Baking Dough Disasters
- Simple Adjustments for Special Dietary Needs
- Storing Your Bread and Using Scraps
- Serving Suggestions for Warm Homemade Slices
- Common Baking Myths Debunked
- Basic Homemade Bread Recipe FAQs
- 📝 Recipe Card
The Chemistry of the Golden Rise
Understanding the "how" makes you a better baker instantly. Bread is essentially a controlled chemical reaction where we manage living organisms and protein structures.
- Fermentation Fuel: The granulated sugar provides immediate energy for the yeast, allowing it to produce CO2 quickly for a better lift.
- Gluten Network: Kneading aligns the proteins in the all purpose flour, creating a stretchy "net" that traps air bubbles.
- Fat Lubrication: The softened butter coats the gluten strands, which prevents them from becoming too tough and results in a silky, velvety crumb.
Right then, let's look at how the vessel you choose changes your outcome. Some people love a classic loaf tin, while others swear by a heavy pot. If you love the comfort of fresh baking but want something faster for breakfast later this week, you might also like my Homemade Biscuits Recipe for those mornings when you're in a rush.
| Baking Method | Texture Outcome | Heat Retention | Best For |
|---|---|---|---|
| Standard Loaf Tin | Soft, uniform sides | Medium | Classic sandwich slices |
| Dutch Oven | Thick, shatter crisp crust | Very High | Artisan style rounds |
| Baking Sheet | Slightly flatter, rustic | Low | Focaccia or free form loaves |
Choosing the right method depends on your mood, but for this specific basic homemade bread recipe, a standard 9x5 loaf tin is our best friend for that iconic shape.
Essential Ingredients for Your Best Loaf
The beauty of this loaf is the simplicity. You likely have everything in your cupboard right now, but the quality of these few items really dictates the final texture.
| Component | Science Role | Pro Secret |
|---|---|---|
| Active Dry Yeast | Leavening agent | Always "bloom" in water first to ensure it's still alive. |
| All Purpose Flour | Structural base | Weigh your flour if possible; "scooping" often packs too much in. |
| Warm Water | Yeast activator | Keep it between 105°F and 115°F to avoid killing the yeast. |
| Sea Salt | Flavor & control | Salt slows yeast down, preventing the bread from over rising and collapsing. |
I've tested various brands, and while a high-quality unbleached flour is great, your standard supermarket all purpose flour works perfectly here. Just make sure your yeast isn't expired!
The Ingredient List: 1 cup warm water (105°F–115°F) Why this? Essential for waking up the dormant yeast safely. 1.5 tsp active dry yeast (Substitute: 1.25 tsp Instant yeast, skip the bloom step) 1 tbsp granulated sugar
Why this? Feeds the yeast and helps with crust browning. 3 cups all purpose flour (Substitute: Bread flour for a chewier, heartier texture) 1 tsp fine sea salt Why this? Enhances flavor and regulates the fermentation process. 2 tbsp unsalted butter,
softened (Substitute: 2 tbsp Margarine or vegan butter) 1 tbsp neutral oil Why this? Used only to grease the bowl for rising.
Chef's Tip: If you don't have a thermometer, the water should feel like lukewarm bath water on the inside of your wrist. If it's too hot for you, it's too hot for the yeast!
Simple Tools for Beginner Bread Bakers
You don't need a high tech kitchen to master a basic homemade bread recipe. In fact, doing it by hand helps you learn the "feel" of the dough, which is a skill you'll keep forever.
- Large Mixing Bowl: Glass or ceramic is great as it holds heat well during the rise.
- Measuring Cups: Or a digital scale for much better accuracy.
- 9x5 inch Loaf Pan: The standard size for a tall, proud loaf.
- Pastry Brush: For that final butter swipe that makes the crust shimmer.
- Whisk or Fork: To combine the dry ingredients before the heavy lifting starts.
While a stand mixer (such as a KitchenAid) makes kneading a breeze, I honestly recommend kneading by hand for your first few tries. You'll feel the dough transform from a sticky mess into a smooth, elastic ball, and that's the most satisfying part of the process.
step-by-step Instructions for Your First Loaf
Let's get cooking! This timeline allows for plenty of resting, so don't feel rushed. The dough needs time to develop its personality.
- Bloom the yeast. Mix 1 cup warm water (105°F-115°F), 1.5 tsp yeast, and 1 tbsp sugar in a small bowl. Note: Wait 5-10 mins until it becomes bubbly and frothy.
- Combine dry ingredients. Whisk 3 cups flour and 1 tsp salt in your large mixing bowl.
- Integrate the fats. Add the 2 tbsp softened butter to the flour, rubbing it in with your fingers until crumbly.
- Form the dough. Pour the yeast mixture into the flour and stir with a wooden spoon until a shaggy ball forms.
- Knead the dough. Turn dough onto a floured surface and knead for 8-10 mins until smooth, elastic, and no longer sticky.
- First rise. Place dough in a bowl greased with 1 tbsp oil, cover with a damp cloth, and let sit for 1 hour 30 mins until doubled in size.
- Shape the loaf. Punch down the dough gently, roll into a rectangle, and roll it up tightly like a sleeping bag.
- Second rise. Place in a greased loaf pan, cover, and let rise for 45 mins until the dough peaks above the rim.
- Bake the bread. Bake at 375°F for 30 mins until the top is deep golden brown.
- Cool and brush. Remove from the oven and immediately brush the top with a little extra butter until it looks glossy and soft.
Chef's Tip: To check if it's done, tap the bottom of the loaf with your thumb. It should sound hollow, like a small drum. If it sounds thuddy, give it 5 more minutes.
Solving Common Bread Baking Dough Disasters
Even with a basic homemade bread recipe, things can go sideways. The good news? Most bread mistakes are still edible as toast!
The "Brick" Loaf (Too Dense)
If your bread feels heavy and hasn't risen much, it’s usually a temperature issue. Either the water was too hot and killed the yeast, or your kitchen was too cold during the rise. Try letting your dough rise inside an oven that is turned off but has the light on that light bulb provides just enough heat.
The Collapsed Top
Did your beautiful loaf deflate the moment you put it in the oven? This usually means it "over proofed." The yeast ran out of gas because it rose too long before baking. Next time, keep a closer eye on that second rise and get it in the oven as soon as it clears the pan rim.
Thick, Leathery Crust
A crust that’s too tough usually happens if the oven temperature is too low or if you didn't add fat to the dough. The 2 tbsp of butter in this recipe are key to keeping that crust thin and manageable.
| Problem | Root Cause | Solution |
|---|---|---|
| Huge air pocket at the top | Loose shaping | Roll the dough tighter during the shaping step. |
| Crumb is too crumbly | Not enough kneading | Knead for the full 8-10 mins to build gluten strength. |
| Dough won't rise | Dead yeast | Check the expiration date and ensure water is 105°F-115°F. |
Common Mistakes Checklist: ✓ Check your yeast "bloom" if it's not bubbly after 10 minutes, start over. ✓ Use the "poke test" if you poke the dough and it springs back slowly, it's ready.
✓ Never skip the second rise; this is what creates the light, airy texture. ✓ Let the bread cool for at least 20 minutes before slicing to prevent gumminess.
Simple Adjustments for Special Dietary Needs
If you have specific needs or want to experiment with the flavor profile of your basic homemade bread recipe, it is very easy to swap things around.
Vegan Transformation
This recipe is very easy to make plant based. Simply swap the 2 tbsp of unsalted butter for a high-quality vegan butter stick or even 2 tbsp of coconut oil (solid state). The neutral oil used for greasing is already vegan friendly.
The texture remains remarkably similar, though coconut oil will add a very subtle nutty aroma.
Honey Whole Wheat Twist
If you want a bit more fiber, you can replace 1 cup of the all purpose flour with whole wheat flour. You may need to add 1 extra tablespoon of water, as whole wheat is thirstier. Swap the granulated sugar for 1 tbsp of honey for that classic brown bread flavor profile.
If you are looking for other fun swaps, consider these budget friendly alternatives to keep your baking costs down.
| Premium Ingredient | Budget Alternative | Flavor Impact | Savings |
|---|---|---|---|
| Name brand Flour | Store brand AP Flour | Negligible in simple loaves | $2.00 per bag |
| Honey | Granulated Sugar | Less floral, same rise | $0.15 per batch |
| European Butter | Margarine | Less rich, still very soft | $0.50 per batch |
Storing Your Bread and Using Scraps
Homemade bread doesn't have the preservatives of the plastic wrapped store stuff, so it has a shorter shelf life. But honestly, it rarely lasts more than two days in my house anyway!
- Room Temperature
- Store in a paper bag or a bread box for up to 3 days. Avoid plastic bags if you want to keep the crust from getting soggy.
- Freezing
- This bread freezes beautifully. Slice it first, then wrap it tightly in foil and place in a freezer bag for up to 3 months. You can toast slices directly from frozen!
- Reheating
- A quick 10 seconds in the microwave or a few minutes in a low oven (300°F) will bring back that "just baked" softness.
Zero Waste Tips: Don't you dare throw away those end pieces or stale heels! Stale homemade bread makes the absolute best French toast because it absorbs the custard without falling apart. You can also pulse dried out pieces in a blender for the most incredible, crunchy breadcrumbs you've ever had.
If you have extra crusts, toss them with olive oil and garlic salt and bake them at 350°F for the ultimate homemade croutons.
Serving Suggestions for Warm Homemade Slices
Now for the best part eating it. While a thick slab of butter is the gold standard, this basic homemade bread recipe is a versatile canvas.
Artisan Toast (Better Than Dining Out)
Toast a thick slice and top it with smashed avocado, a squeeze of lemon, and a pinch of chili flakes. Because this bread is sturdier than store-bought, it holds up to heavy toppings without bending.
The Perfect Soup Dipper
There is nothing quite like dipping a warm, crusty piece of bread into a bowl of soup. This loaf is the ideal companion for a Homemade Tomato Soup Recipe because the soft crumb soaks up the broth perfectly.
Common Baking Myths Debunked
Let's clear the air on a few things that often scare off new bakers.
- Myth: You must have a warm kitchen to bake bread. Truth: While warmth speeds things up, dough will rise in a cool kitchen it just takes longer. Cold fermentation actually develops more flavor!
- Myth: Kneading by hand is impossible to get right. Truth: It is actually harder to over knead by hand than it is with a machine. Your arms will get tired long before the gluten gets ruined.
- Myth: Sugar is only for flavor. Truth: Sugar is a functional ingredient here. It softens the crumb and provides the "food" the yeast needs to produce that initial burst of CO2.
You've got this! Baking your own bread is one of the most rewarding things you can do in a kitchen. It's tactile, it's therapeutic, and the reward is literally the best thing since... well, sliced bread. Let me know how your first loaf turns out!

Basic Homemade Bread Recipe FAQs
What are the basic ingredients in bread making?
Flour, water, yeast, and salt are the essentials. The flour provides structure, water hydrates the proteins, yeast produces gas for lift, and salt controls the rate of fermentation and adds flavor.
What is 3 ingredient bread?
Yes, this usually refers to self rising flour, yogurt, and salt. This quick bread relies on the baking powder already present in the self rising flour for leavening instead of commercial yeast.
What is a 2 ingredient dough?
Typically, this is Greek yogurt mixed with self rising flour. The combination creates a dough that is soft, slightly tangy, and requires no yeast; it's great for quick bagels or flatbreads, similar to the principles used in our Easy Pizza Dough Recipe.
What are the five ingredients to make bread?
The five standard ingredients are flour, water, yeast, salt, and a sweetener like sugar or honey. The fifth ingredient is added to feed the yeast initially and help with browning the final crust.
Why is my bread dough not rising as expected?
The most common cause is the water temperature being too hot, which kills the yeast. Check that your water is between 105°F and 115°F, or ensure your kitchen isn't too cold during the proofing time.
How to get a shiny, soft crust on homemade sandwich bread?
Brush the top of the loaf with melted butter immediately after it comes out of the oven. The heat melts the butter, which soaks in slightly and prevents the crust from hardening too quickly, resulting in that glossy finish.
Is it true that I must knead bread dough for exactly 10 minutes?
No, the time is a guideline based on hand kneading speed, not a strict rule. You should knead until the dough becomes smooth, elastic, and passes the windowpane test, which indicates the gluten structure is fully developed.
Basic Homemade Bread Recipe

Ingredients:
Instructions:
Nutrition Facts:
| Calories | 146 kcal |
|---|---|
| Protein | 3.4 g |
| Fat | 3.4 g |
| Carbs | 25 g |
| Fiber | 0.8 g |
| Sugar | 1 g |
| Sodium | 197 mg |
