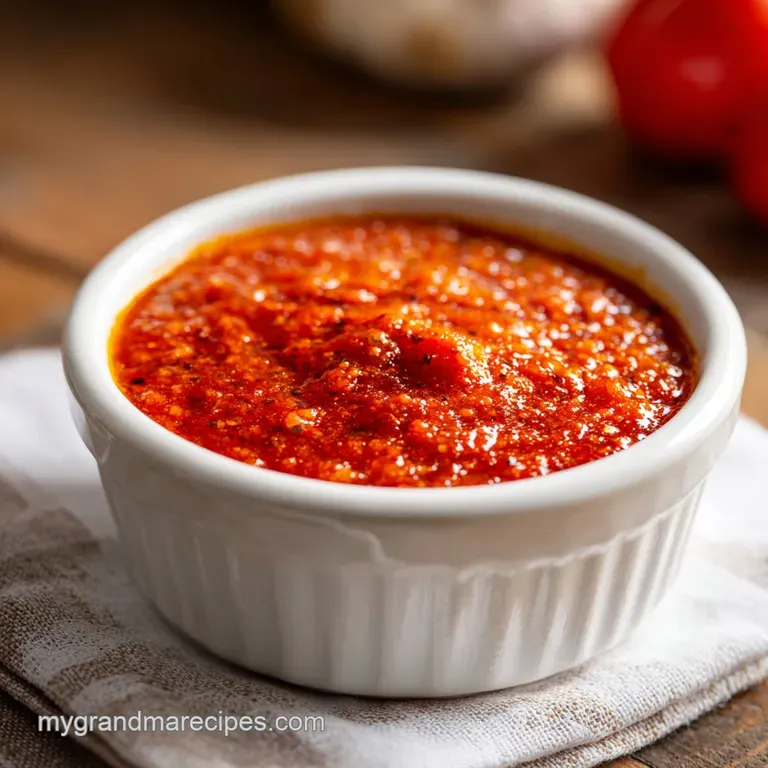
Authentic Red Chile Sauce
- Time: Active 10 minutes, Passive 20 minutes, Total 30 minutes
- Flavor/Texture Hook: Earthy, smoky, and mahogany hued with a velvety finish
- Perfect for: Authentic enchiladas, wet burritos, or a morning chilaquiles spread
- What to Expect from This Bold Recipe
- Choosing the Best Dried Pods for Flavor
- Simple Tools for a Velvety Smooth Texture
- A Step-by-Step Guide to Perfect Sauce
- Common Mistakes and How to Avoid Them
- Easy Ways to Customize Your Flavor Profile
- Best Methods for Saving and Heating Leftovers
- What to Serve with Your Homemade Sauce
- Recipe FAQs
- 📝 Recipe Card
¡Hola! Listen, if you’ve been buying that red sauce in a can or, heaven forbid, mixing a packet of "taco seasoning" with water and calling it sauce, we need to have a serious heart to heart.
Forget everything you think you know about red sauce being just "spicy tomato water." Authentic red chile sauce the kind that makes your kitchen smell like a sun drenched plaza in Santa Fe doesn't have a single tomato in it. It’s all about the pods.
I remember the first time I tried to make this without my abuela watching over my shoulder. I thought I could skip the toasting step because, honestly, who has the time? Big mistake. The sauce tasted flat, almost raw, like I was eating wet cardboard.
But when you take those 60 seconds to let the pods hit a hot skillet, the whole game changes. The kitchen fills with this intoxicating, toasty aroma that's half chocolate, half tobacco, and entirely soul warming.
We’re going to use real dried New Mexico pods here. They have this leathery, dusty skin that feels like history in your hands. When you rehydrate them, they transform into a vibrant, silky purée that clings to a spoon.
It's a labor of love that actually only takes 30 minutes, but the flavor tastes like it’s been simmering since the dawn of time. Let’s get into how we make this liquid gold happen without the bitterness that plagues so many beginner batches.
What to Expect from This Bold Recipe
Before we pick up a single knife, let's talk about why this specific method is the one you'll keep in your back pocket forever. Most people think the secret is in the spices, but it’s actually in the "fry." We aren't just boiling a sauce; we are frying the purée in oil to stabilize the flavors.
It’s a technique that bridges the gap between a simple salsa and a complex mole.
Why the Sauce Deepens in ColorFat Soluble Bloom: Simmering the purée in 2 tablespoons of neutral oil helps the chile's pigments and flavor compounds dissolve, resulting in a richer mahogany color.
Maillard Magic: The over high heat contact with oil in the saucepan caramelizes the trace sugars found in the 100g of dried pods, removing the "raw" vegetal taste.
When you see that sauce hit the hot oil and hear that aggressive sizzle, don't panic. That’s the sound of flavor being locked in. The oil coats the tiny particles of chile skin that made it through the blender, making the final result feel velvety on the tongue rather than gritty.
| Servings | Pod Weight | Broth Amount | Best Use |
|---|---|---|---|
| 2 people | 35g (approx 4-5 pods) | 0.75 cups | Breakfast tacos or single omelet |
| 6 people | 100g (12-15 pods) | 2 cups | Standard tray of enchiladas |
| 12 people | 200g (25-30 pods) | 4 cups | Large batch of tamales or party dip |
If you're in the mood for a different kind of red sauce that’s more Italian leaning, you should check out this Pizzaiola Sauce Recipe. It’s a great example of how different cultures use heat and aromatics to achieve totally different "red" results. While this chile sauce is earthy and smoky, a Pizzaiola is bright and herb forward.
Choosing the Best Dried Pods for Flavor
The soul of this dish is the 100g of dried New Mexico red chile pods. When you're at the market, don't just grab the first bag you see. You want pods that are still slightly pliable, like a piece of good leather.
If they shatter the moment you touch them, they’re likely too old and will have a dusty, muted flavor. Look for a deep, dark crimson color almost like a black cherry.
In addition to the chiles, we are using 2 cups of low sodium broth. I usually lean toward chicken broth for that savory backbone, but vegetable broth works perfectly if you’re keeping things plant based. The garlic needs to be fresh three cloves, smashed to release those oils.
Don't use the pre minced stuff in a jar; it has a weird metallic aftertaste that will ruin the purity of the chiles.
| Ingredient | Science Role | Pro Secret |
|---|---|---|
| Dried Chile Pods | Flavor and Body | Remove every single seed; seeds contain "pith" which is where the bitter heat hides. |
| Neutral Oil | Heat Transfer | Frying the purée "fixes" the flavor, preventing that "raw" dried fruit taste. |
| Apple Cider Vinegar | Acid Balance | A tiny splash at the end brightens the heavy, earthy notes of the cumin and oregano. |
The choice of oil matters too. Use 2 tablespoons of something with a high smoke point like avocado or grapeseed oil. You want the oil hot enough to shimmer but not smoke before the sauce hits the pan. This ensures the "fry" happens instantly, creating that beautiful mahogany finish we’re after.
Simple Tools for a Velvety Smooth Texture
You don't need a professional kitchen, but a high speed blender is your best friend here. If you have a Vitamix or a Ninja, you’ll get a much smoother purée. If you're using a standard older blender, you’ll just need to be more diligent with the straining step.
Speaking of straining, a fine mesh sieve is non negotiable. Even the best blender in the world will leave behind tiny bits of leathery skin that can feel like plastic in your mouth.
You’ll also want a sturdy pair of kitchen scissors. Trying to deseed 15 pods with a knife is a recipe for frustration (and stained fingers). Snipping the tops off and sliding the scissors down the side is ten times faster. I also recommend a splatter screen for the frying stage.
When that water based purée hits the hot oil, it’s going to jump.
Chef's Tip: Wear gloves! I once made the mistake of deseeding a whole bag of chiles and then forgot to wash my hands before taking out my contact lenses. Trust me, you only make that mistake once.
If you don't have gloves, rub your hands with a little bit of oil before starting; it acts as a barrier against the capsaicin.
While we're talking about bold, punchy glazes and sauces, you might also like the sticky sweetness of a Huli Huli Chicken Sauce. It uses a different kind of heat and sugar balance, but it shows how a good sauce can completely carry a meal.
A step-by-step Guide to Perfect Sauce

- Wipe the 100g of dried chile pods with a damp cloth to remove any field dust. Use scissors to remove the stems and seeds, then slit each pod lengthwise.
- Heat a skillet over medium heat. Toast the pods for 30 60 seconds per side. Wait for them to become fragrant but pull them off before they turn black, or they will be bitter.
- Place the toasted pods in a heat proof bowl and cover them with boiling water. Let them soak for 10–15 minutes until they are soft and floppy.
- Transfer the softened pods to your blender. Add the 3 smashed garlic cloves, 1 teaspoon Mexican oregano, 0.5 teaspoon cumin, 1 teaspoon kosher salt, 2 cups broth, and 1 cup of the soaking water. Note: Taste the soaking water first; if it's very bitter, use plain water instead.
- Blend on high for at least 60 seconds until completely smooth.
- Pass the mixture through a fine mesh strainer into a clean bowl, using the back of a spoon to push all the pulp through. Discard the remaining skin fragments.
- Heat 2 tablespoons of oil in a saucepan over medium heat. Carefully pour in the strained purée. Watch for the sizzle and splatter as it hits the fat.
- Simmer for 10 minutes, stirring occasionally. You are looking for the sauce to deepen to a dark mahogany color and thicken slightly.
- Stir in 1 teaspoon of apple cider vinegar. Taste and add a pinch more salt if the flavors don't "pop" yet.
| Method | Time | Pros | Cons |
|---|---|---|---|
| Stovetop Skillet | 1 minute | Intense aroma, total control over char | Easy to burn if you walk away |
| Oven (400°F) | 3 minutes | Good for huge batches | Harder to smell when they're "just right" |
Common Mistakes and How to Avoid Them
The most frequent heartbreak in making red chile sauce is bitterness. This usually comes from two places: over toasting the pods or using bitter soaking water. If your pods turn black and smell like a campfire, throw them out and start over. It's only 60 seconds of work, and it's not worth ruining the whole batch.
If the soaking water tastes like old tea, don't use it in the blender stick to fresh broth or water.
Why Your Sauce Tastes Metallic
If your sauce has a strange, tinny flavor, it might be the cumin. Many people overdo the cumin, which can turn "soapy" or "metallic" in large quantities. We only use 0.5 teaspoon for a reason. It should be a background note, a warm hug for the chiles, not the star of the show.
Also, ensure your spices aren't three years old; stale oregano just tastes like dust.
Why Your Sauce Is Too Thin
If you find your sauce is looking more like a juice than a gravy, you probably added too much soaking water too fast. The fix is simple: keep simmering. As the water evaporates during the 10 minute simmer in oil, the flavors will concentrate and the texture will turn velvety.
| Problem | Root Cause | Solution |
|---|---|---|
| Bitter Aftertaste | Scorched pods during toasting | Add a pinch of sugar or extra salt to mask. |
| Grainy Mouthfeel | Skipped the straining step | Pass the finished sauce through a sieve again. |
| Too Much Heat | Used "Hot" New Mexico pods | Whisk in a little more broth or a dollop of sour cream. |
Common Mistakes Checklist:
- ✓ Forgot to wipe the pods: Field dust can make the sauce taste "dirty."
- ✓ Toasted until black: This is the #1 cause of a ruined, acrid batch.
- ✓ Skipped the "frying" step: The sauce will taste "raw" and won't thicken properly.
- ✓ Used Mediterranean oregano: It’s too minty; look for Mexican oregano for that citrusy punch.
- ✓ Not blending long enough: Give the blender time to really pulverize those fibers.
Easy Ways to Customize Your Flavor Profile
Once you have the base down, you can start playing with the "vibe" of the sauce. If you want something a bit richer and heavier more like a Texas style "chili gravy" you can whisk in a tablespoon of flour into the oil before adding the purée to create a light roux.
This gives it that cafeteria style comfort that many of us grew up with.
For those who like a bit of sweetness, a teaspoon of piloncillo or brown sugar can do wonders. It doesn't make the sauce "sweet," but it rounds out the sharp edges of the dried chiles. If you find the New Mexico pods are a bit too mild for your taste, try swapping out 3 of them for dried Arbol chiles.
Those little guys pack a punch and will raise the heat level significantly without changing the overall flavor profile too much.
If you are looking for a "Creamy Red Sauce," you can stir in a quarter cup of heavy cream or Mexican crema at the very end. This is fantastic for enchiladas suizas style dishes where you want that luxurious, fatty finish to balance the spice.
Best Methods for Saving and Heating Leftovers
This sauce is a meal prepper’s dream because it actually tastes better the next day. As it sits in the fridge, the garlic and oregano have more time to infuse into the chile base. It will stay fresh in an airtight jar for up to 7 days.
You’ll notice it thickens up quite a bit when cold, almost becoming a paste.
When you're ready to use it again, don't just microwave it on high. Put it back in a small saucepan with a splash of water or broth. Heat it over medium low, stirring constantly to re emulsify the oil and the solids. If you see it separating, a quick whisk will bring it back to its original velvety glory.
Freezing and Zero Waste:Freezing: This sauce freezes beautifully. I like to freeze it in silicone ice cube trays. Once frozen, pop the "chile cubes" into a freezer bag. They stay good for up to 6 months.
You can drop a couple of cubes directly into a pot of beans or a stew for an instant flavor boost. Zero Waste: Don't throw away the stems and seeds if you have a garden! They make for great compost. If you have leftover soaking water that isn't bitter, use it to cook your rice.
It adds a gorgeous golden hue and a faint earthy aroma that pairs perfectly with the finished sauce.
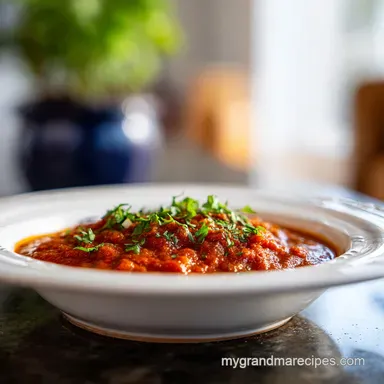
What to Serve with Your Homemade Sauce
The most obvious choice is enchiladas. Dip your corn tortillas directly into the warm sauce before filling them this is the "authentic" way. It ensures the flavor is baked into every layer of the tortilla, not just sitting on top. But don't stop there. This sauce is a transformation tool for the humble egg.
I love making "Quick Huevos Rancheros" on Tuesday mornings. Just fry two eggs, place them on a toasted tortilla, and ladle this mahogany sauce over the top. The way the runny yolk mingles with the smoky cumin and the zip of the apple cider vinegar is something everyone should experience at least once a week.
It also makes a killer base for Chilaquiles. Toss some thick, crunchy tortilla chips in the simmering sauce for about 30 seconds just long enough for them to absorb the flavor but still keep a bit of their structural integrity.
Top with some crumbled cotija cheese and fresh cilantro, and you have a breakfast that beats any restaurant in town. Honestly, once you start making this, you'll find reasons to pour it over everything from grilled chicken to roasted potatoes. It's not just a sauce; it's a staple.

Recipe FAQs
Is it true I must boil the chiles for a long time to get them soft?
No, this is a common misconception. You only need to soak the toasted pods in boiling water for 10 15 minutes until they become soft, which saves time and preserves the delicate flavor profile.
How to prevent my red chile sauce from tasting bitter?
Toast the pods just until fragrant. If they turn black or smell like a campfire, they are ruined; always discard bitter soaking water and use fresh broth if the water tastes off.
How to ensure the sauce has a smooth, refined texture?
Pass the blended mixture through a fine mesh strainer. This essential step removes stubborn skin fragments that even high speed blenders often miss, ensuring a silky consistency similar to the smooth finish achieved in our hearty chili.
Can I skip the final simmering step?
No, the 10-minute simmer is critical. This step allows the sauce to thicken properly and deepens the color to a rich mahogany, ensuring the raw edge of the chiles is cooked off.
How to store leftover sauce?
Refrigerate in an airtight container for up to one week. You can also freeze the sauce for several months, which makes it incredibly convenient to have on hand for future meals.
Should I leave the seeds inside the pods to make the sauce spicier?
No, remove the seeds before toasting. Leaving the seeds in often results in an unpleasant, gritty texture and can contribute to unnecessary bitterness rather than a clean, balanced heat.
Is it true that adding oil at the end changes the flavor?
No, the oil is for the initial frying process. You heat the oil in a saucepan first, then pour in the strained purée to fry the sauce; this technique is what develops the depth of flavor you need for a robust sauce.
Authentic Red Chile Sauce
Ingredients:
Instructions:
Nutrition Facts:
| Calories | 101 kcal |
|---|---|
| Protein | 2.2 g |
| Fat | 5.6 g |
| Carbs | 12.6 g |
| Fiber | 4.8 g |
| Sugar | 5.3 g |
| Sodium | 438 mg |
